iFreilicht
About
- Username
- iFreilicht
- Location
- Germany
- Joined
- Visits
- 9
- Last Active
- Roles
- No Roles
- Points
- 7
- Location
- Germany
- Posts
- 40
- 2
- Badges
-
Deluge MIDI Host Mod Buildlog
Current status

Looks awesome, right? Unfortunately, it doesn't quite work. It did, sometimes, if I was lucky, but there were too big issues:
- The whole thing doesn't boot when powered by USB, only when powered by batteries, so no host device could be connected
- RK 005 doesn't connect to hub most of the time and detects no devices, so the hub only outputs power. Lame.
Actual current status
The 555 timer board will power the RK005 after everything else, which for some reason makes it more reliably detect the downstream devices.
So, it's still a work in progress.
Original post
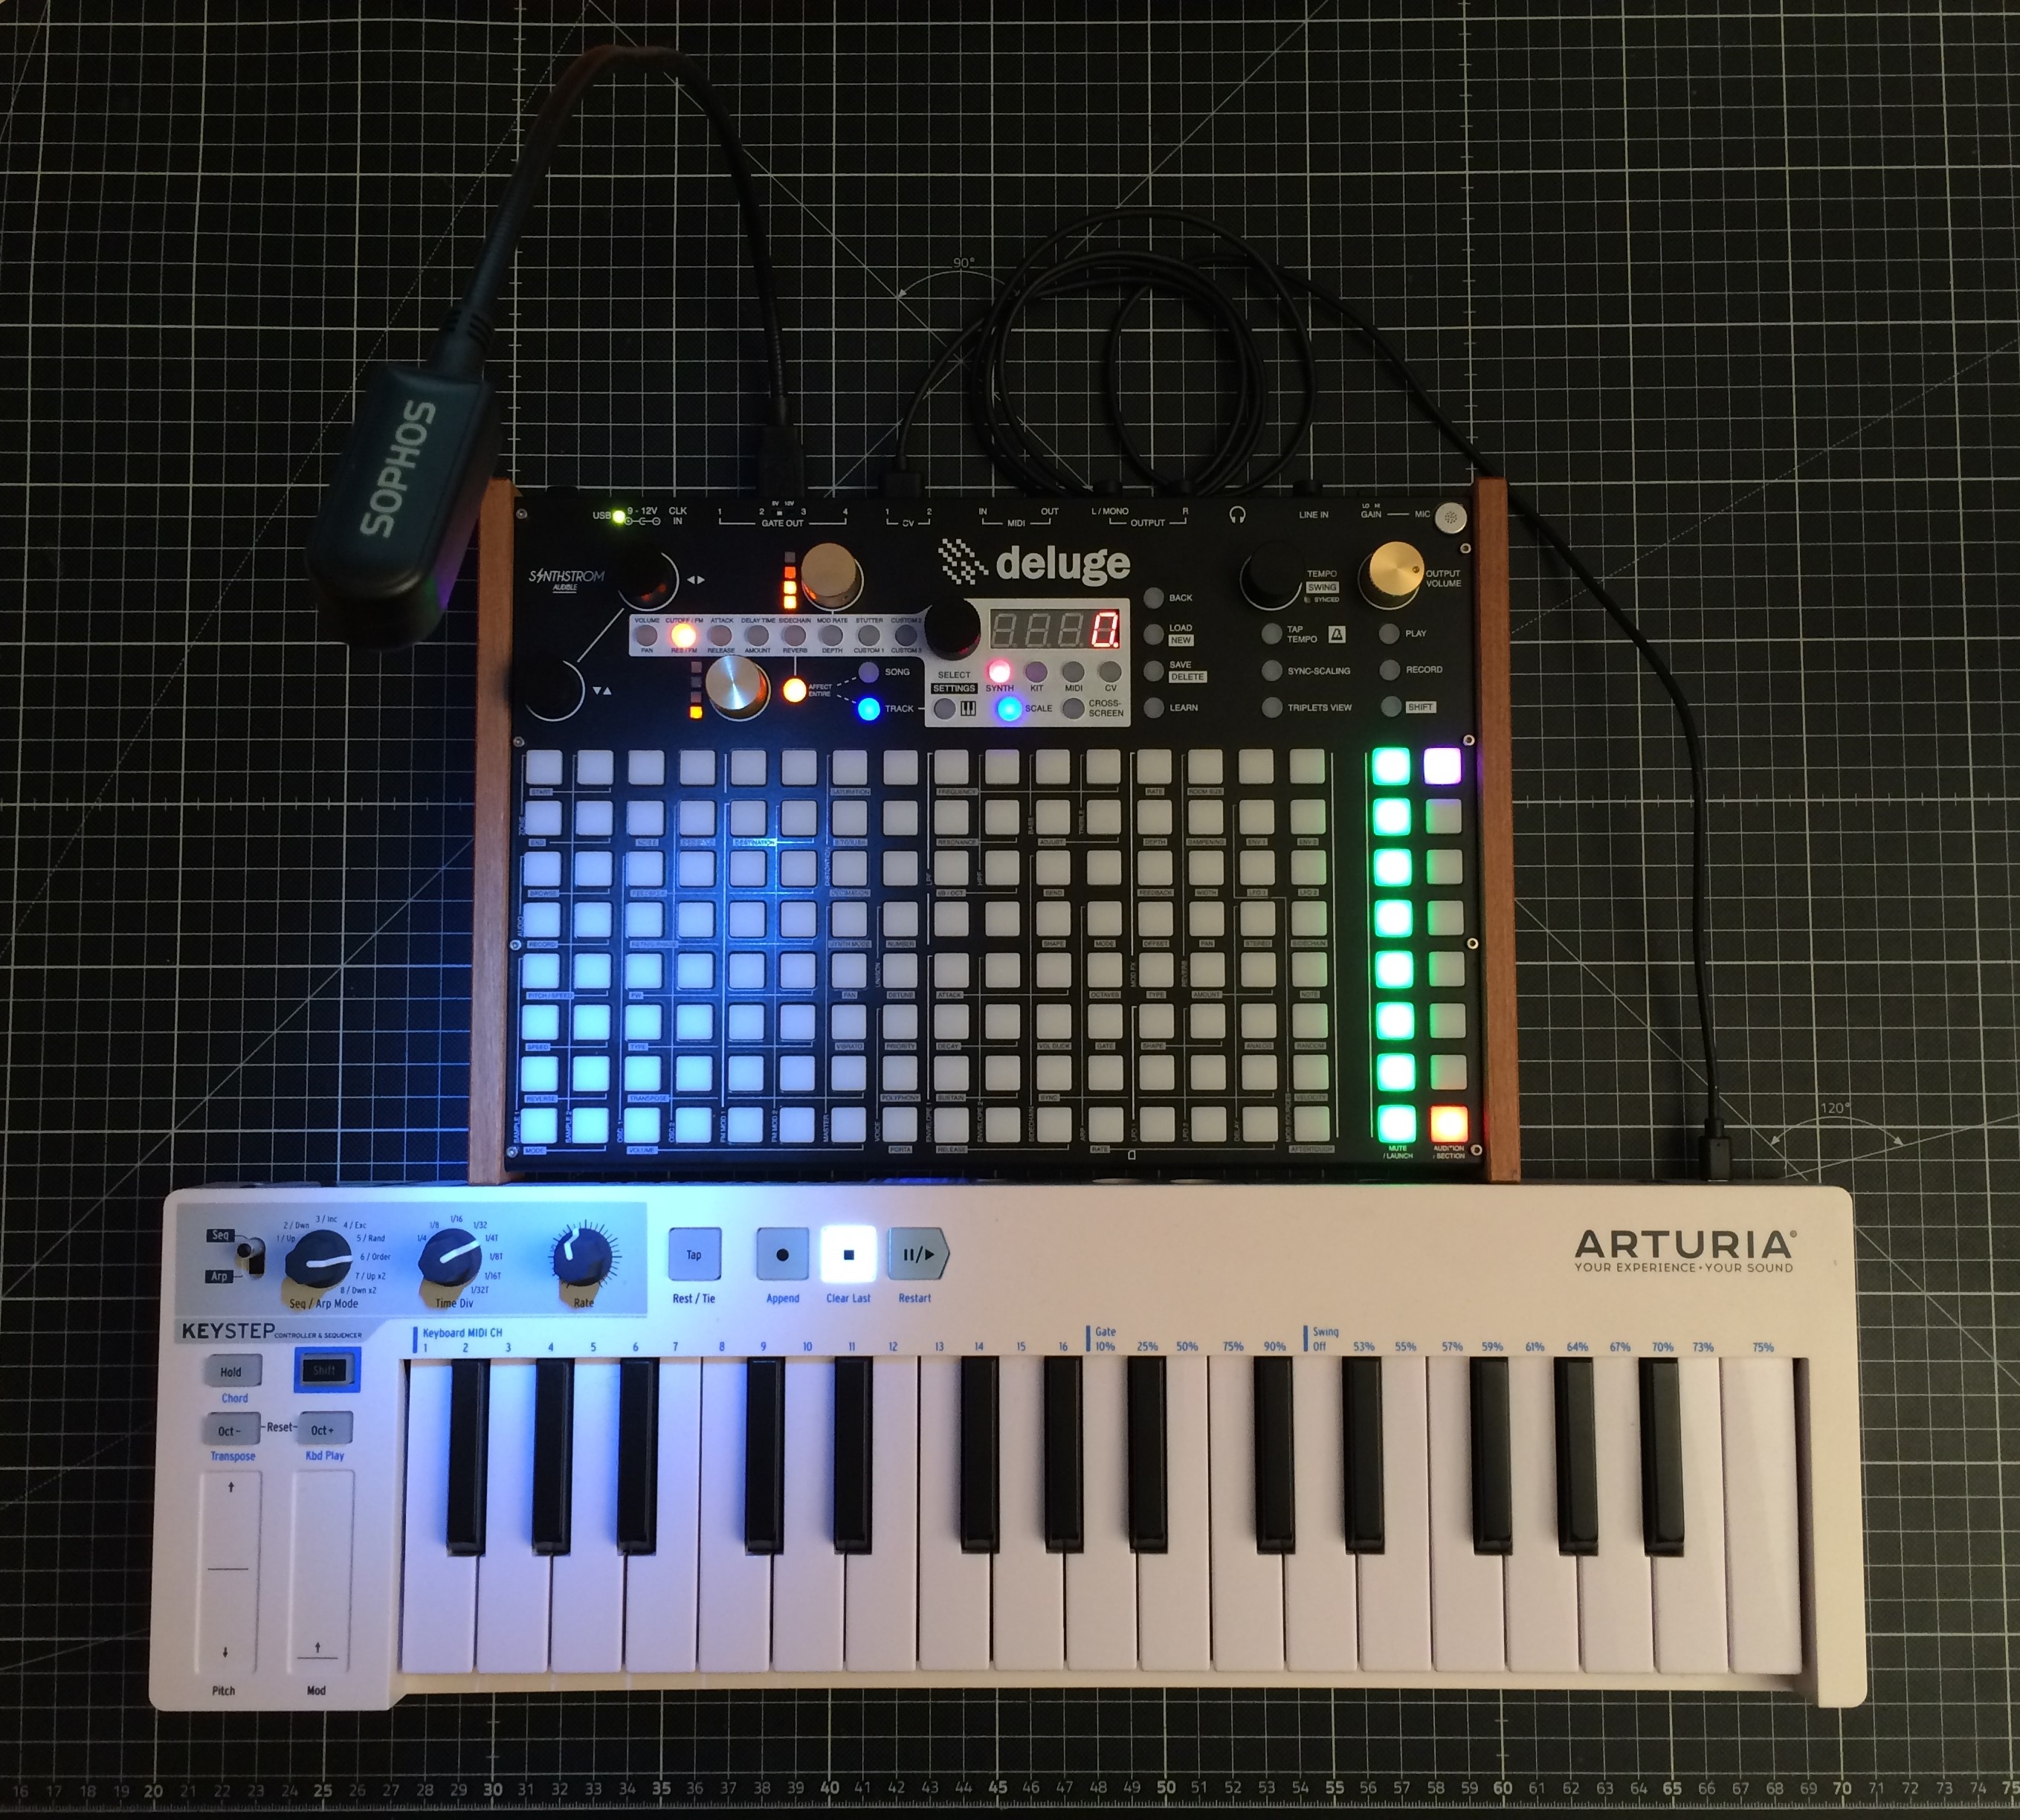
Hi everyone! Bought my deluge a week ago, huge fan, such a powerful and fun device. It's replacing the OP-Z for me, which was much more portable and great fun as well, but ultimately not the right fit for a bunch of reasons.
While the Deluge is more powerful than the OP-Z in a lot of ways, one feature I'm missing quite a bit is the ability to act as a MIDI host. Mind you, it was terribly buggy on the OP-Z (like a lot of things right now), but it was very convenient to just connect a Keystep with just one cable and be ready to go.
So, that's what I will mod into the Deluge. Specifically:
Important Features
- MIDI Host with 4 USB ports - Enable the Deluge to act as a host to MIDI devices
- Provide Power to MIDI devices - All connected USB MIDI devices will be provided with power from the internal battery/power bus
- MIDI thru between USB and DIN - Deluge can already do that (which is awesome, btw), but I need to keep that feature alive
Potential additional Features
- One more CV/Gate/Clock output - Can't have enough of those, can you?
- Battery level indicator - Self explanatory
- MIDI Status LED - Blinks on signal receive
- USB C input jack - I charge most of my stuff with USB C, so that would be a nice modernisation
- Increase battery life by up to 400% - Not sure on the exact number yet, will need to be tested.
How I'm going to achieve that?
Short Story
Put an RK 005, a USB Hub and a Powerbank into the Deluge, cut a few holes and solder it together right.
Long Story
Space
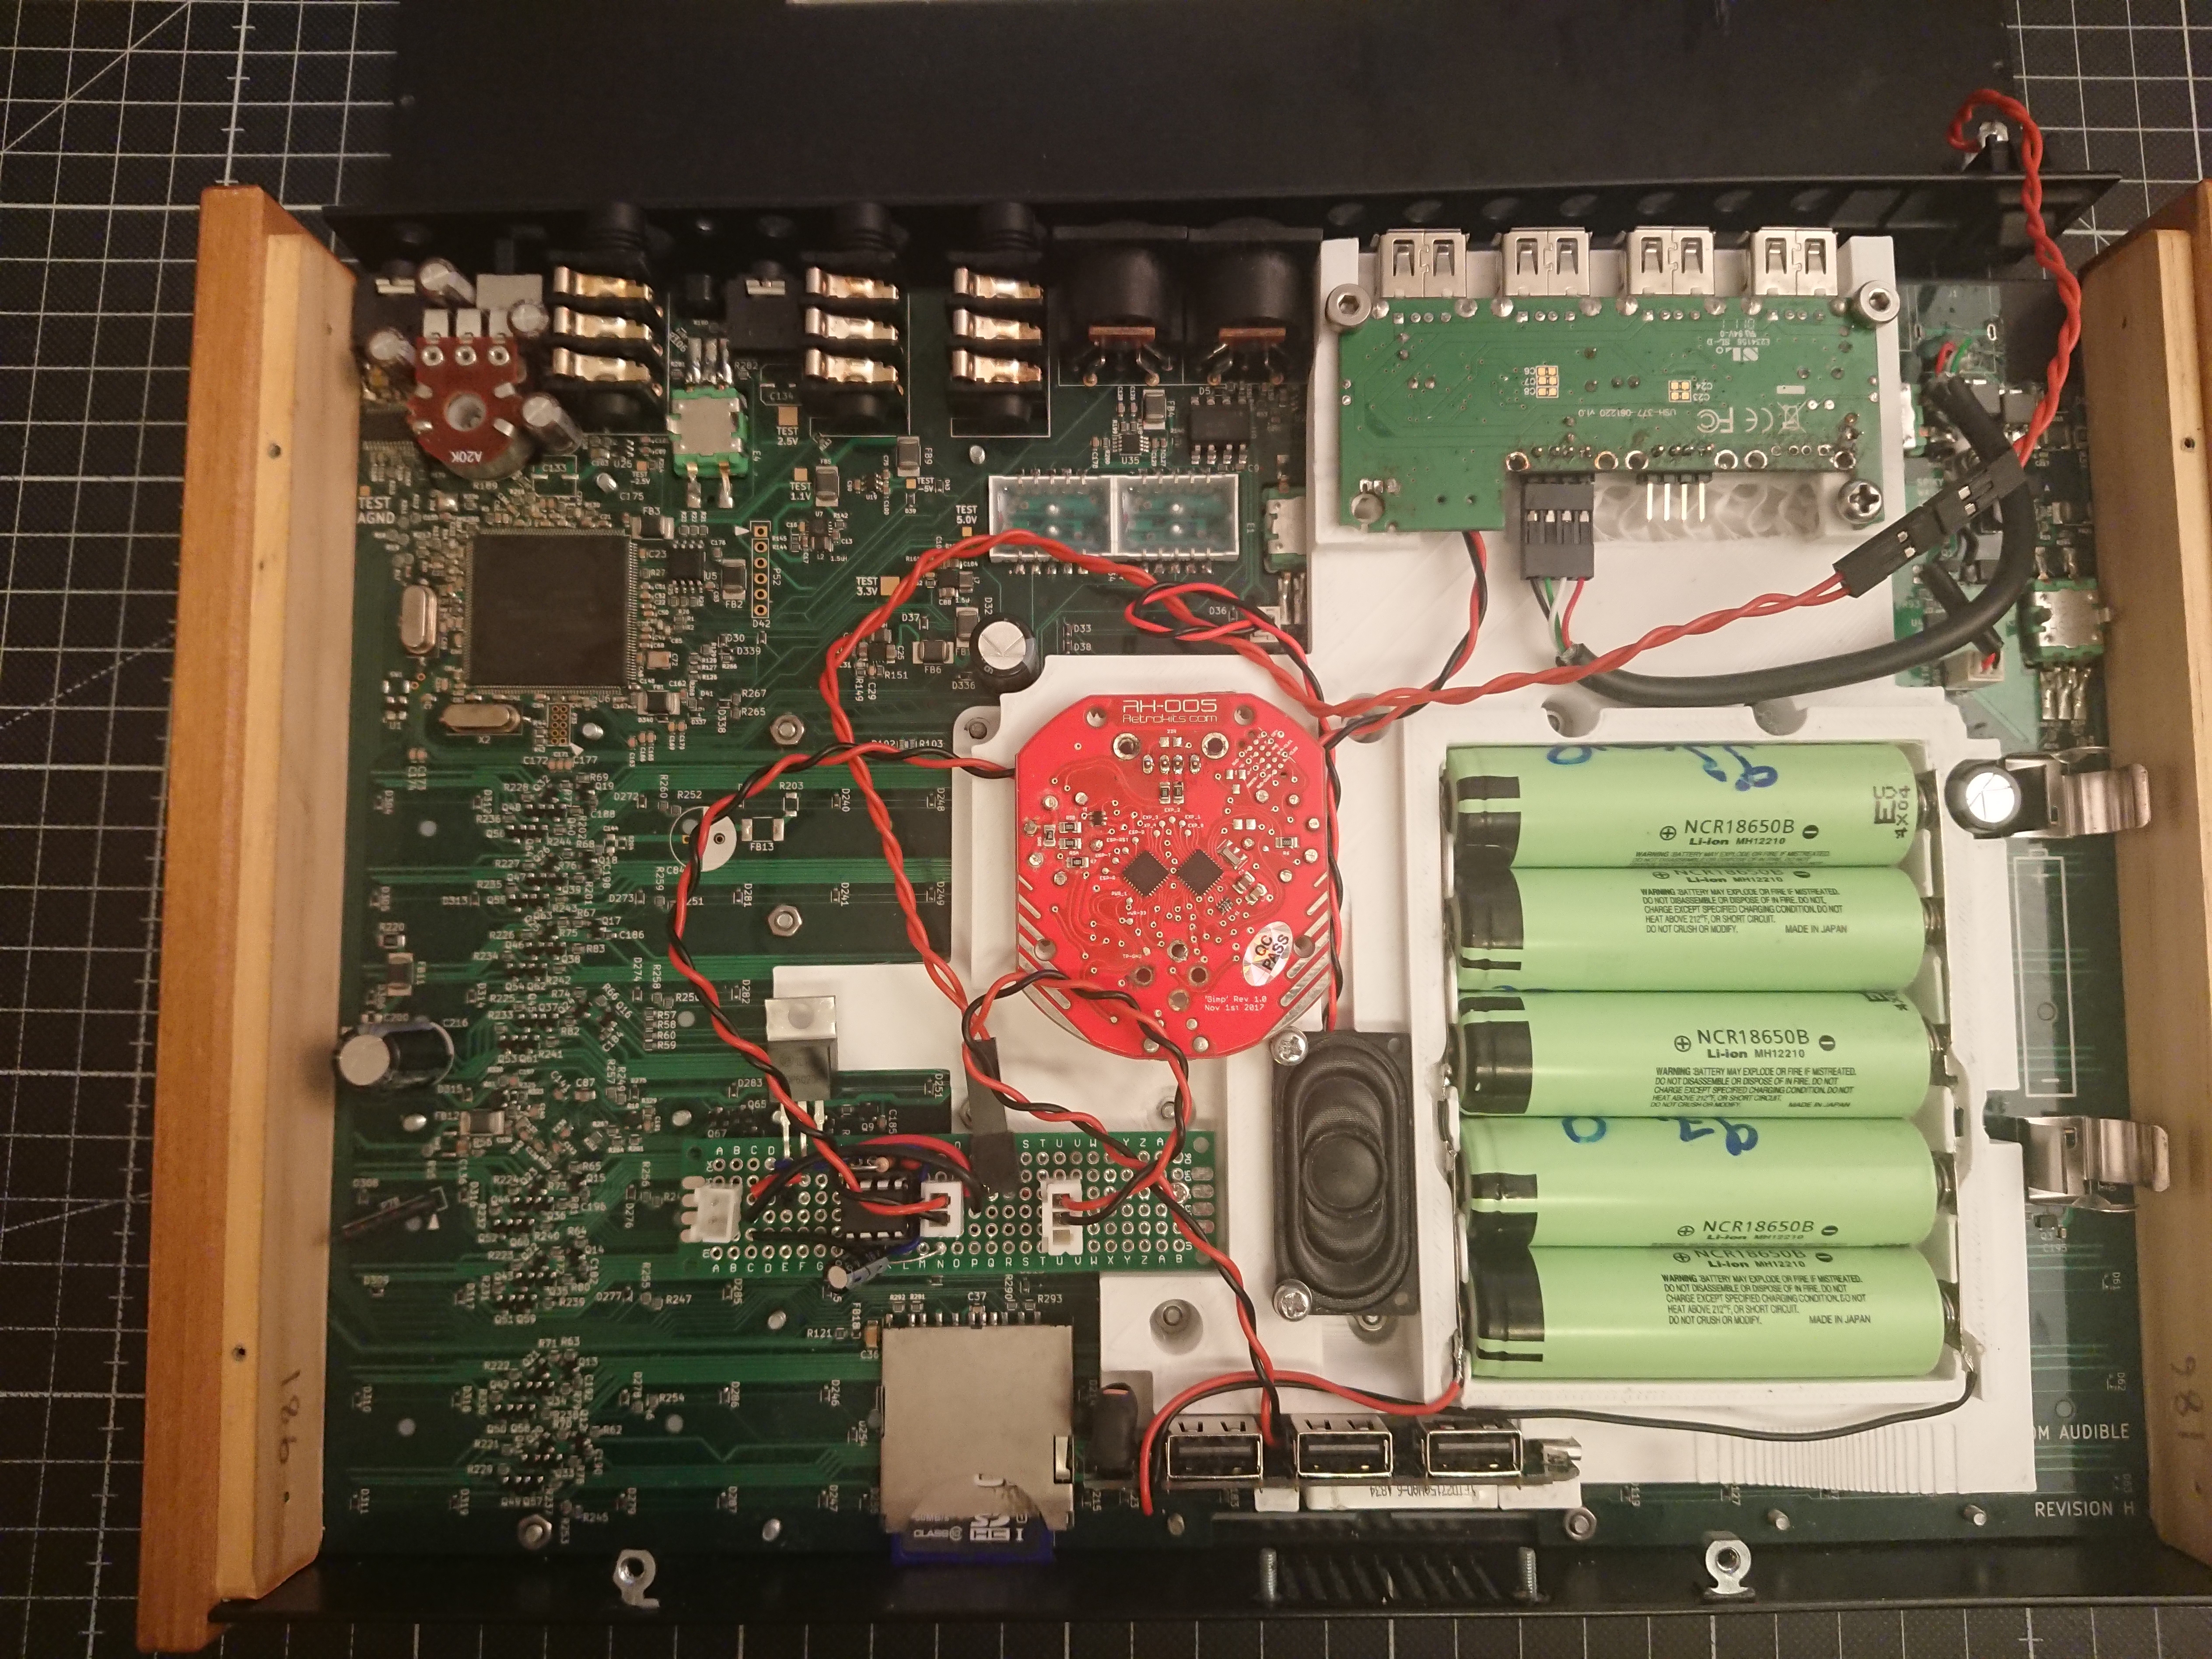
Here you can see what the Deluge looks like with the bottom panel removed. Lots of free space, about 21mm deep.
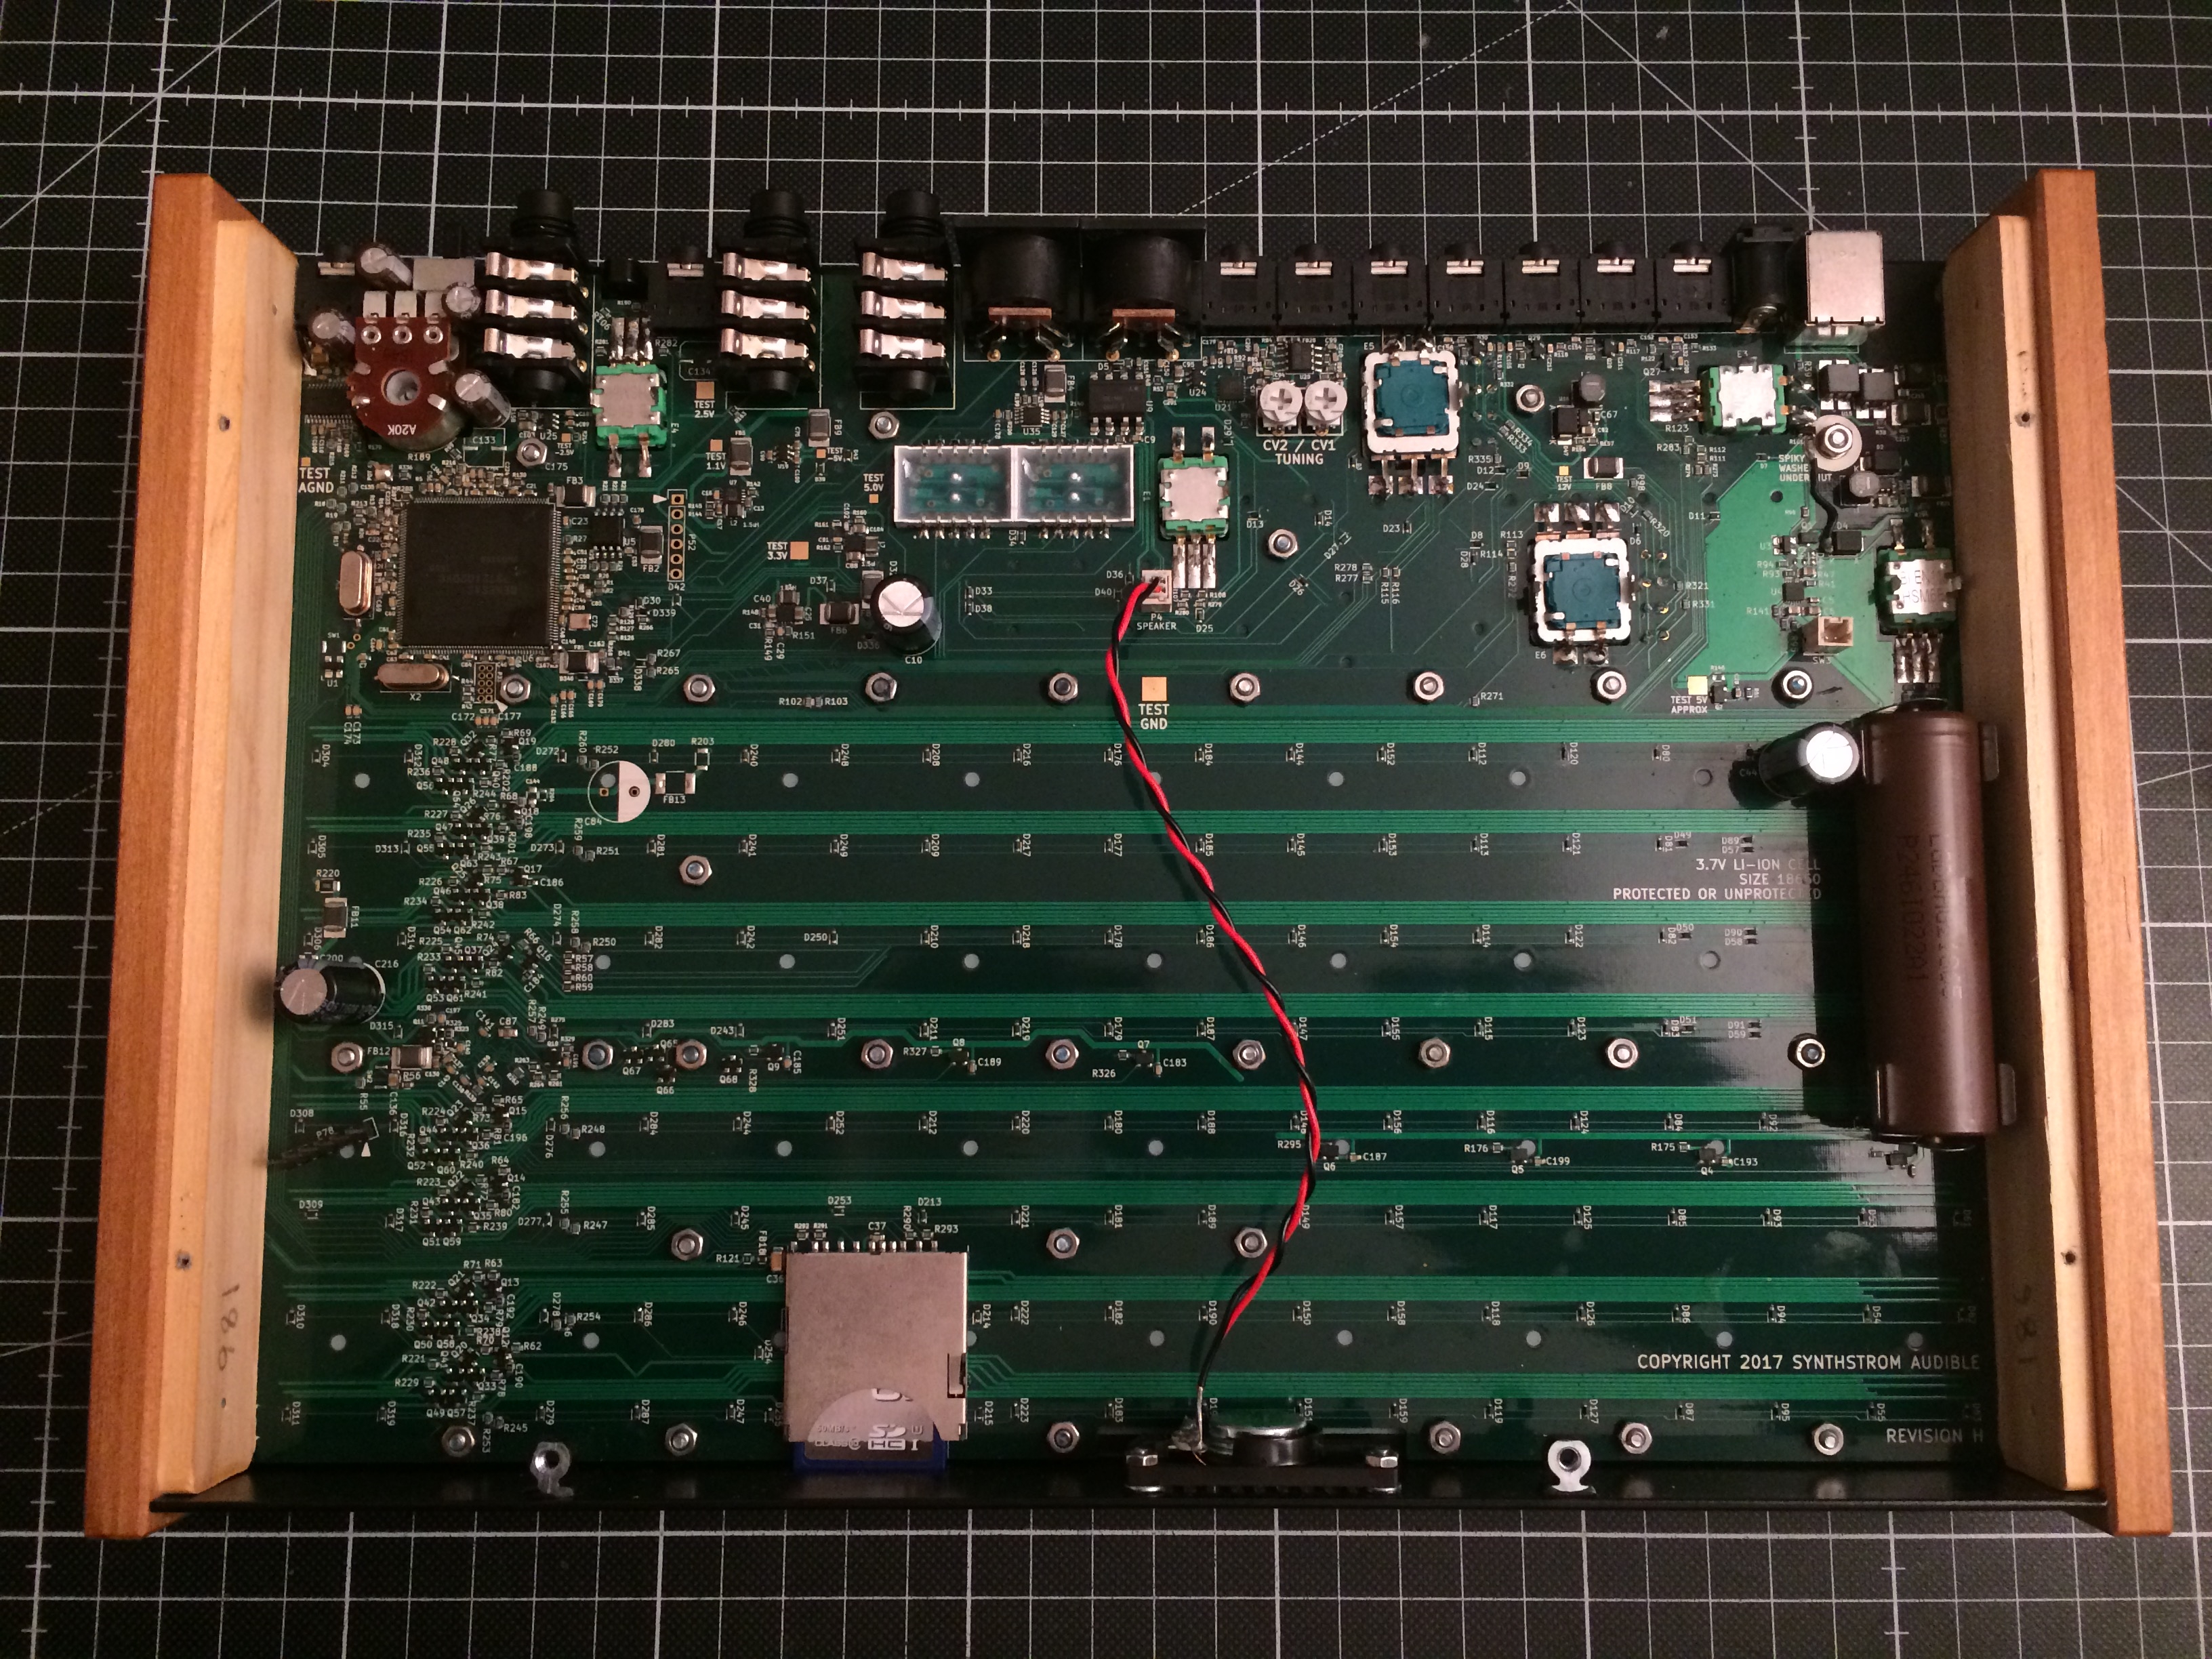
Into this free space I want to fit an RK 005, a USB Hub, and a Powerbank. All of those things will be held in place by 3D-printed mounts that will in turn be mounted to the deluge using Female-Female M2 Standoffs in place of some of the nuts you can see in the picture.
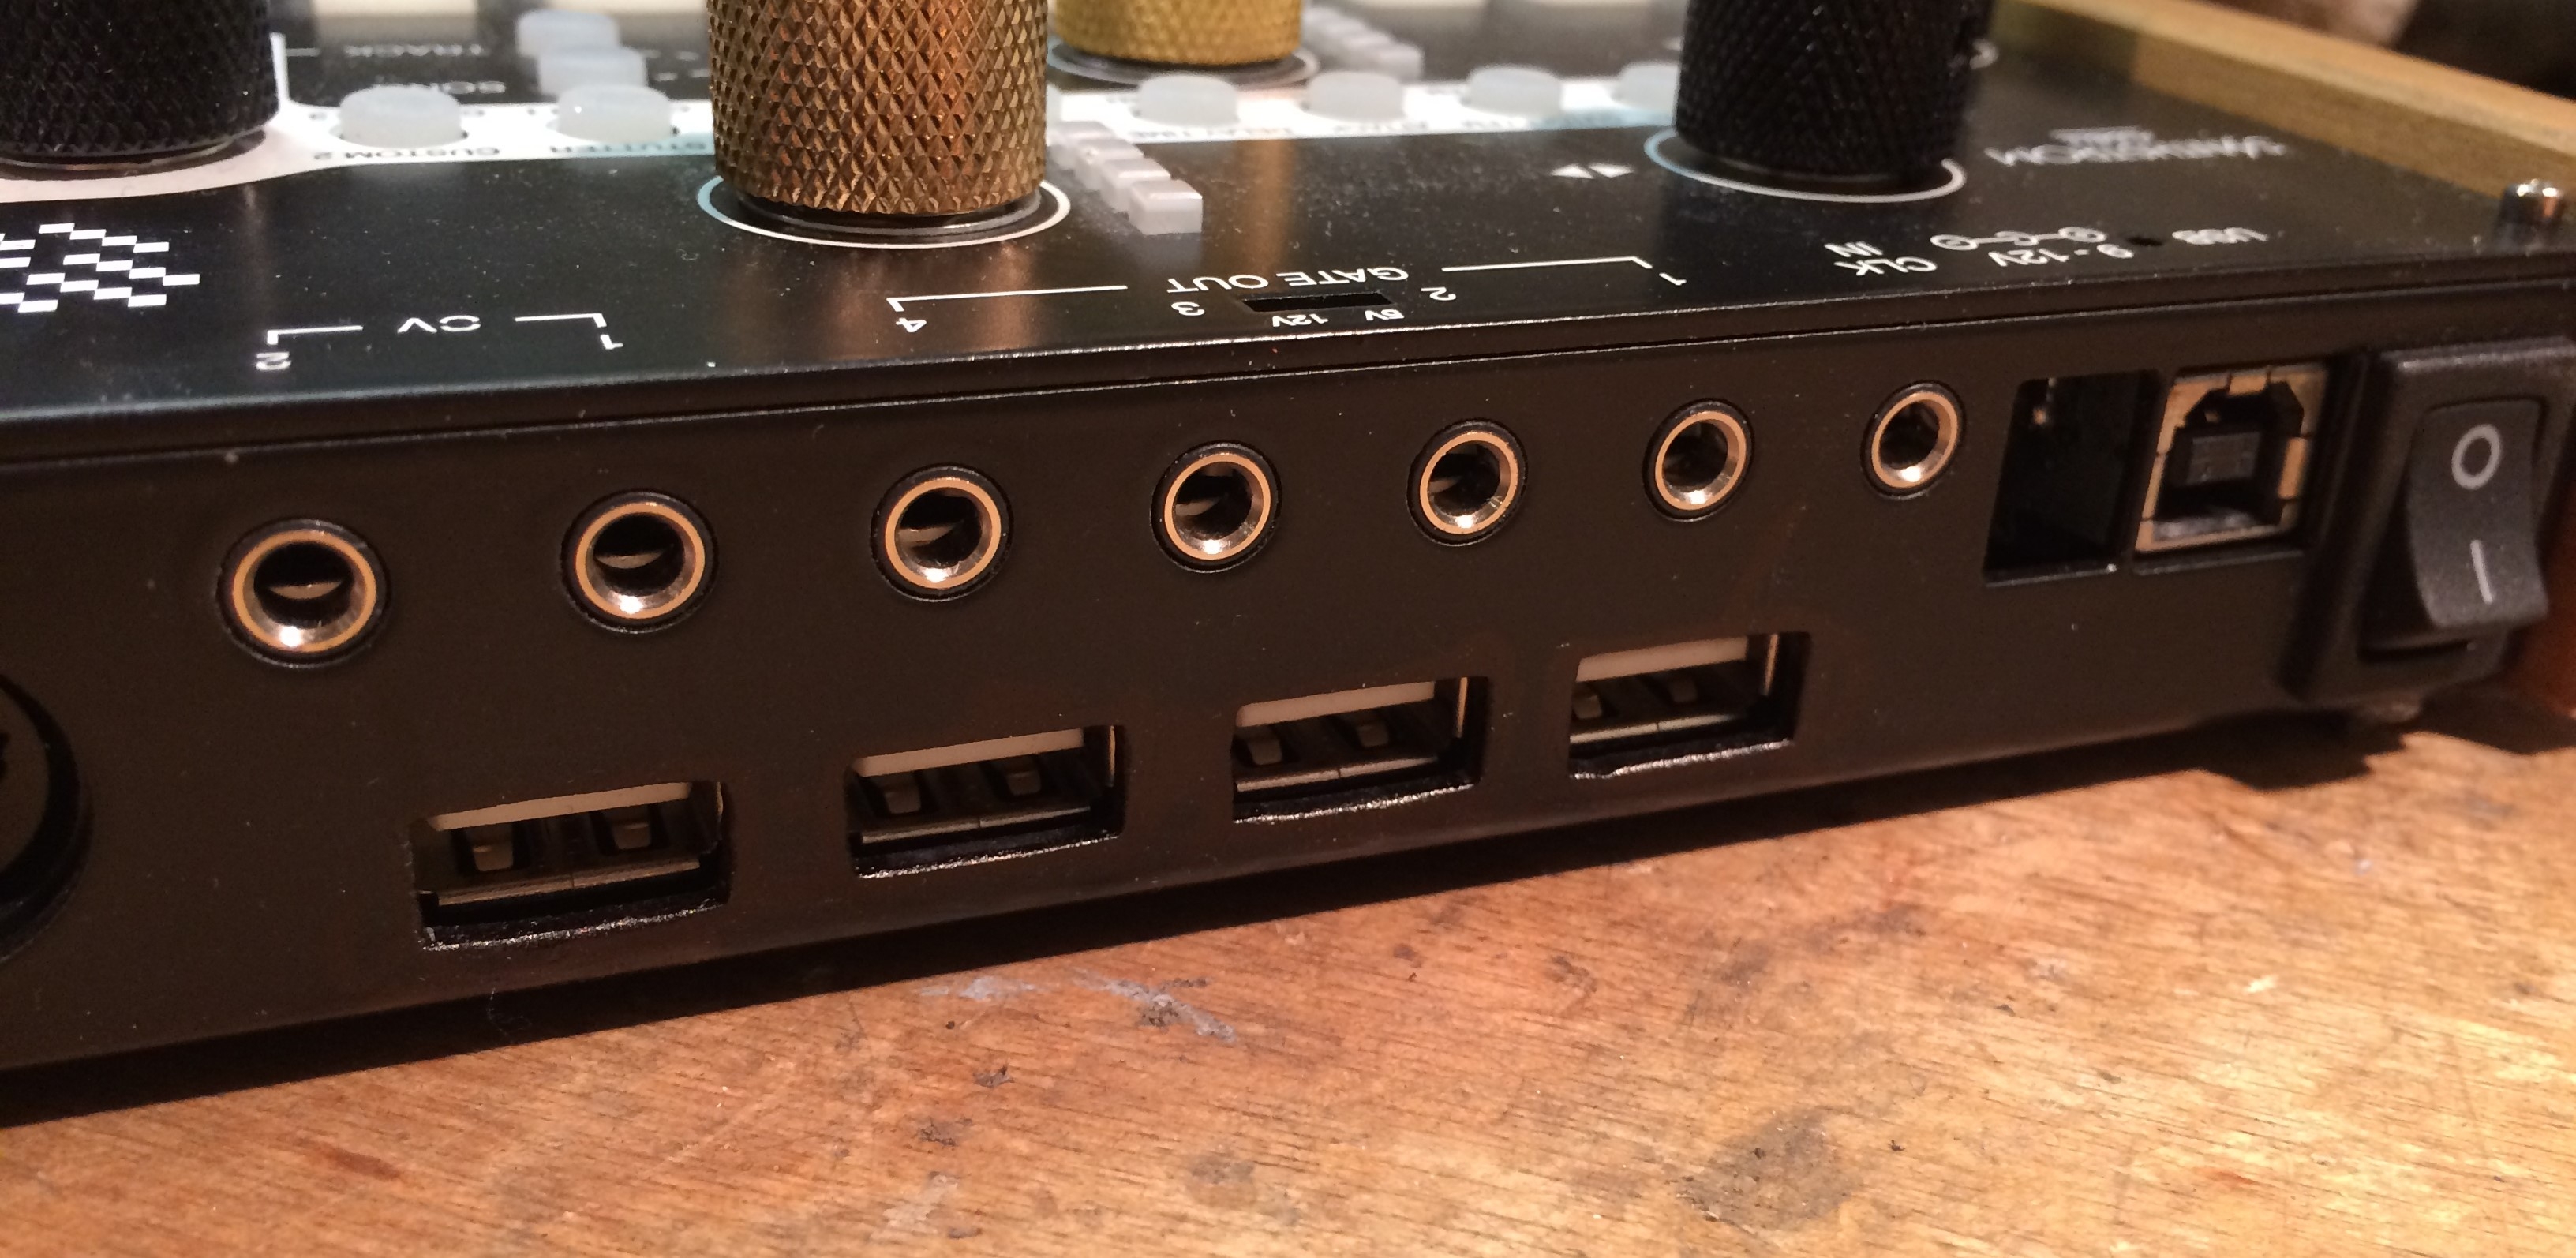
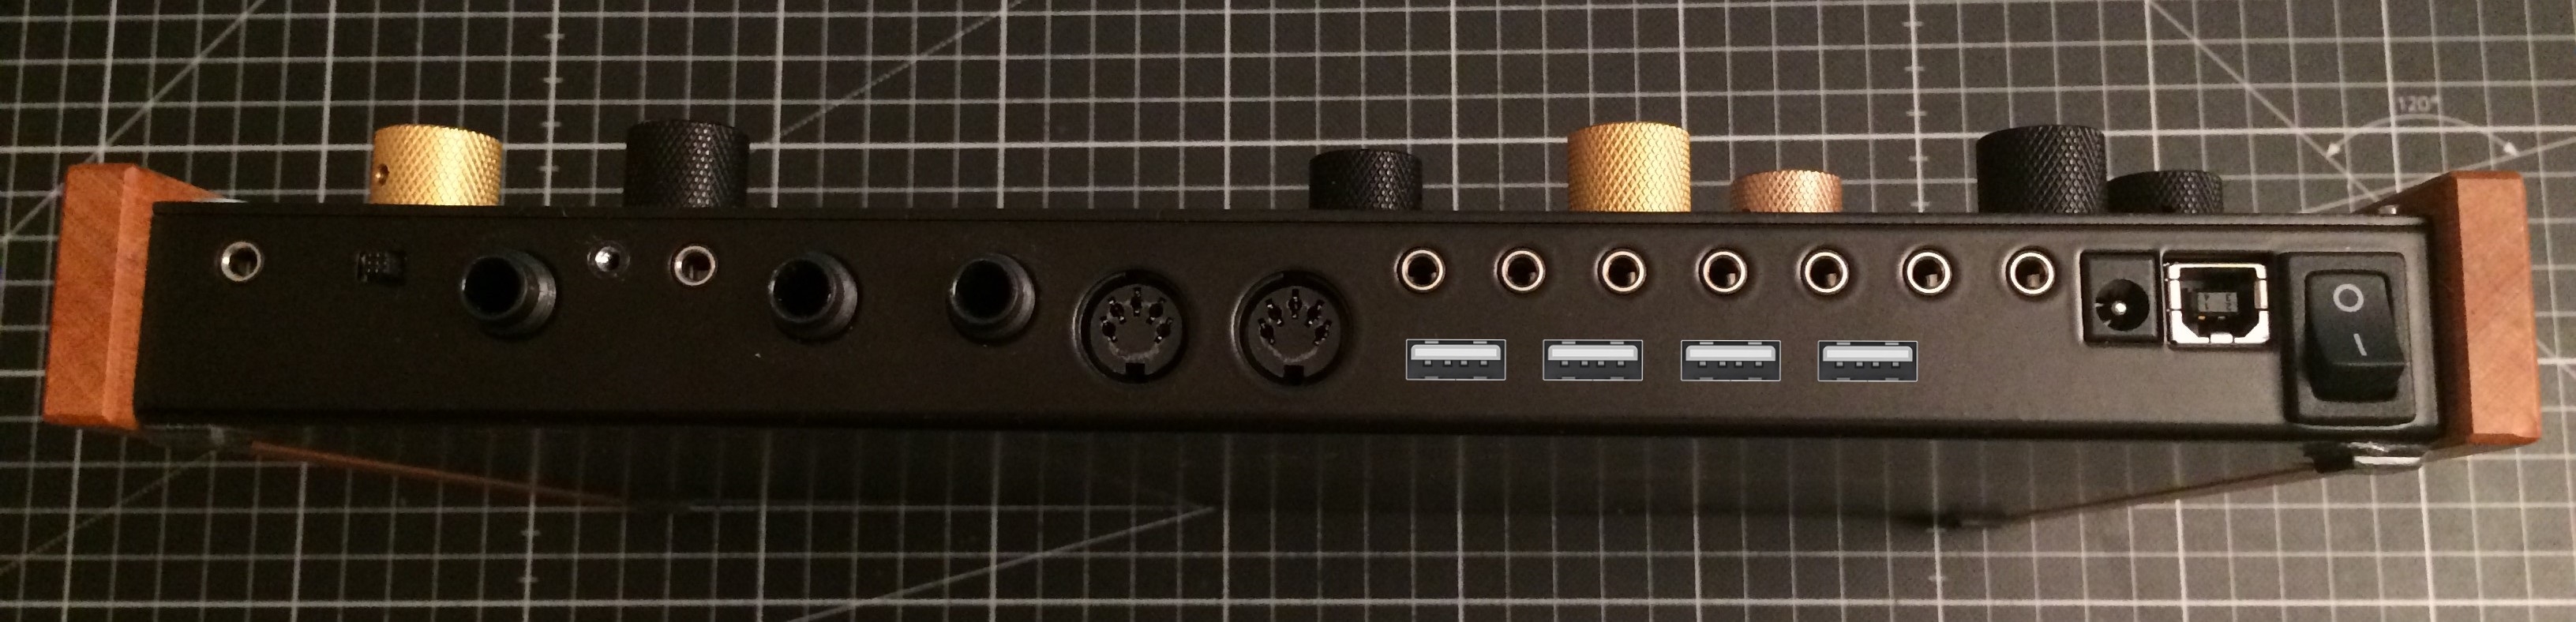
And here we have the rear connector area, as shown in the banner above. The 4 USB ports will be sitting underneath the CV/Gate outputs.
Components/Mods
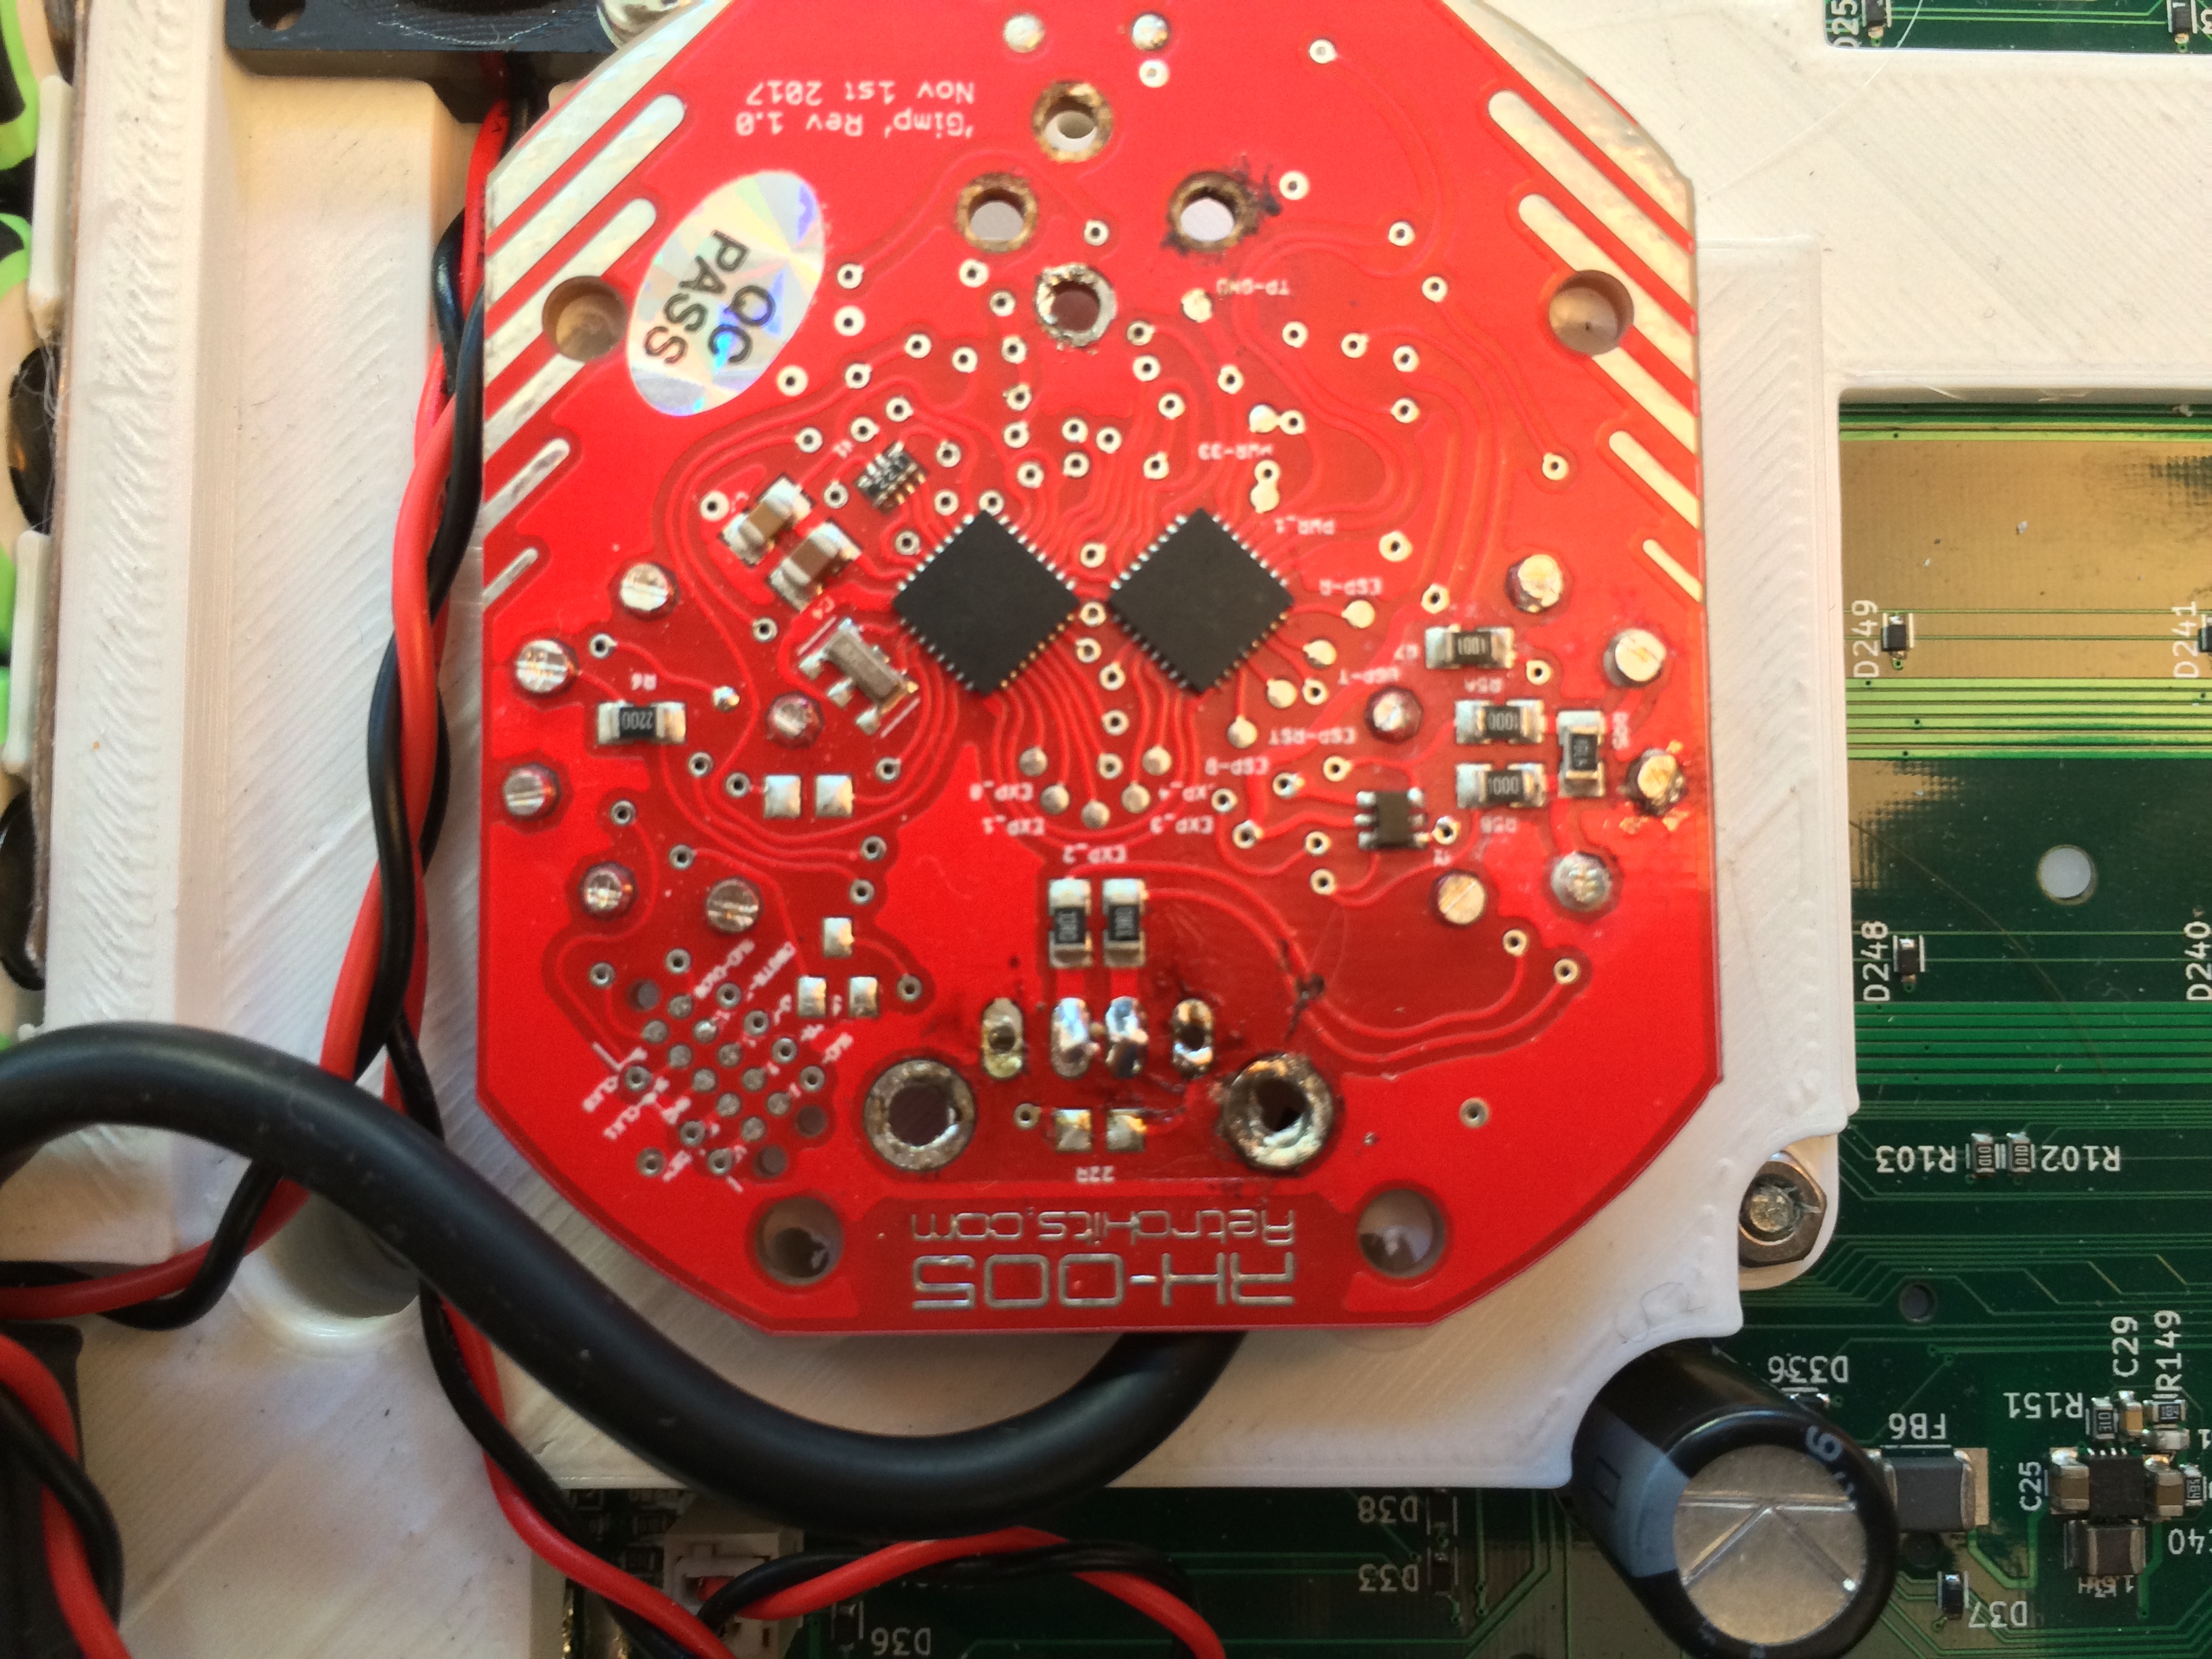
Retrokits RK 005 is a Standalone USB MIDI Host and MIDI Interface. Any message it receives on an IN port will be echoed to all OUT ports, and if it's connected to a PC or other MIDI Host, will also be visible to that device. The cool thing, like a PC, it has full support for USB Hubs, so you can (in theory) connect up to 127 USB MIDI devices to it.
It also has a configurable TRS jack that can be configured to Gate, Clock or CV output and any combination of two of those, which I could put next to the USB ports.
And it has a status LED, which could be a useful thing to make visible as well.
To fit into the chassis of the Deluge, I will have to desolder the TRS jack and the DIN MIDI connectors. Luckily, as the Deluge has MIDI through between USB and DIN, I won't be needing those anyway.
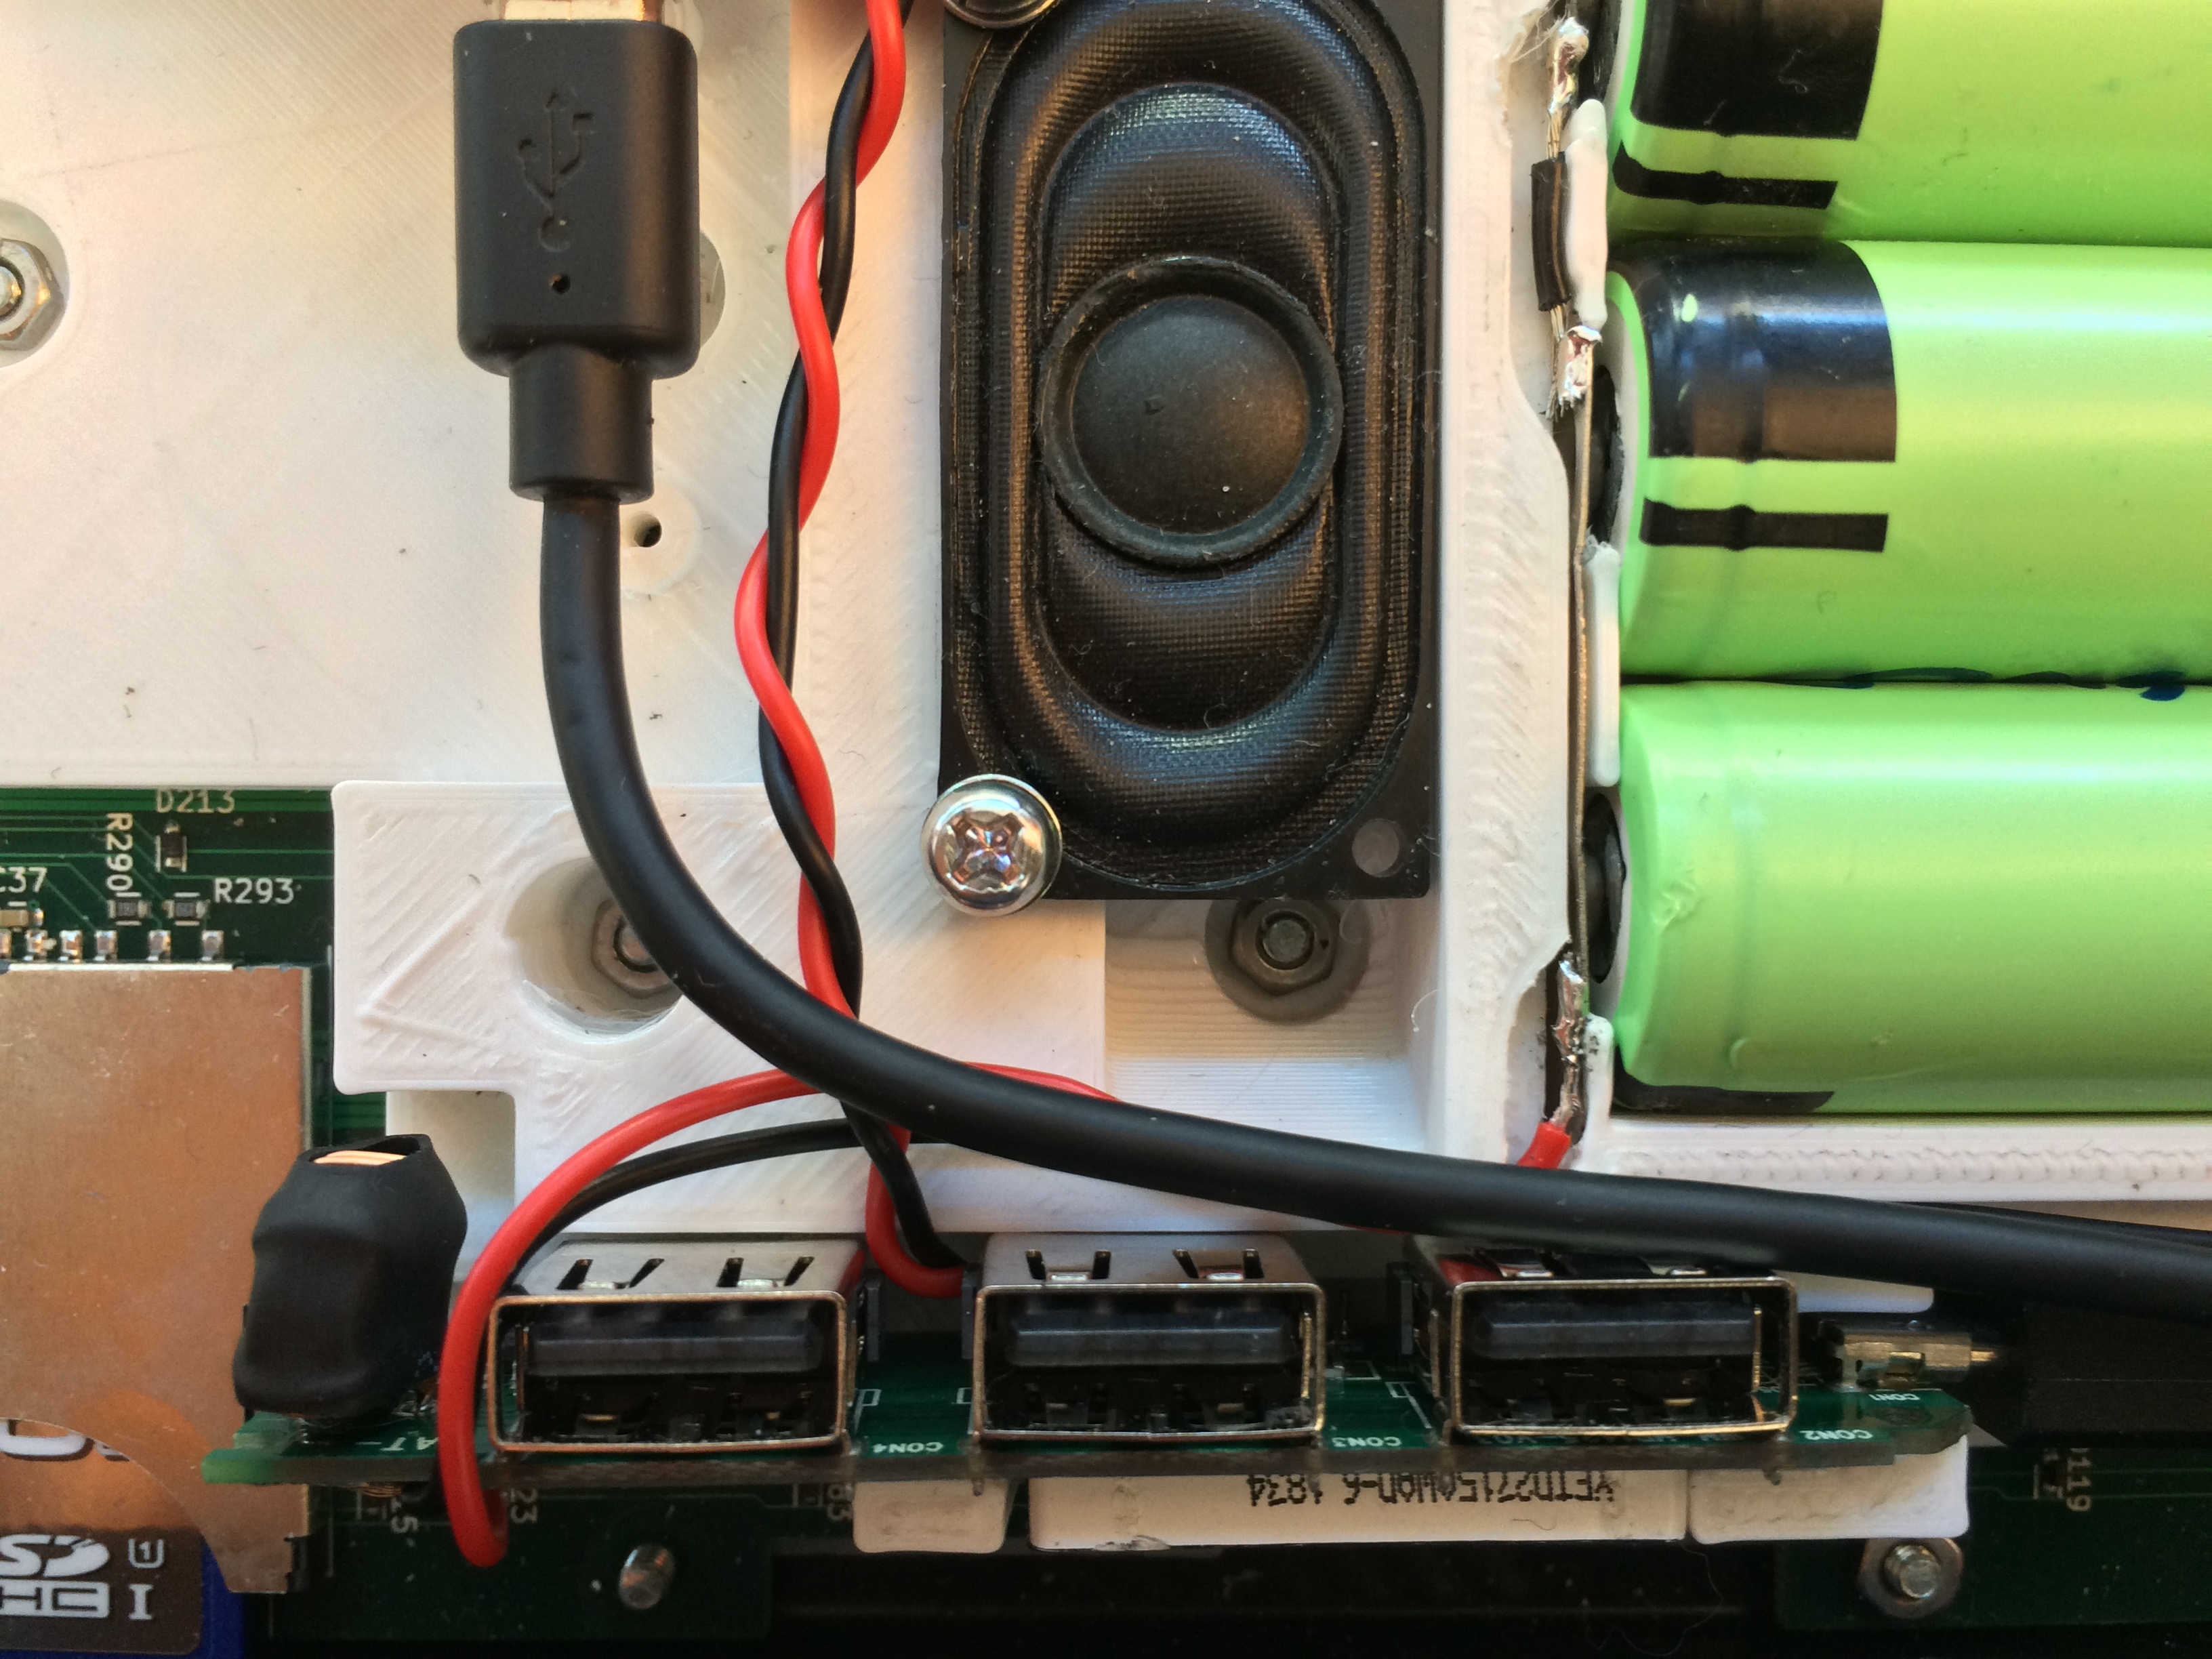
A 7-port USB 2.0 Hub. The flat form factor is important, as is the number of ports. Four of them will face outside, one of the ones facing inward will be connected to the deluges USB port. Then I still got two left for further mods. I'm thinking a Raspberry Pi Zero to interface with Bluetooth MIDI gear, for example.
The case of this will be removed, of course.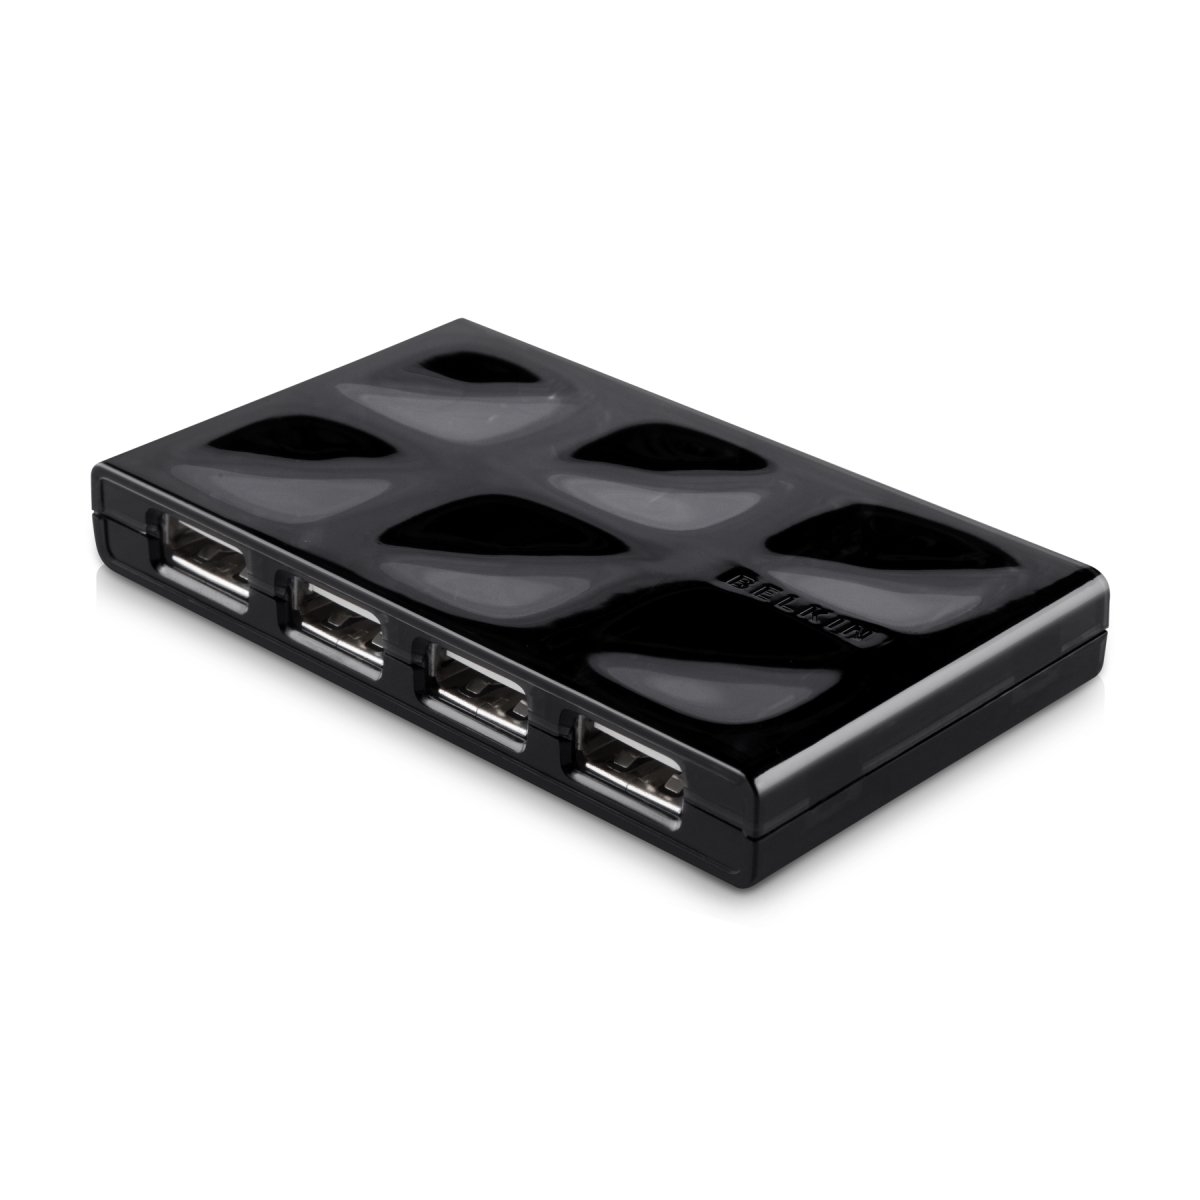
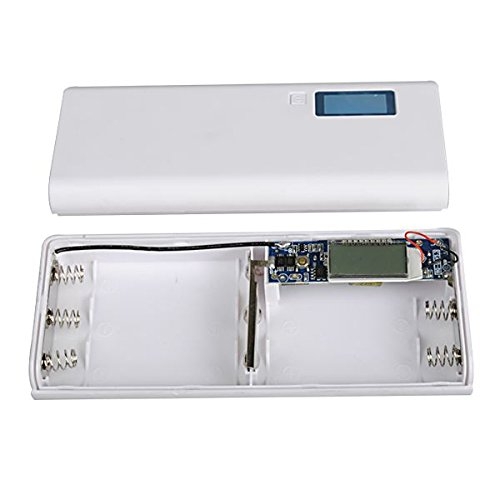
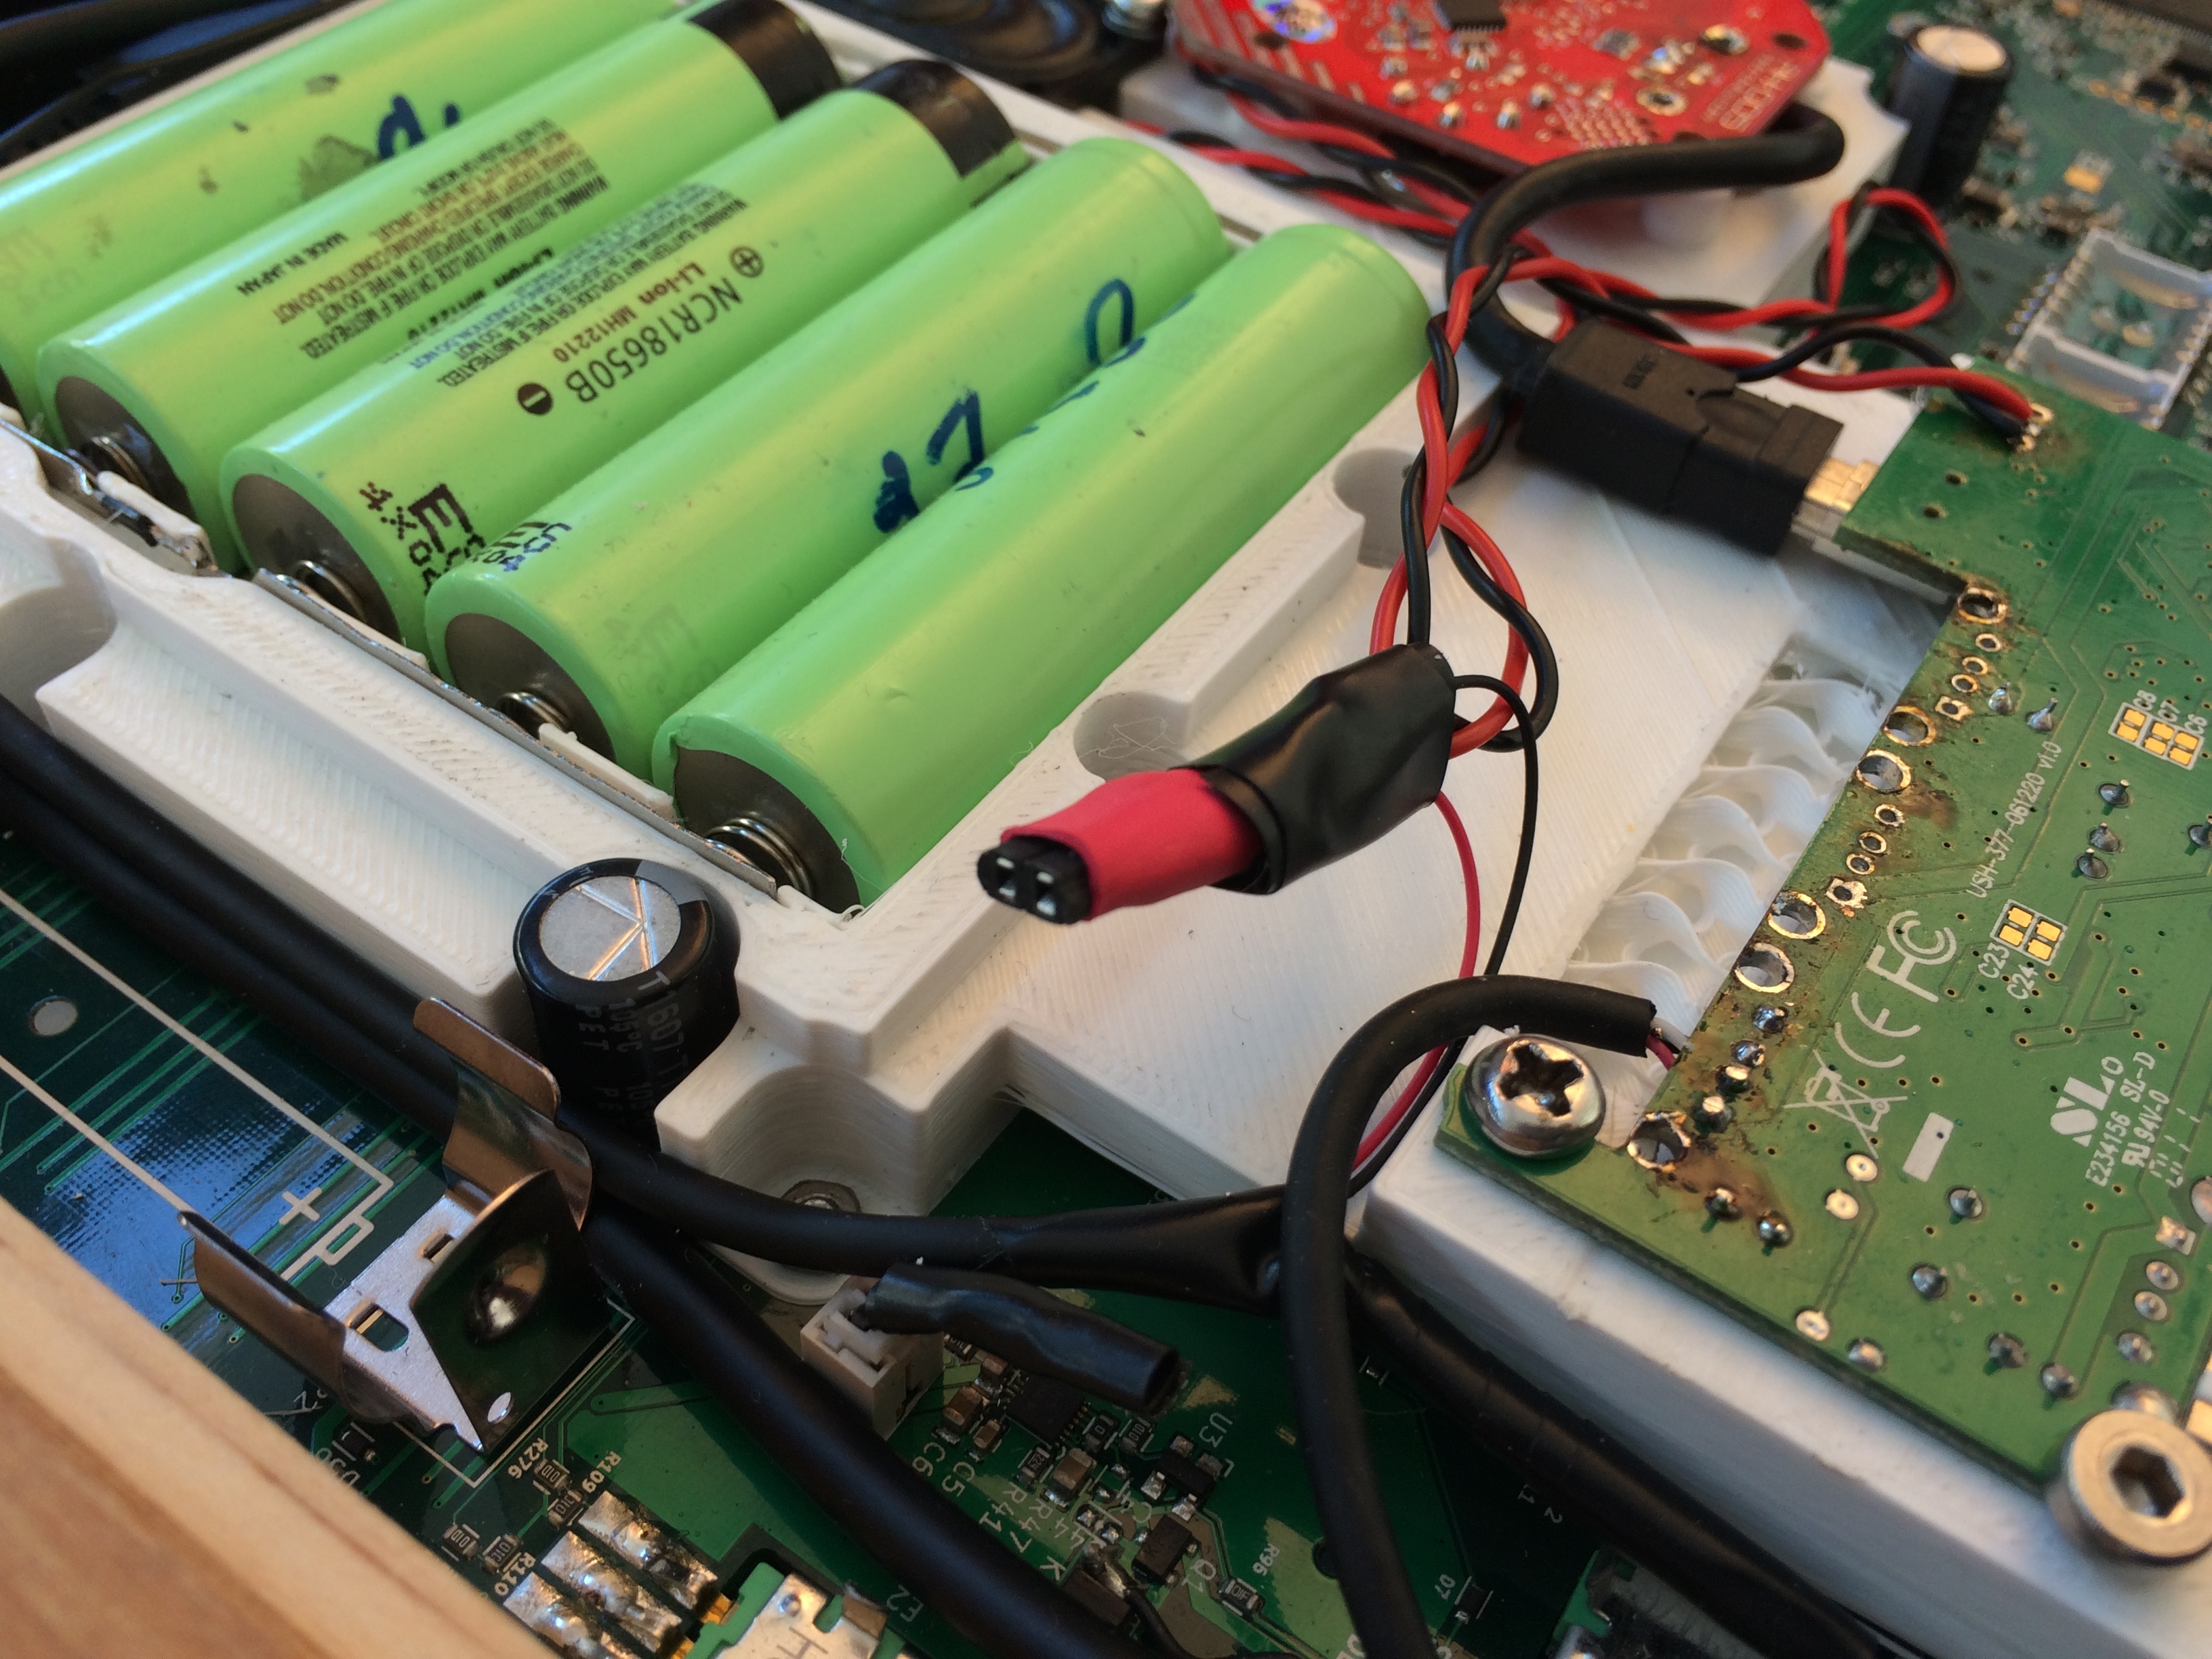
A 5x18650 powerbank kit (similar to what's shown in the picture). The case I don't care about, I only need the circuit. This will be connected to five 18650 batteries, the single one in the Deluge right now will be removed.
I'll probably solder the USB connections, plugging in cables in there feels to error-prone and unreliable.
If I want to make the battery indicator visisble, I'll have to desolder it as well.Sidenote: I will not re-use the 18650 cell of the deluge. I'm getting five new ones from the same batch that will be matched by their inner resistance. This is important for the parallel charging and discharging to work properly.
The Deluge itself will also have to be modified. First of, the battery goes out. The battery holder and capacitor will be left in place unless I run out of space. The 9V input will be desoldered, as well as the USB B connector. In the place of the latter, I'll solder a cable connected to the hub, as shown below. If I'm lucky I can just re-use the USB connector by turning it upside down, that would be pretty smooth. The SW3 header (the one the power switch connects to) will be bridged so the Deluge turns on or off as the powerbank provides power or not. The power switch itself I'm not sure about. Whether I can reuse this depends on how the powerbank behaves exactly. And, of course, I will have to cut holes into the rear/bottom plate to expose the USB connectors.
For some additional indicators, like the MIDI and Battery LEDs, I could use the speaker grill. If I do that, I'll have to reseat the speaker and work out how to redirect the sound towards the grill again.System Design
Here's the plan I threw together in paint.net (for the pedantic: Arrow direction represents logical USB downstream direction)

Really quite simple. The Powerbank has to be bypassed as powerbanks normally don't forward incoming data; instead, they connect the pins using a combination of resistors to communicate to the device being charged how much current it can pull.
And the RK 005 is bypassed for power to give more headroom for connected devicesThe Beginning
Thanks for reading, hope you'll follow me on this journey. Maybe you have some ideas/tips as well? Feel free to share any thoughts!
-
Deluge MIDI Host Mod Buildlog
@darenager said:
Some serious hacking there! Probably not much use to you now but these little midi USB hosts are pretty good http://www.hobbytronics.co.uk/usb-host-miniAh, I thought they could be great for transitioning to a RasPi-based host, but they only support one device, no hubs.
@punchedout said:
Thank you for attempting this and documenting it. Really enjoying the build process.Thanks so much!
Boom, update!
Print went well, not much to report here. The first layer wasn't great, so some of the screw holes came out weirdly, but that's alright. I did a test print to see if I could print the "floating" section the hub mounts to with bridging (an experimental feature in cura), but it sagged too much. So in the end, I went for regular supports.

Fitting went OK. It seems I was sloppy when measuring the position of the MIDI ports, so I had to file off quite a bit off the left side of the hub section. I also cut off the rear support for the USB hub, as it prevented me from fitting cables there. You can see the infill pattern, which looks rather funky. Once that was done, the part fit into the deluge perfectly.
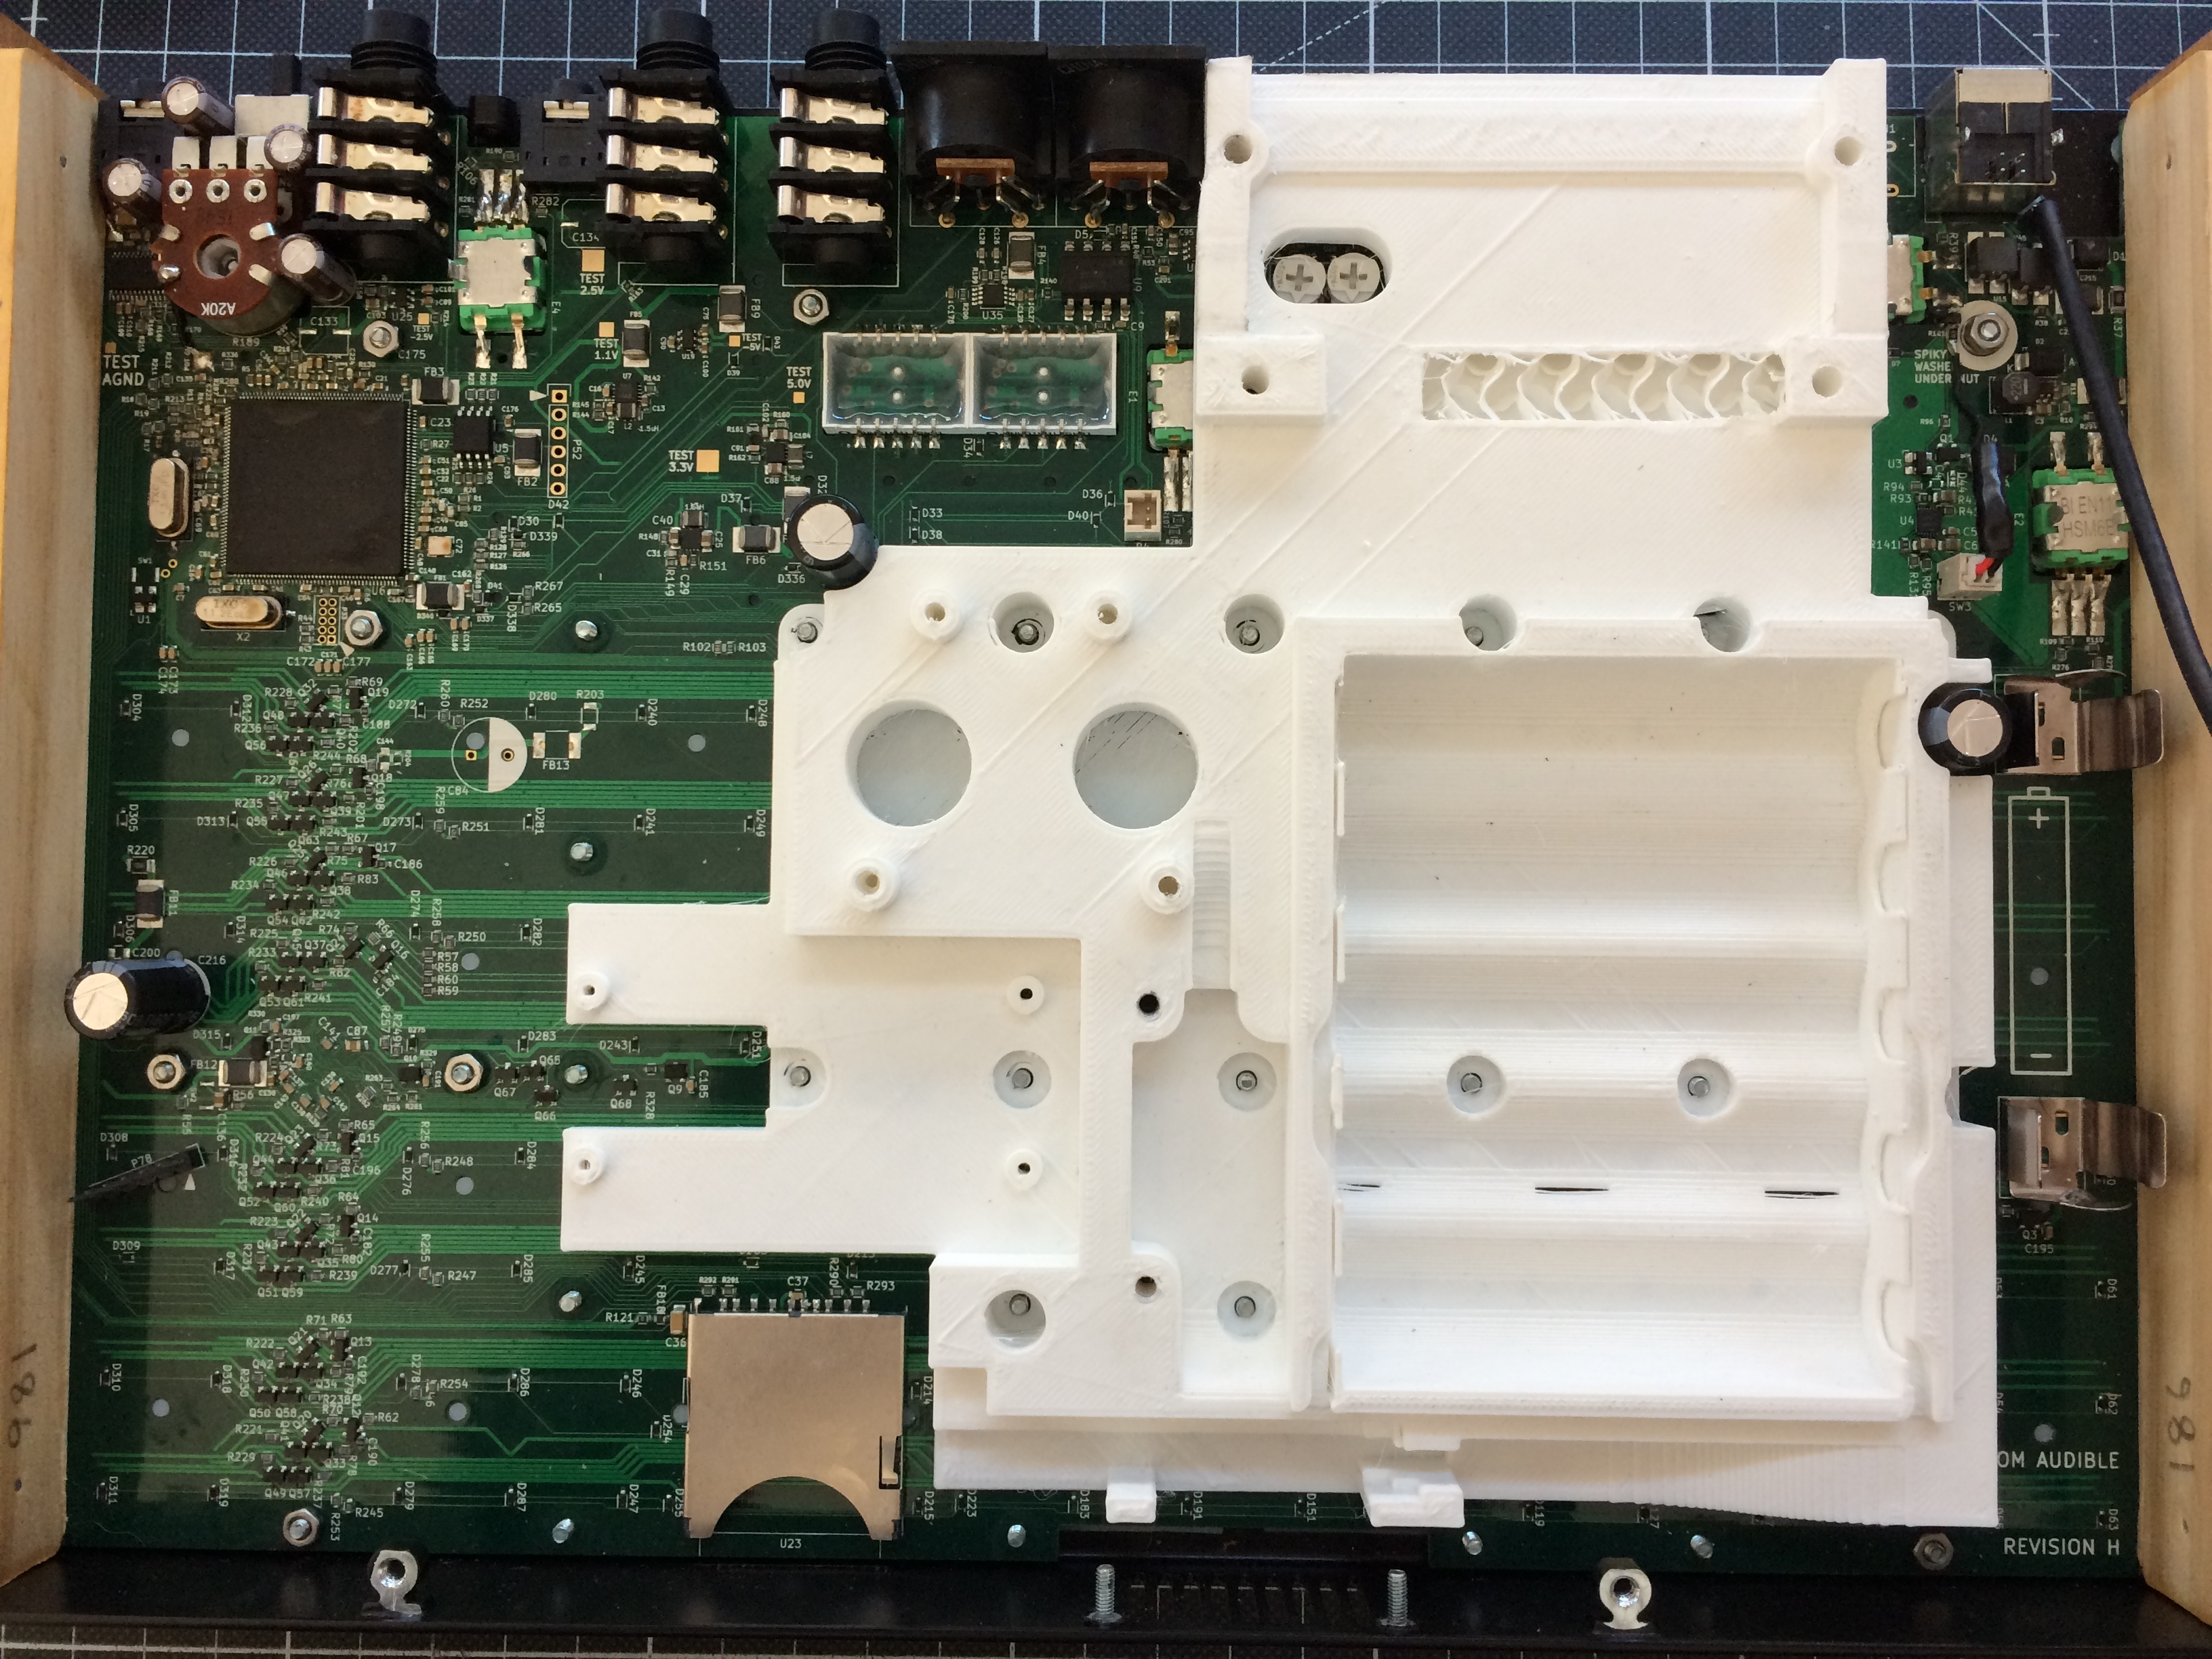
Now for test fitting all the parts. I really messed up the RK 005 mount, the screw holes don't go all the way through and are shifted up by 1-2mm. Luckily, the cutouts for the midi ports are also too close together, so it just clamps to the part without any screws. Apart from that, everything fit quite nicely.
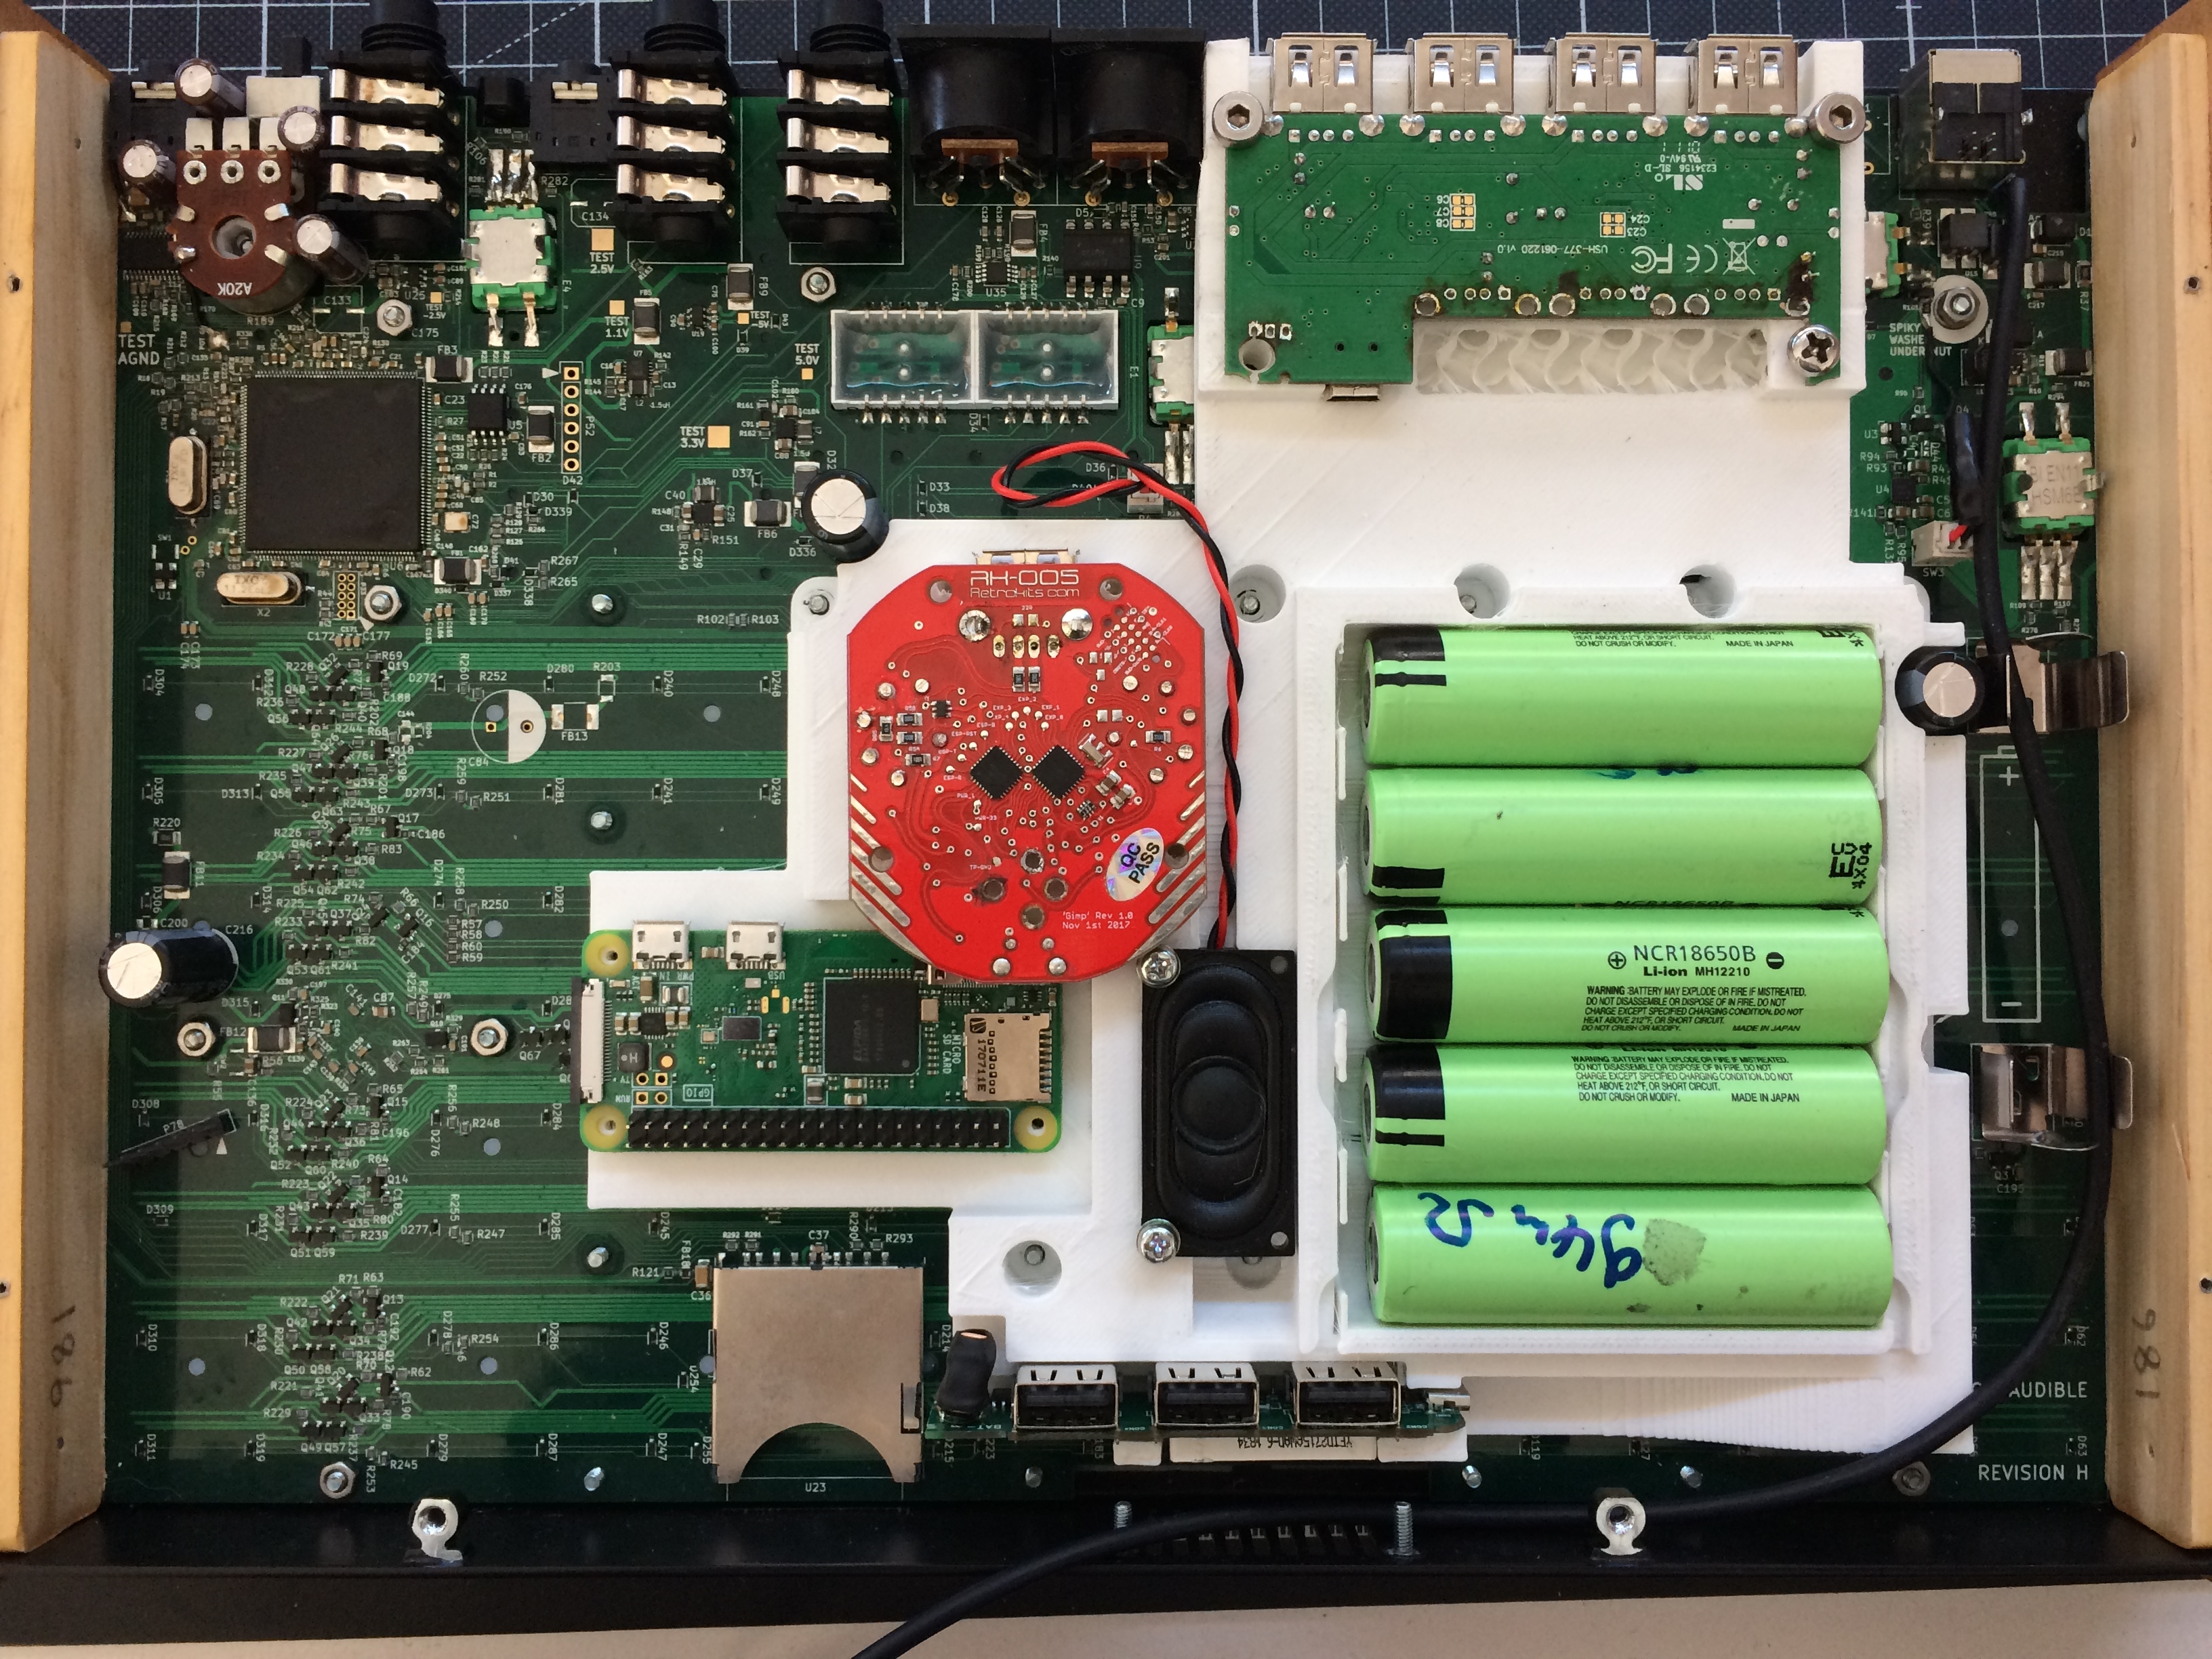
And now the biggest jump; everything mounted and soldered together. I forgot to take many pictures along the way, but I'll walk through some of the challenges afterwards.
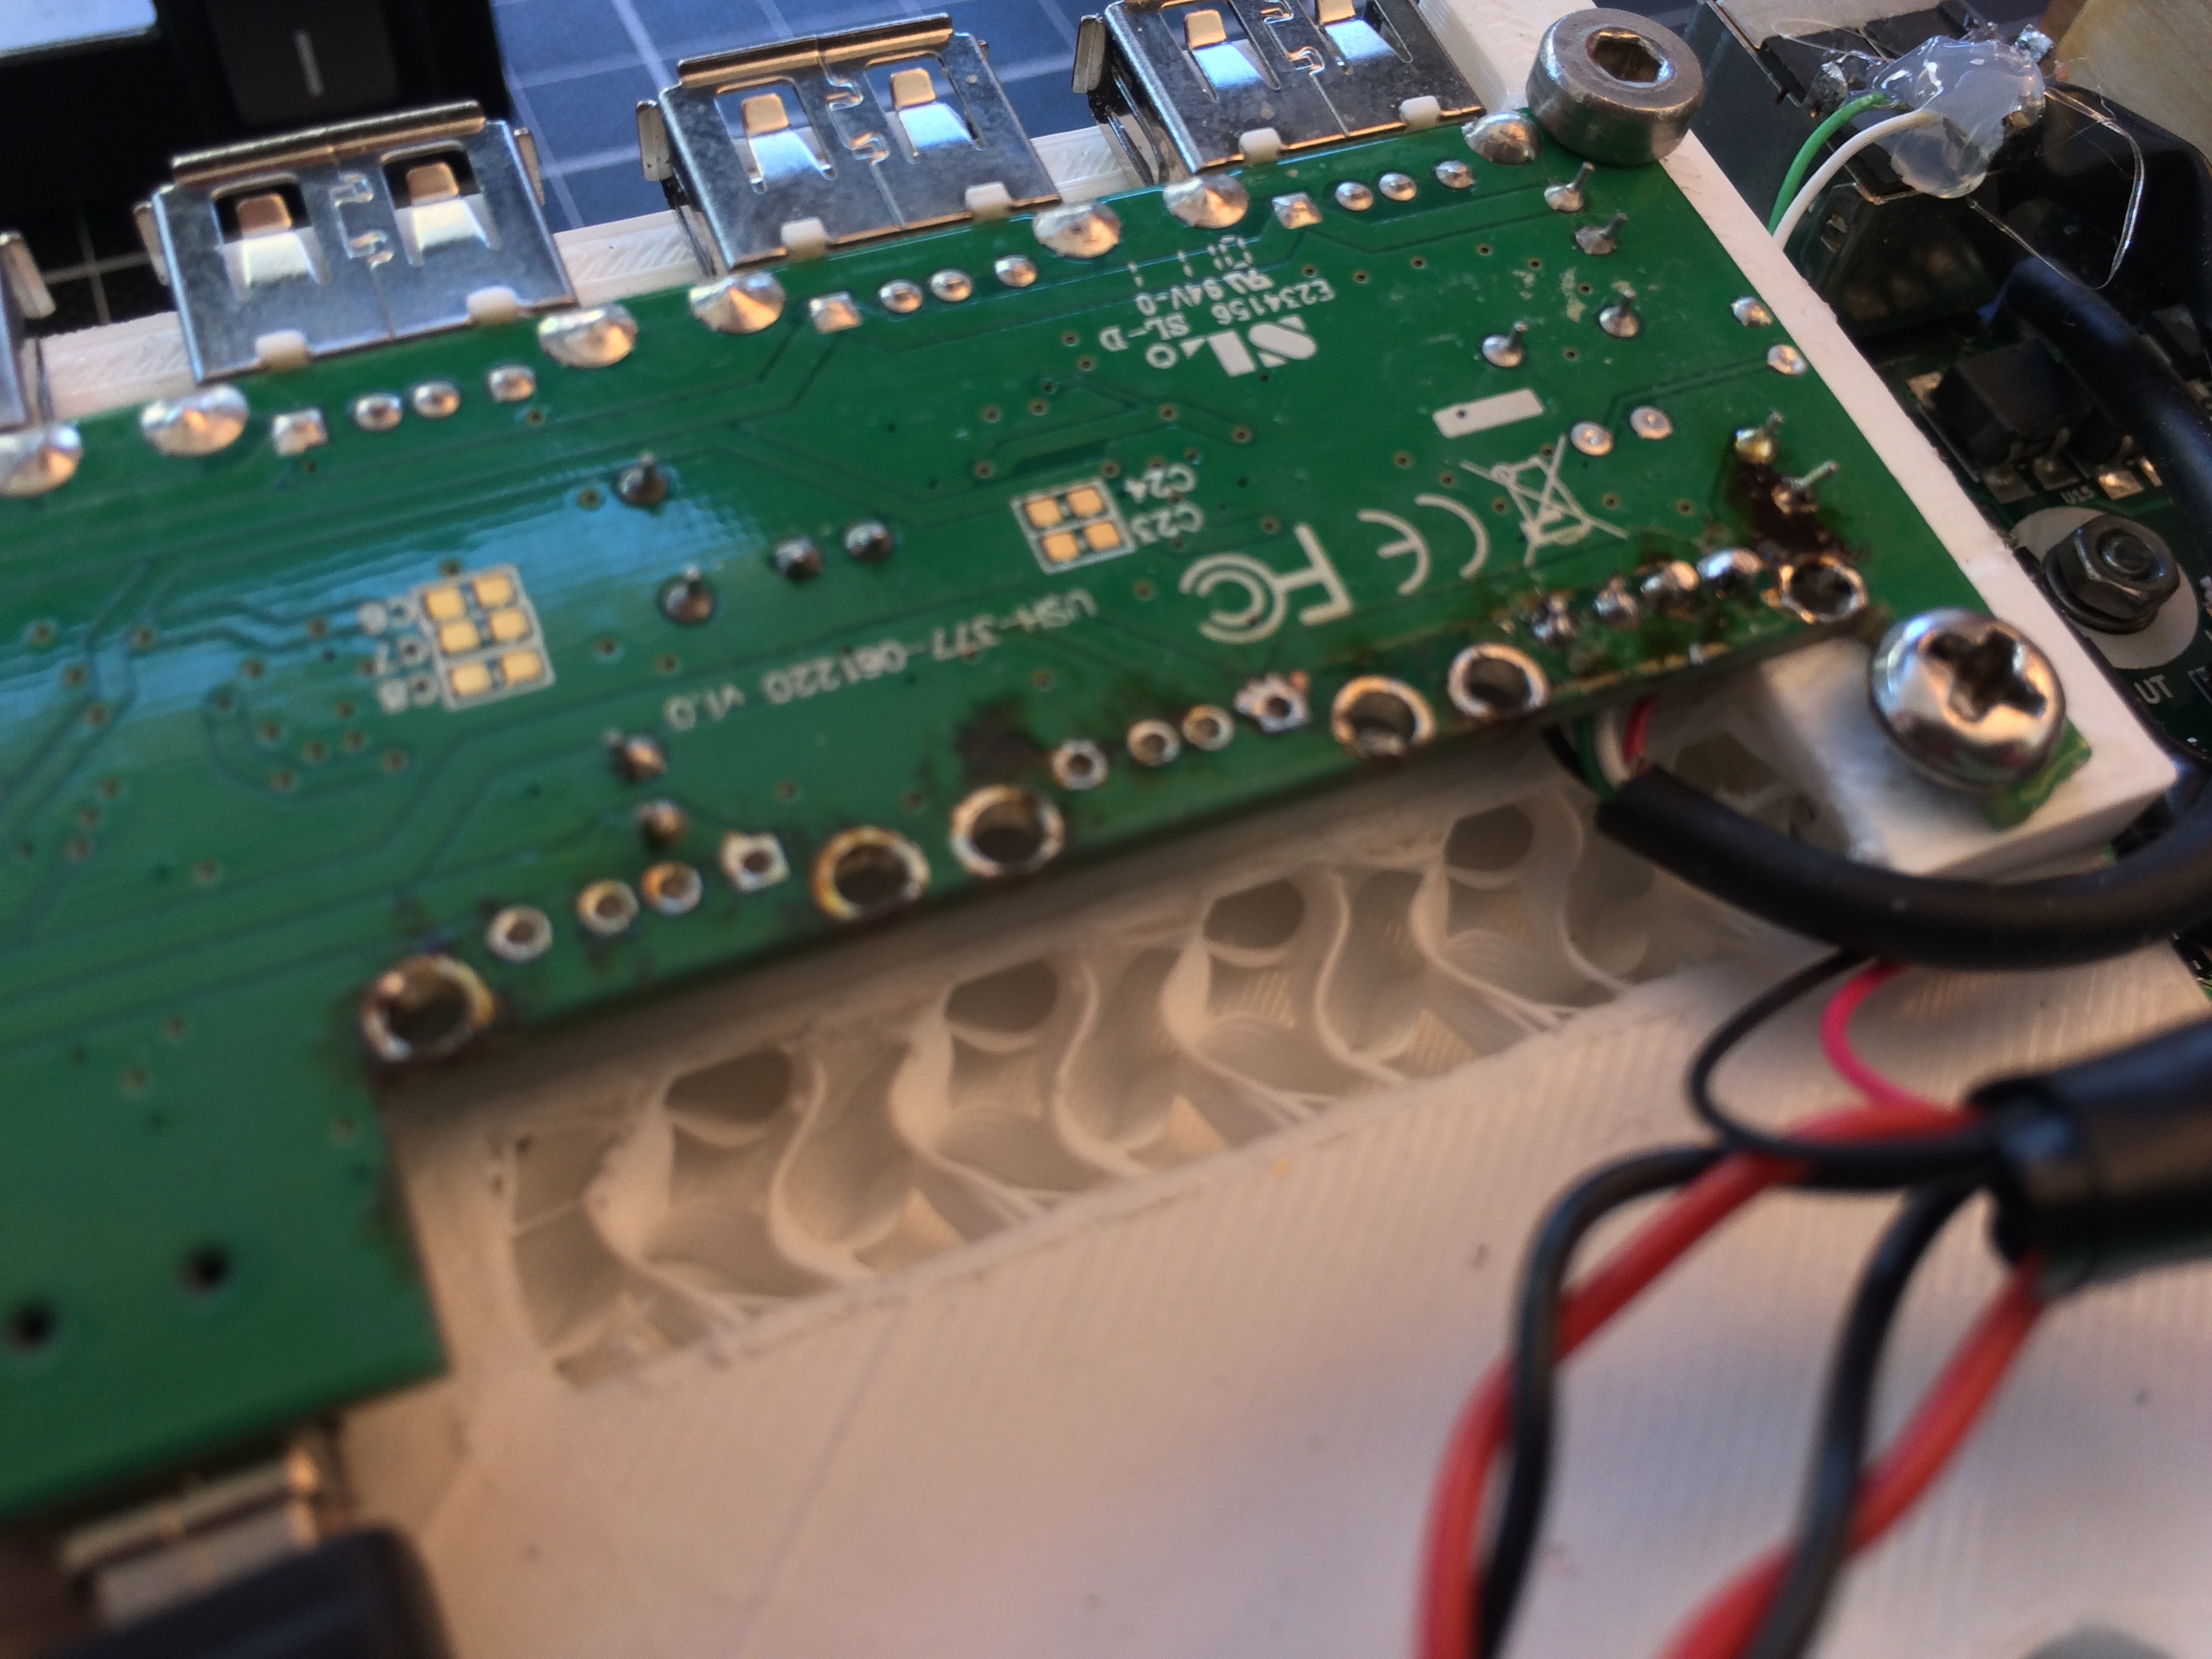
This took a hell of a long time. Mounting the battery holders was quite hard. I had to cut and file them a few times and some still had to be pressed in with the soldering iron so the plastic would melt and let them slid into place. Then I didn't leave a lot of room for soldering them together, so I had to hold the cable with pliers while soldering and feeding solder into the joint.
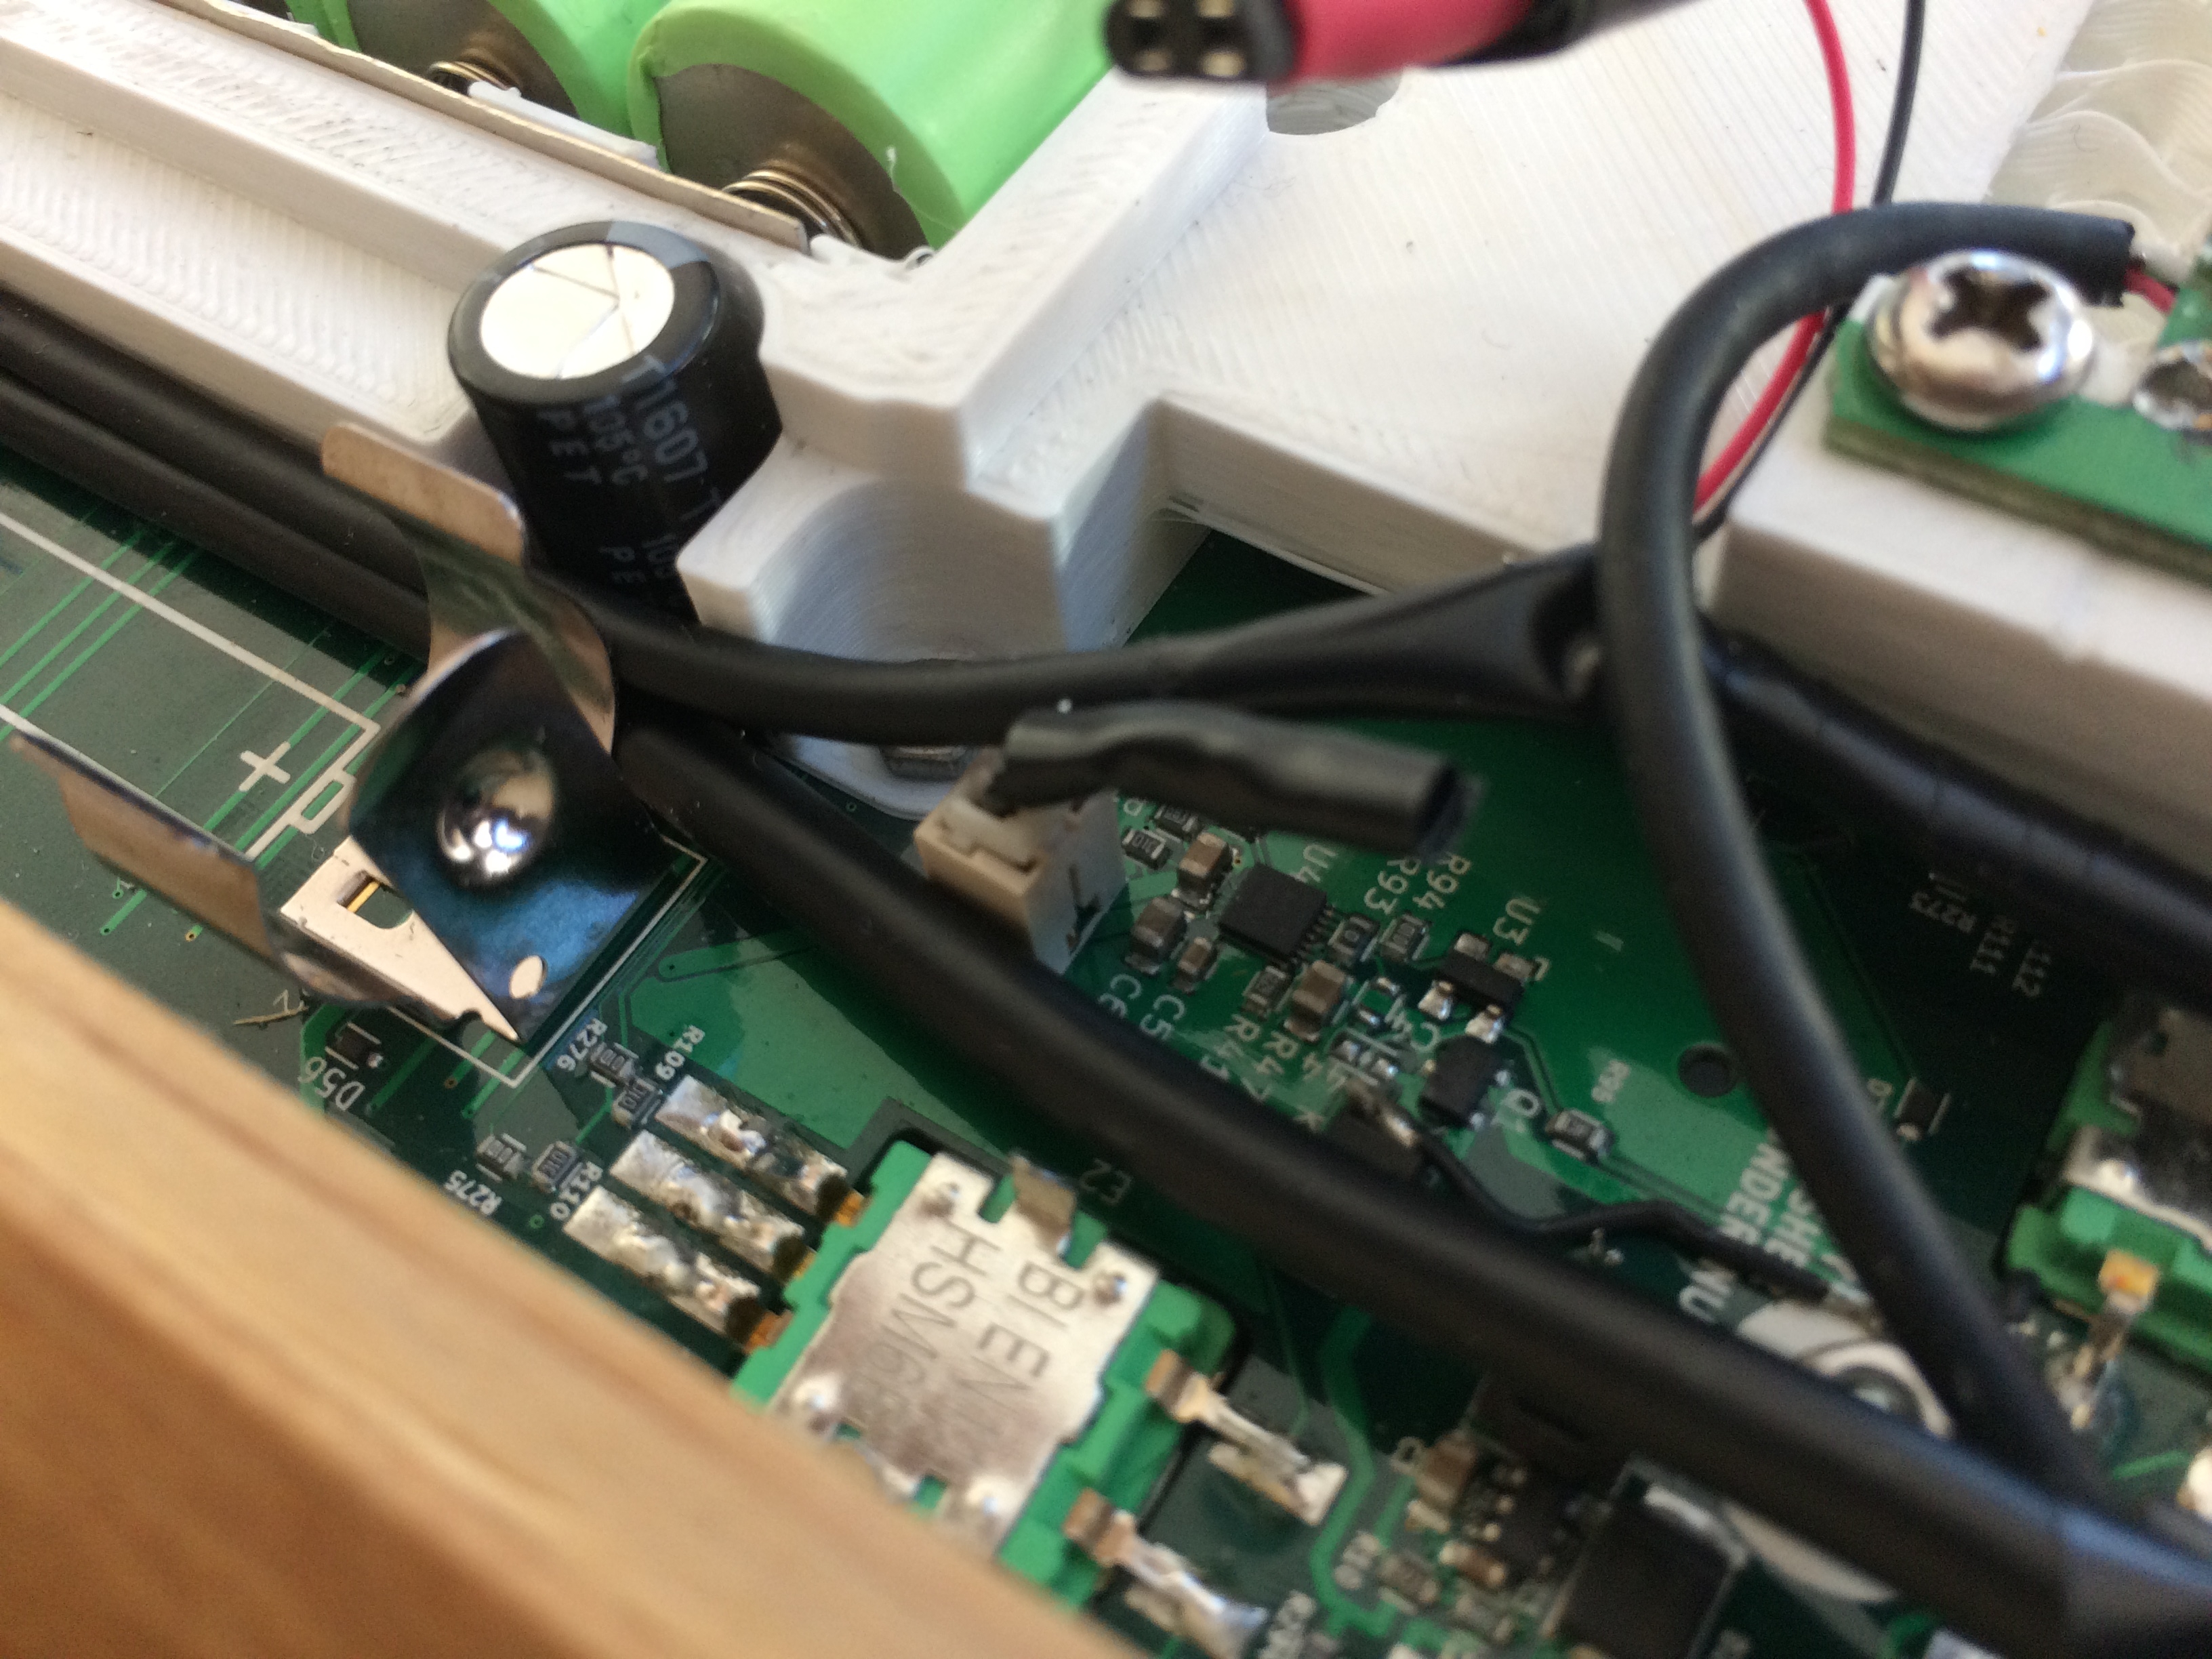
The power cabling was also quite a task. From the USB port, one cable goes to the powerbank, carrying only power, and one goes to the RK 005, carrying only data. The connector was not designed for having cables soldered to it directly, so after finally managing to get them on and making sure there were no shorts, I used hot snot to secure and isolate the leads.

However, the cable to the RK 005 also has to be connected to power coming from the powerbank, which needs to be switched together with power going to the USB hub. So, I soldered a female pin header to the 5V out of the powerbank on one lead and the Power in of the hub and 5V in of the RK 005 on the other lead, and soldered the GND of the RK 005 onto the GND going from powerbank to hub. Again stabilised with hotglue, and made to look nicer with heatshrink and tape. This was probably the hardest bit of soldering I've done in this mod.
When doing this, I also made sure to not build any ground loops. Ground now has the same path as power input, and only fans out like a tree to all the components.
Output soldering on the RK005 went smoothly, but desoldering was quite hard again. Not sure what it is with this board. You can also see the misaligned screw holes in this picture.
Little detail on the speaker: A reflex port. I didn't have space for a proper channel, unfortunately, but it was a fun feature to model
Another piece of the puzzle: The power switch bypass on the deluge.
And then, the final link in the chain; the spot where the deluge USB up is soldered to the hubs USB down port.
Now everything's connected properly and should work, right?
Damn right it does
The only difference you can tell right now is the battery indicator in the speaker grill.
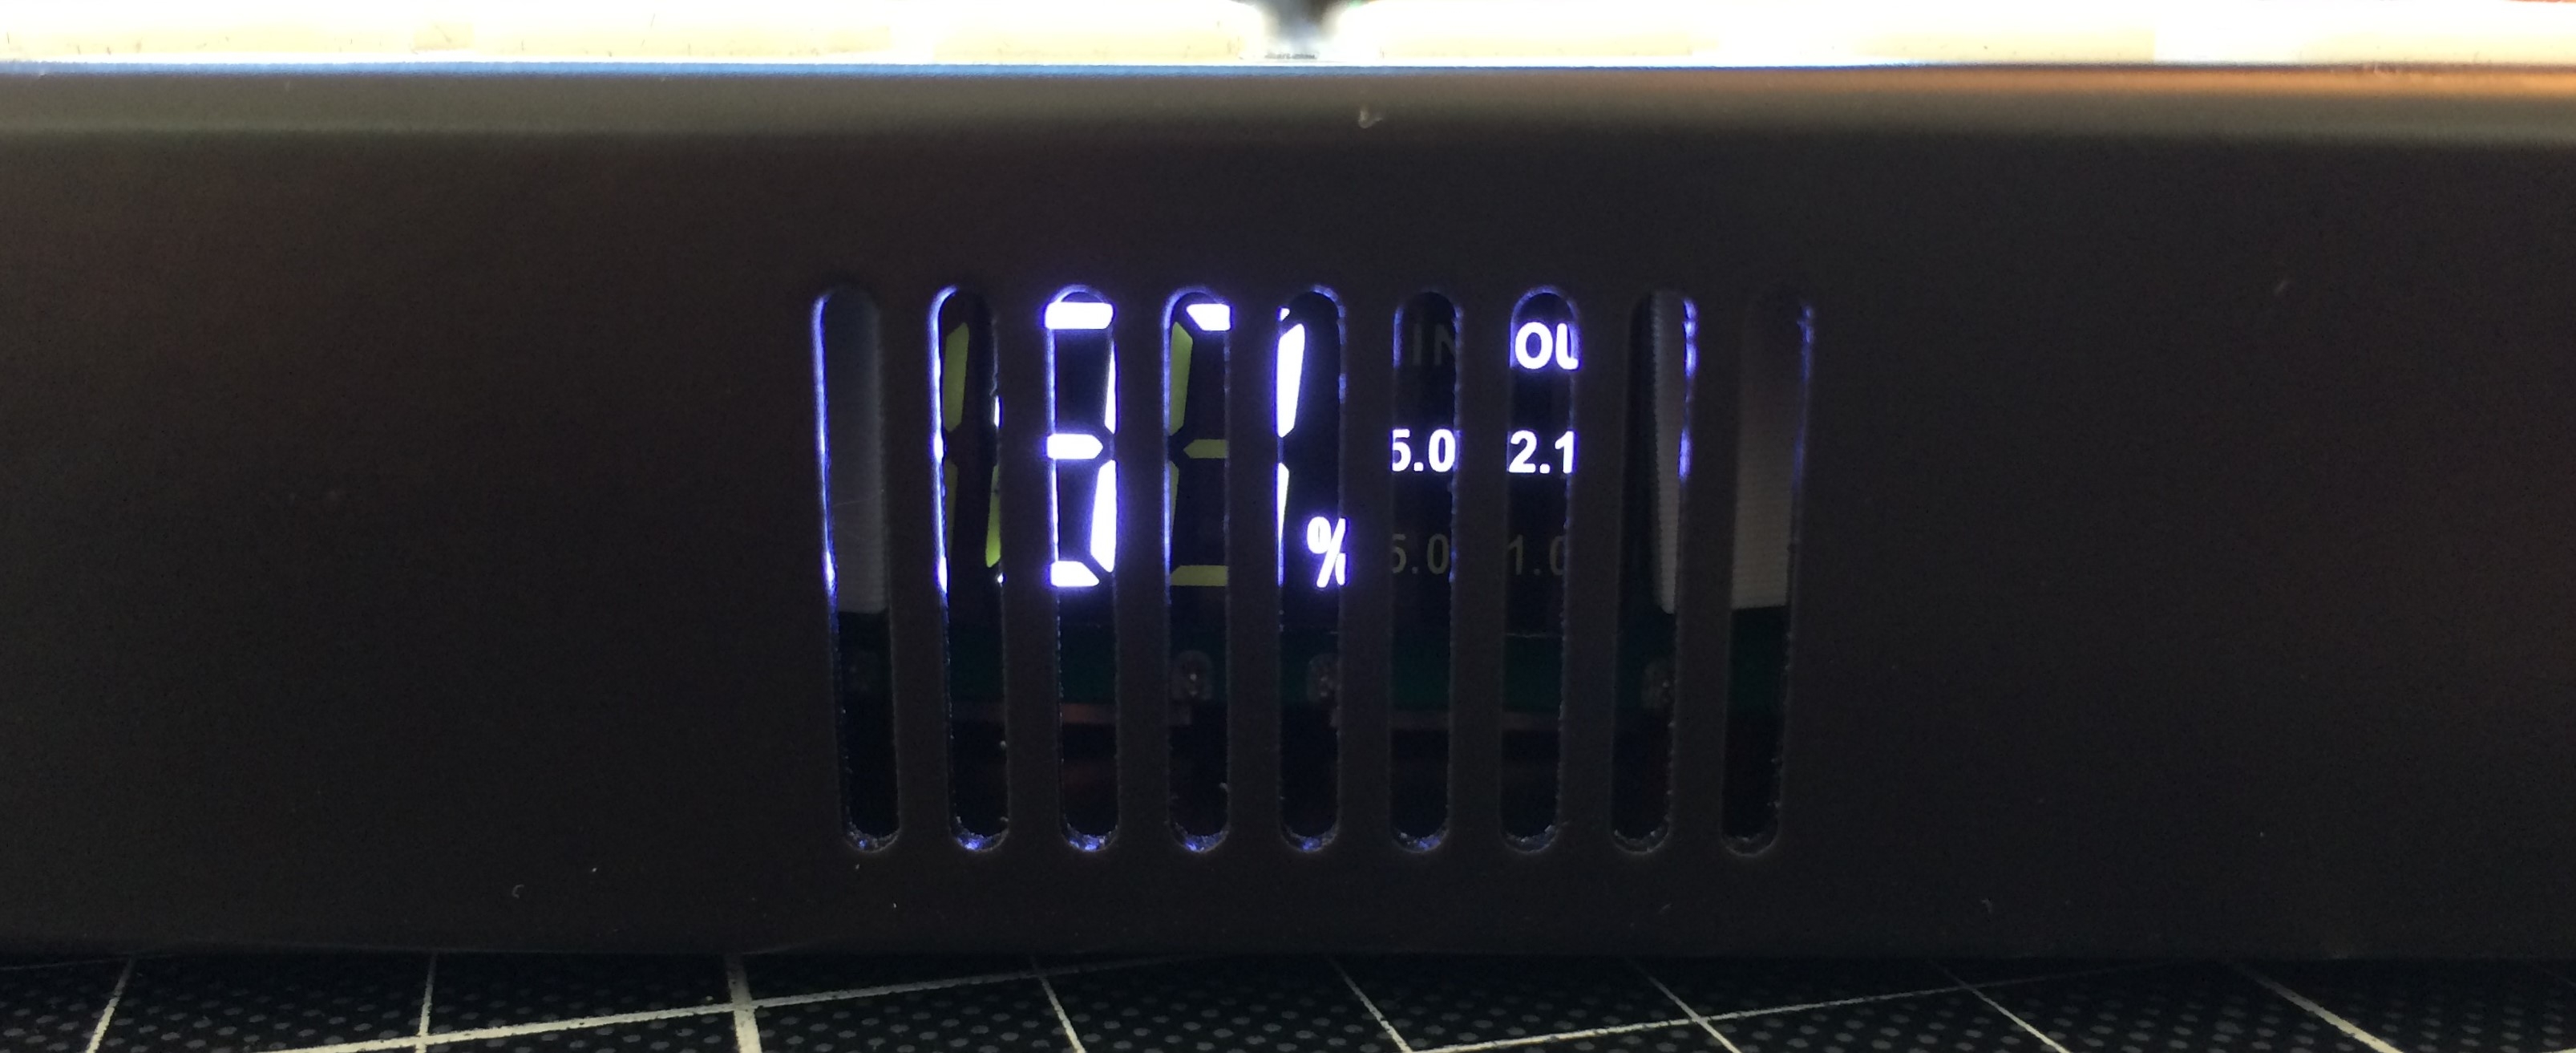
Now, there are a few peculiarities that this mod brought with it. The smallest problem is that the USB LED now flashes between green and yellow, probably because there's no battery installed in the Deluges own battery holder.
But the bigger problem is that it doesn't work when plugged into USB power. With phone chargers, it seems to boot but none of the buttons work (and the led is red sometimes), and on PCs it refuses to boot altogether.
I suspect the powerbank doesn't like charging and putting out power at the same time. I'll have to investigate this.
Next steps
For once, I have to investigate the power issues mentioned above. Potentially, bypassing the powerbank with a diode could already solve this problem.
Another problem is that I already broke off the USB port after plugging in the cable for the 10th time or so, so I need to find a way to mount it more securely than just surface soldering it to the PCB.
Then cut holes into the rear panel to expose the USB ports, and we're done.
Thanks for reading!
-
Deluge MIDI Host Mod Buildlog
I've recently bought a Deluge, and I'm fascinated with your mod!
Will be following your progress to see if I'd be able to do similar to mine.Would be really cool if I can get it to a stage where all the 3D-Files, schematics and so on are available so anyone can replicate it.
I got a update from Retrokits, btw: They say that this is a very common issue, but nothing they can fix.
We alter the startup timing of the 005 almost on every firmware because one person says device A does not boot, another one has problems with device B to X.
They also recommended I try a downgrade to older versions, but that didn't change anything. So I'll go with my safer approach.
Little update
I actually finished a prototype for this, and it works pretty well. You can see that I had to use 5 of the available 6 pins on the ATTiny, so there's no way of reprogramming it while it's inside the Deluge. Not to worry, though.
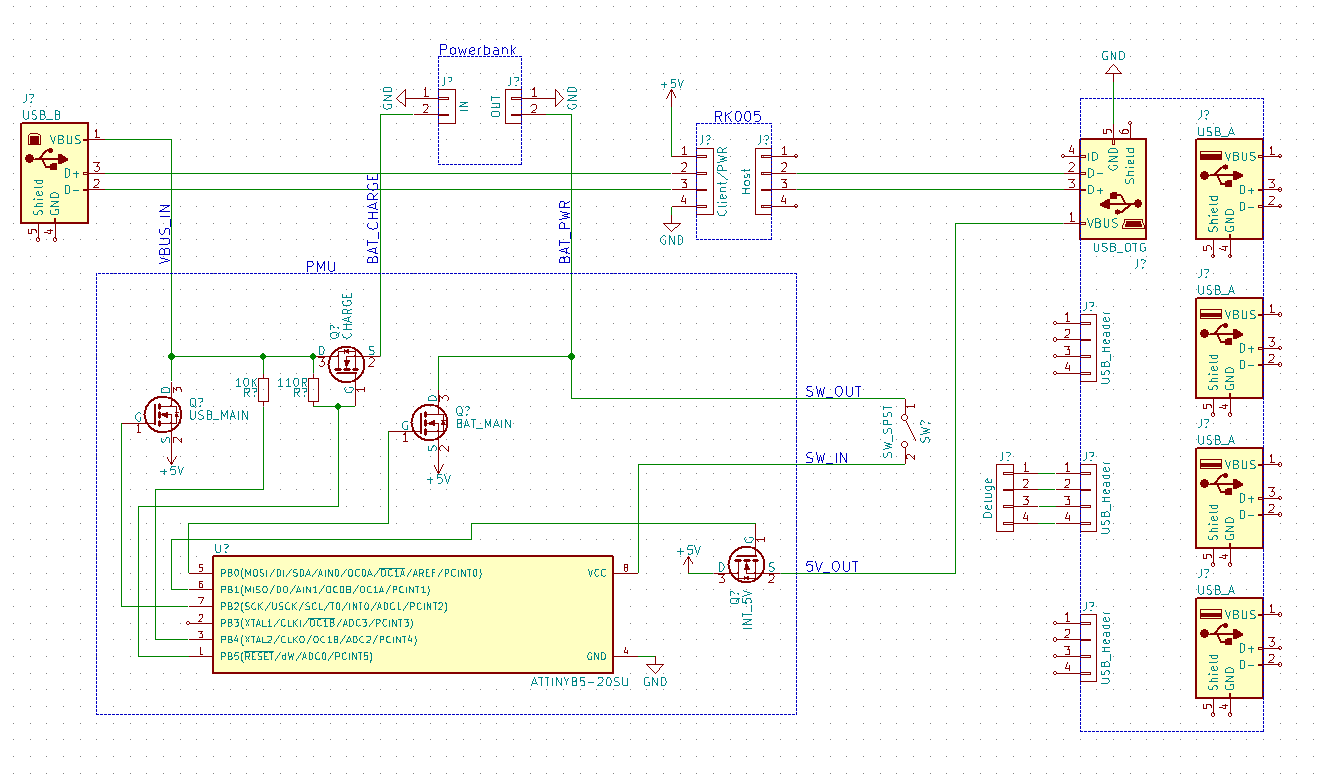
Quick walkthrough:
So here's a short rundown of what happens:
If there's no power, nothing is running (of course).

Once USB power is connected, the CHARGE MOSFET turns on. This is just done with a pull-up resistor, the digispark isn't even powered yet.
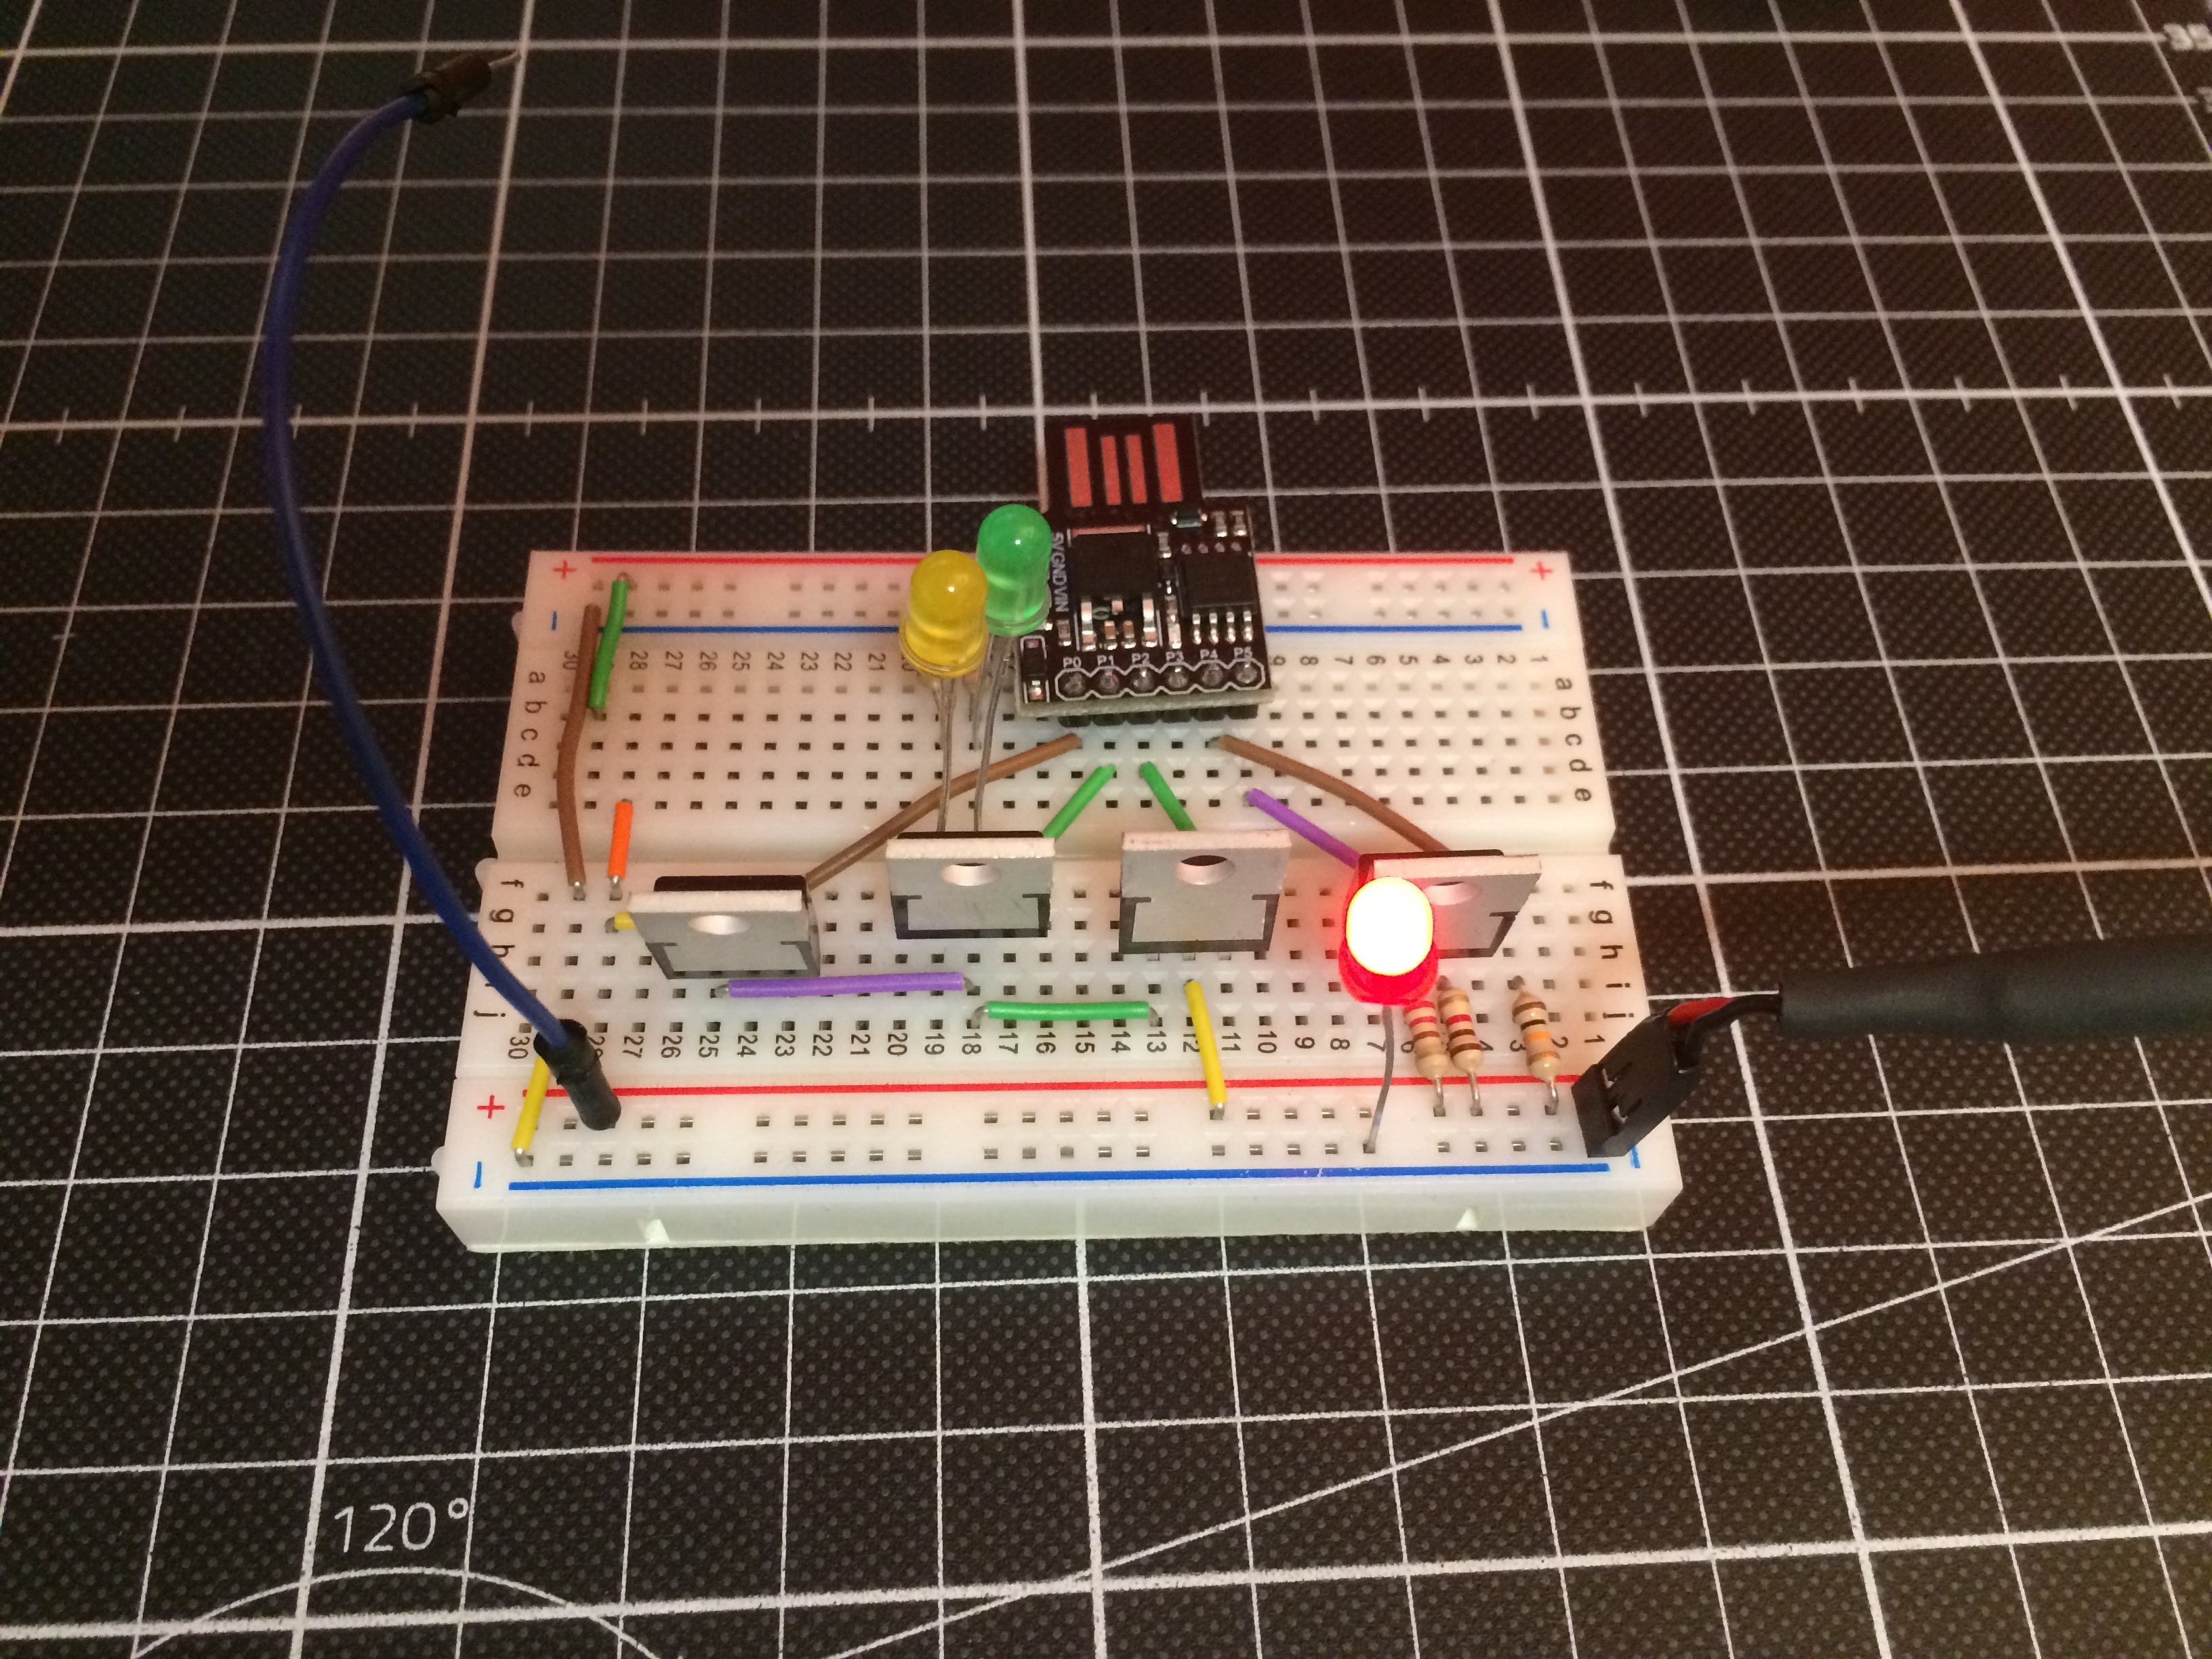
If the power switch is flipped (simulated by this jumper wire), the digispark is powered by the battery. And immediately turns charging off. This is important, otherwise the powerbank would shut down as it does not support charging and discharging at the same time.
It also turns power to the RK-005 (simulated by the green LED) on, either using the USB_MAIN or BAT_MAIN MOSFET, depending on whether USB is connected or not.
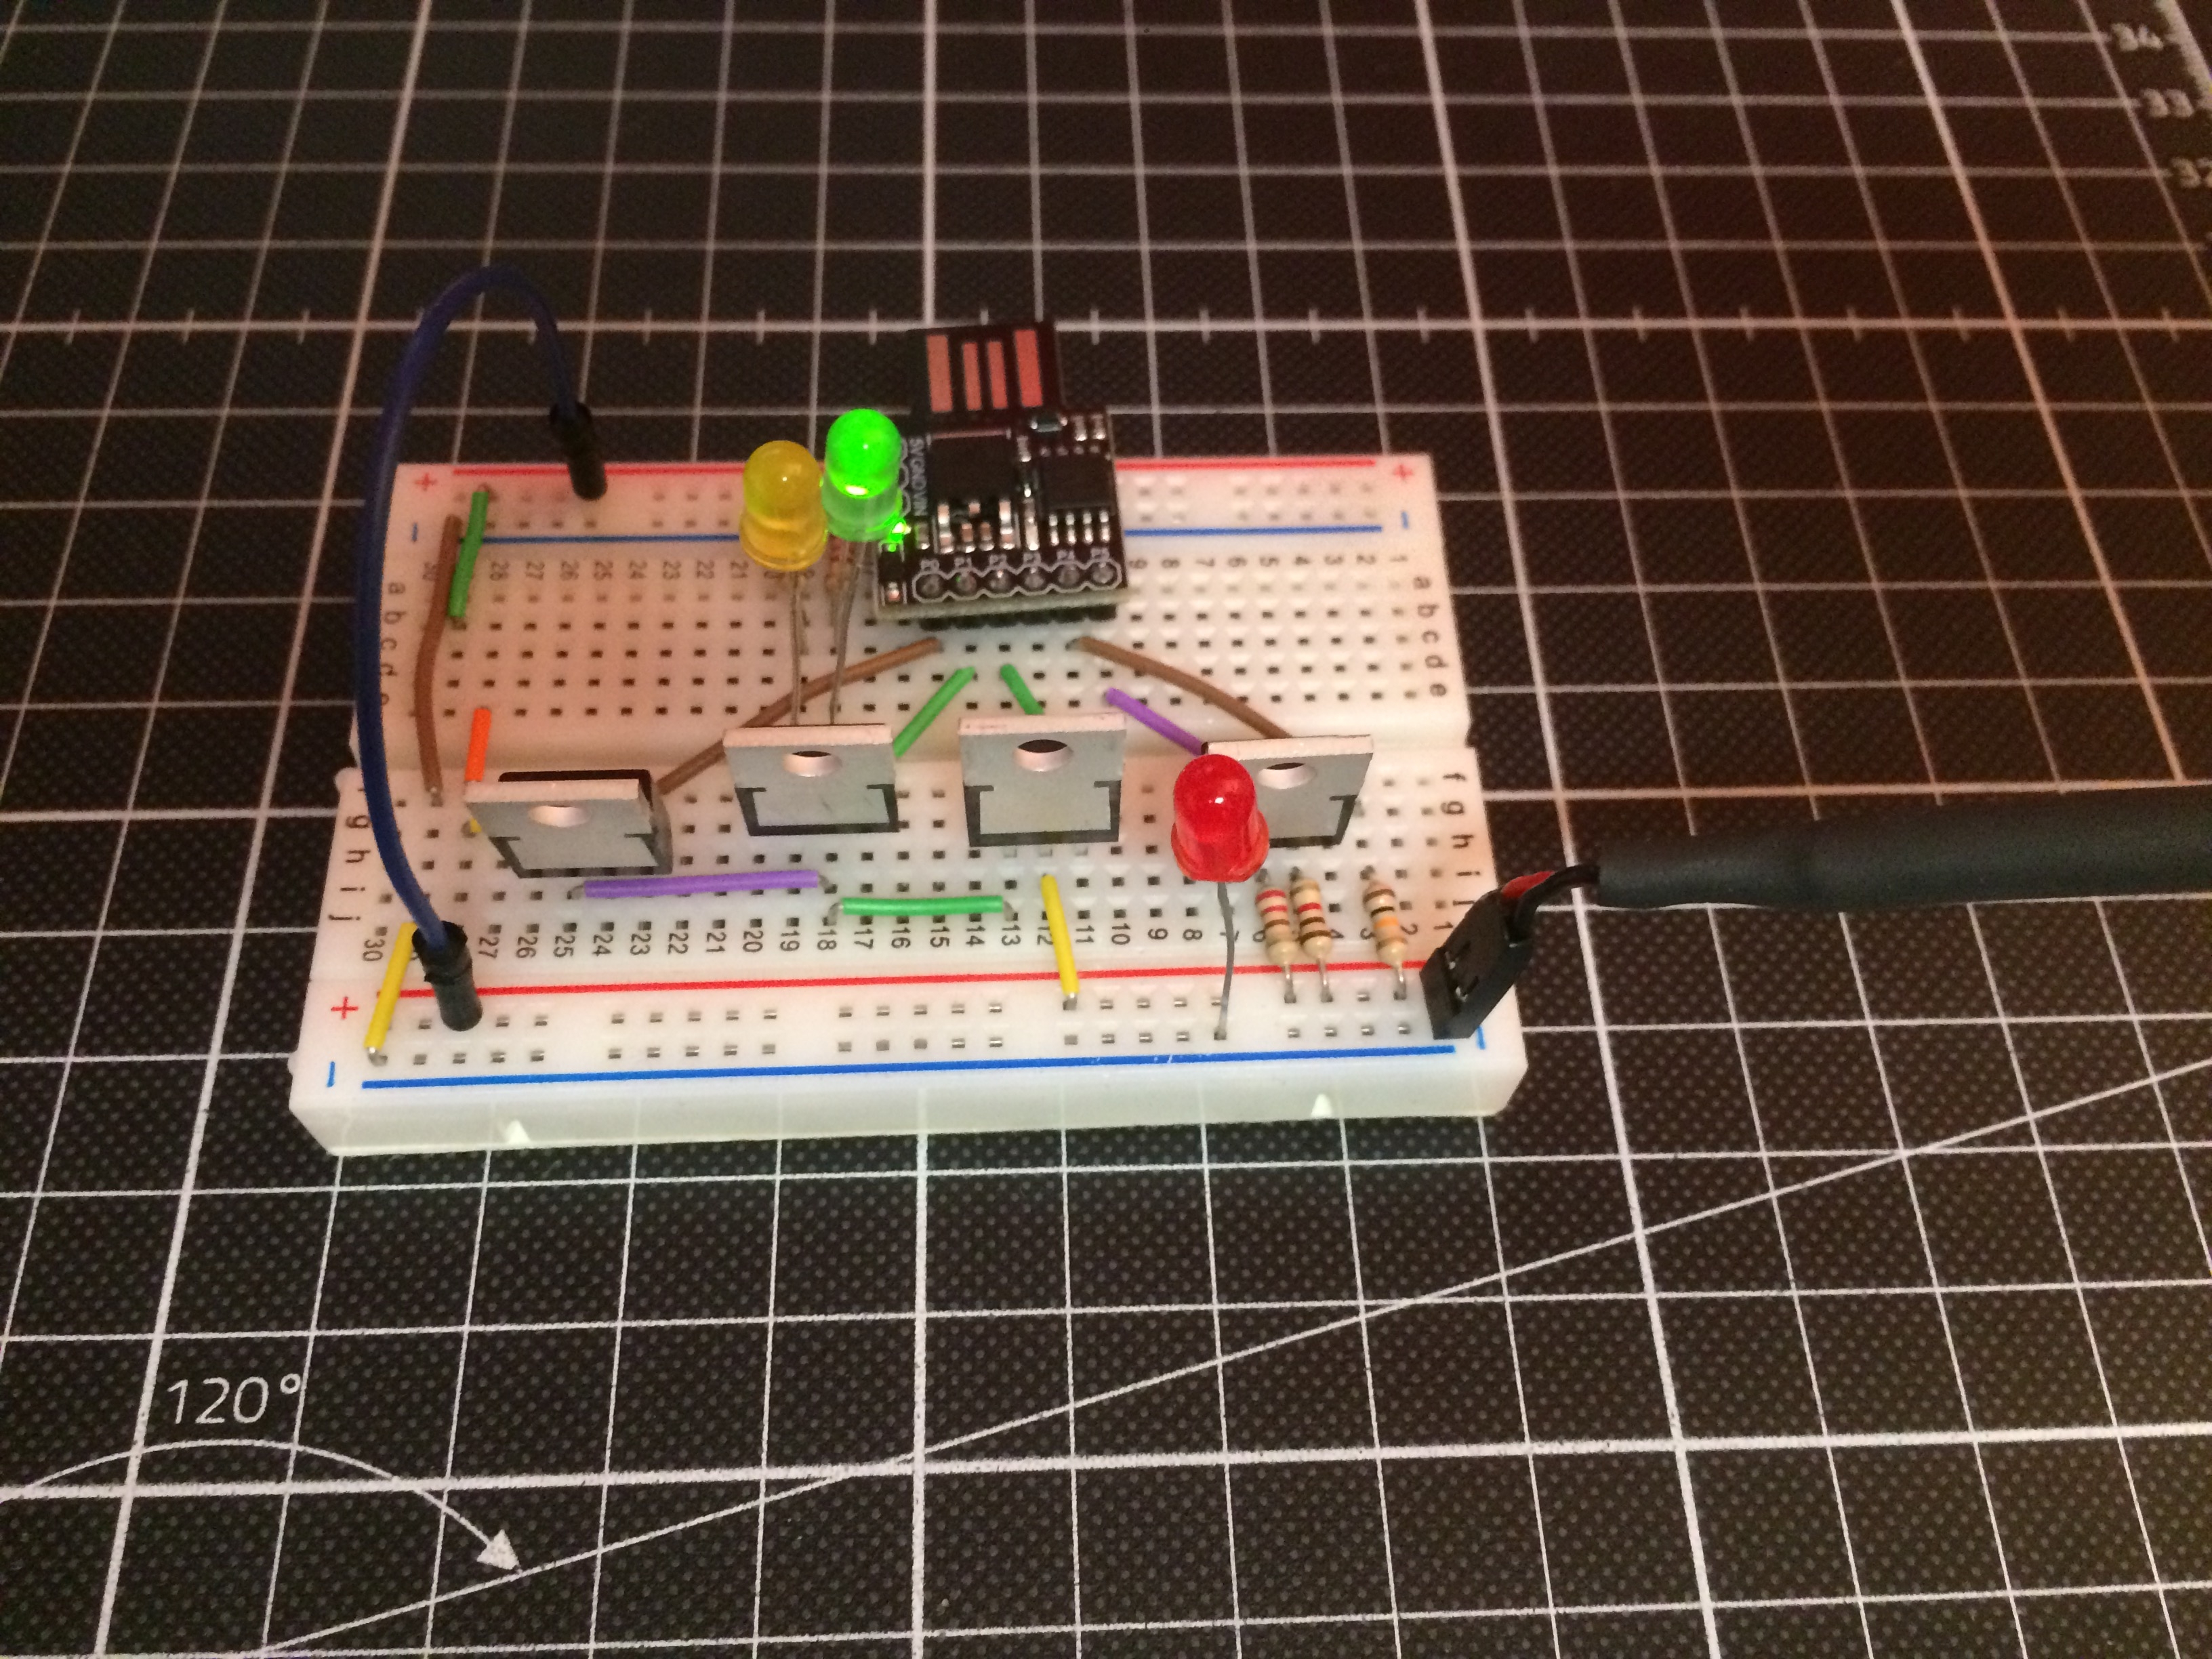
And after a delay of a few seconds, the INT_5V MOSFET is turned on as well, providing power to the USB Hub and thus the Deluge and all connected devices (simulated by the yellow LED).
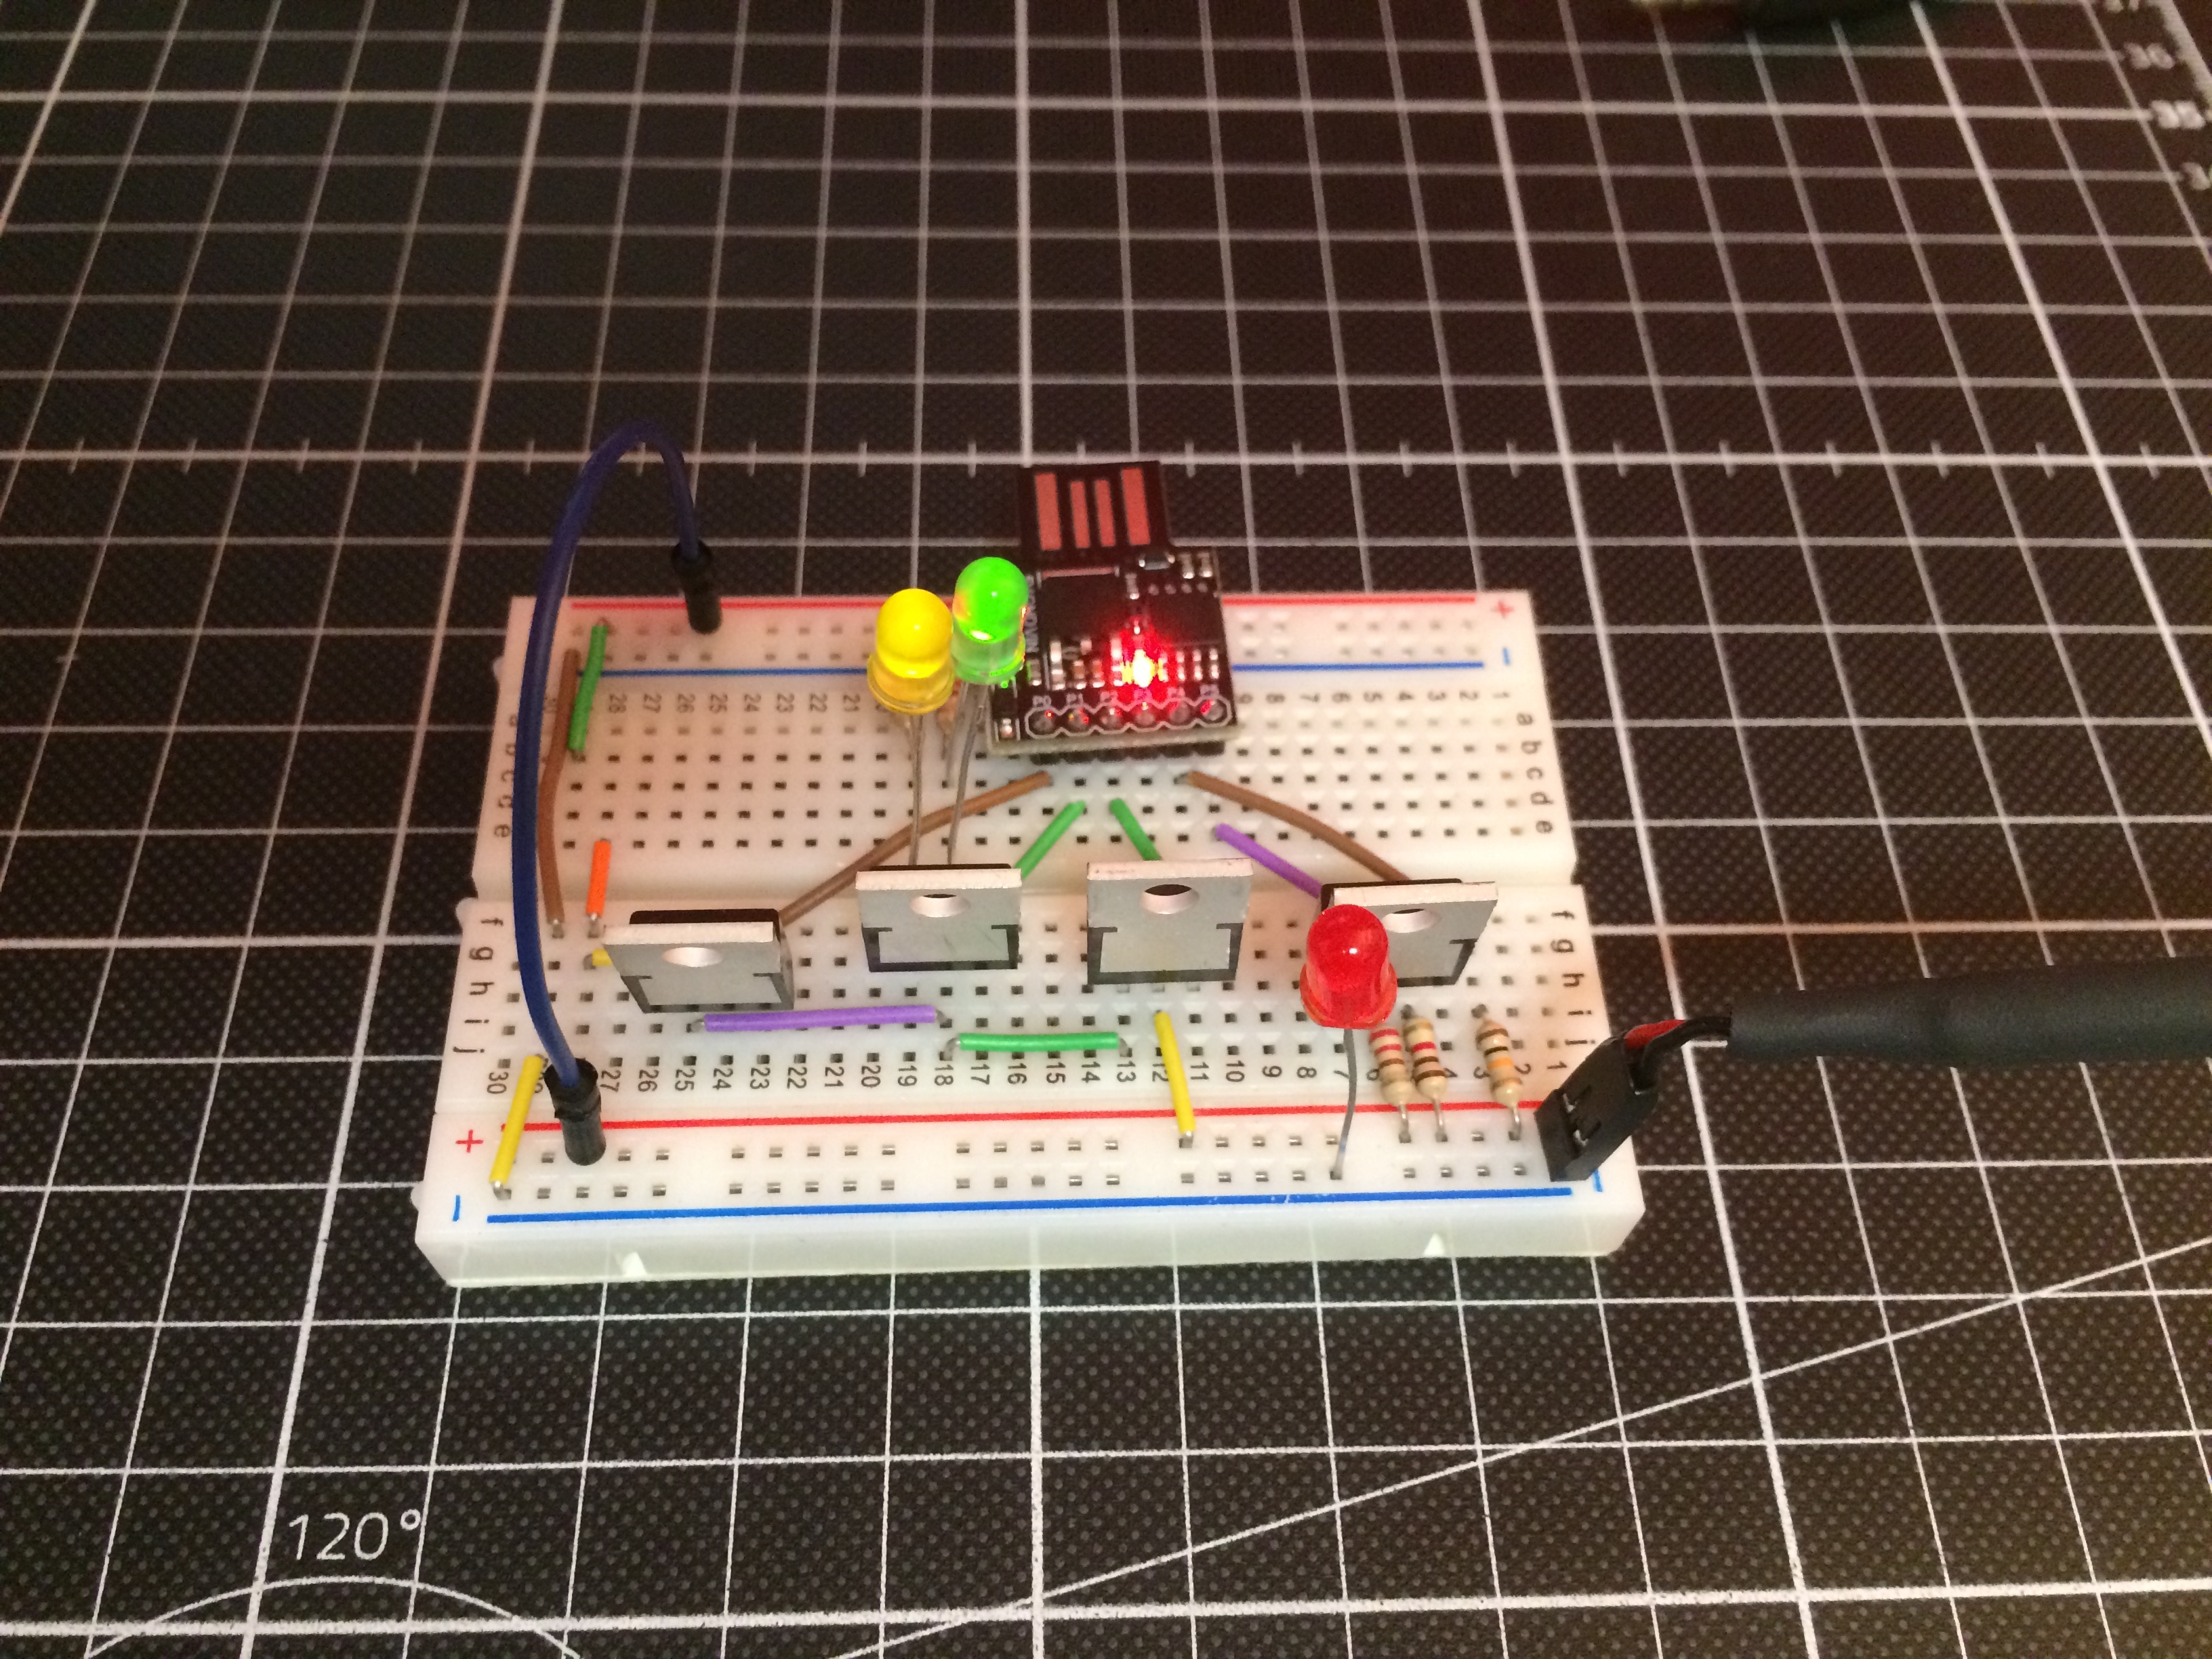
Slight caveat
This doesn't actually work with real components. The problem is that I didn't really know how MOSFETS work, so I just bought N-channel ones because they are more common.
HOWEVER, as I now learned, N-channel MOSFETs can only switch loads properly at the ground side! For turning the high side on and off, you have to use P-channel MOSFETs. Now it would potentially be possible to redesign the circuit to only switch on the low side. However, I don't feel comfortable doing this. I'm not an electrical engineer, but from what I know this would be incredibly unsafe in this case, as it would mean isolating the different grounds of the different devices from one another, which could lead to all sort of weird issues with charge building up on the different grounds. I could see ESD problems arising or even weird current spikes when plugging the whole thing into a USB port, resulting in damage to the hardware or whatever it's being plugged into.
So, I gotta make a trip soon and get my hands on some P-channel MOSFETS. Also get thicker wires for the power distribution. Surely there's not gonna be a single problem after that
")
-
Deluge MIDI Host Mod Buildlog
Super juicy update
USB jack fix
I had a bit of stuff laying around from desoldering the USB connectors from the hub and the RK 005.
So I took one,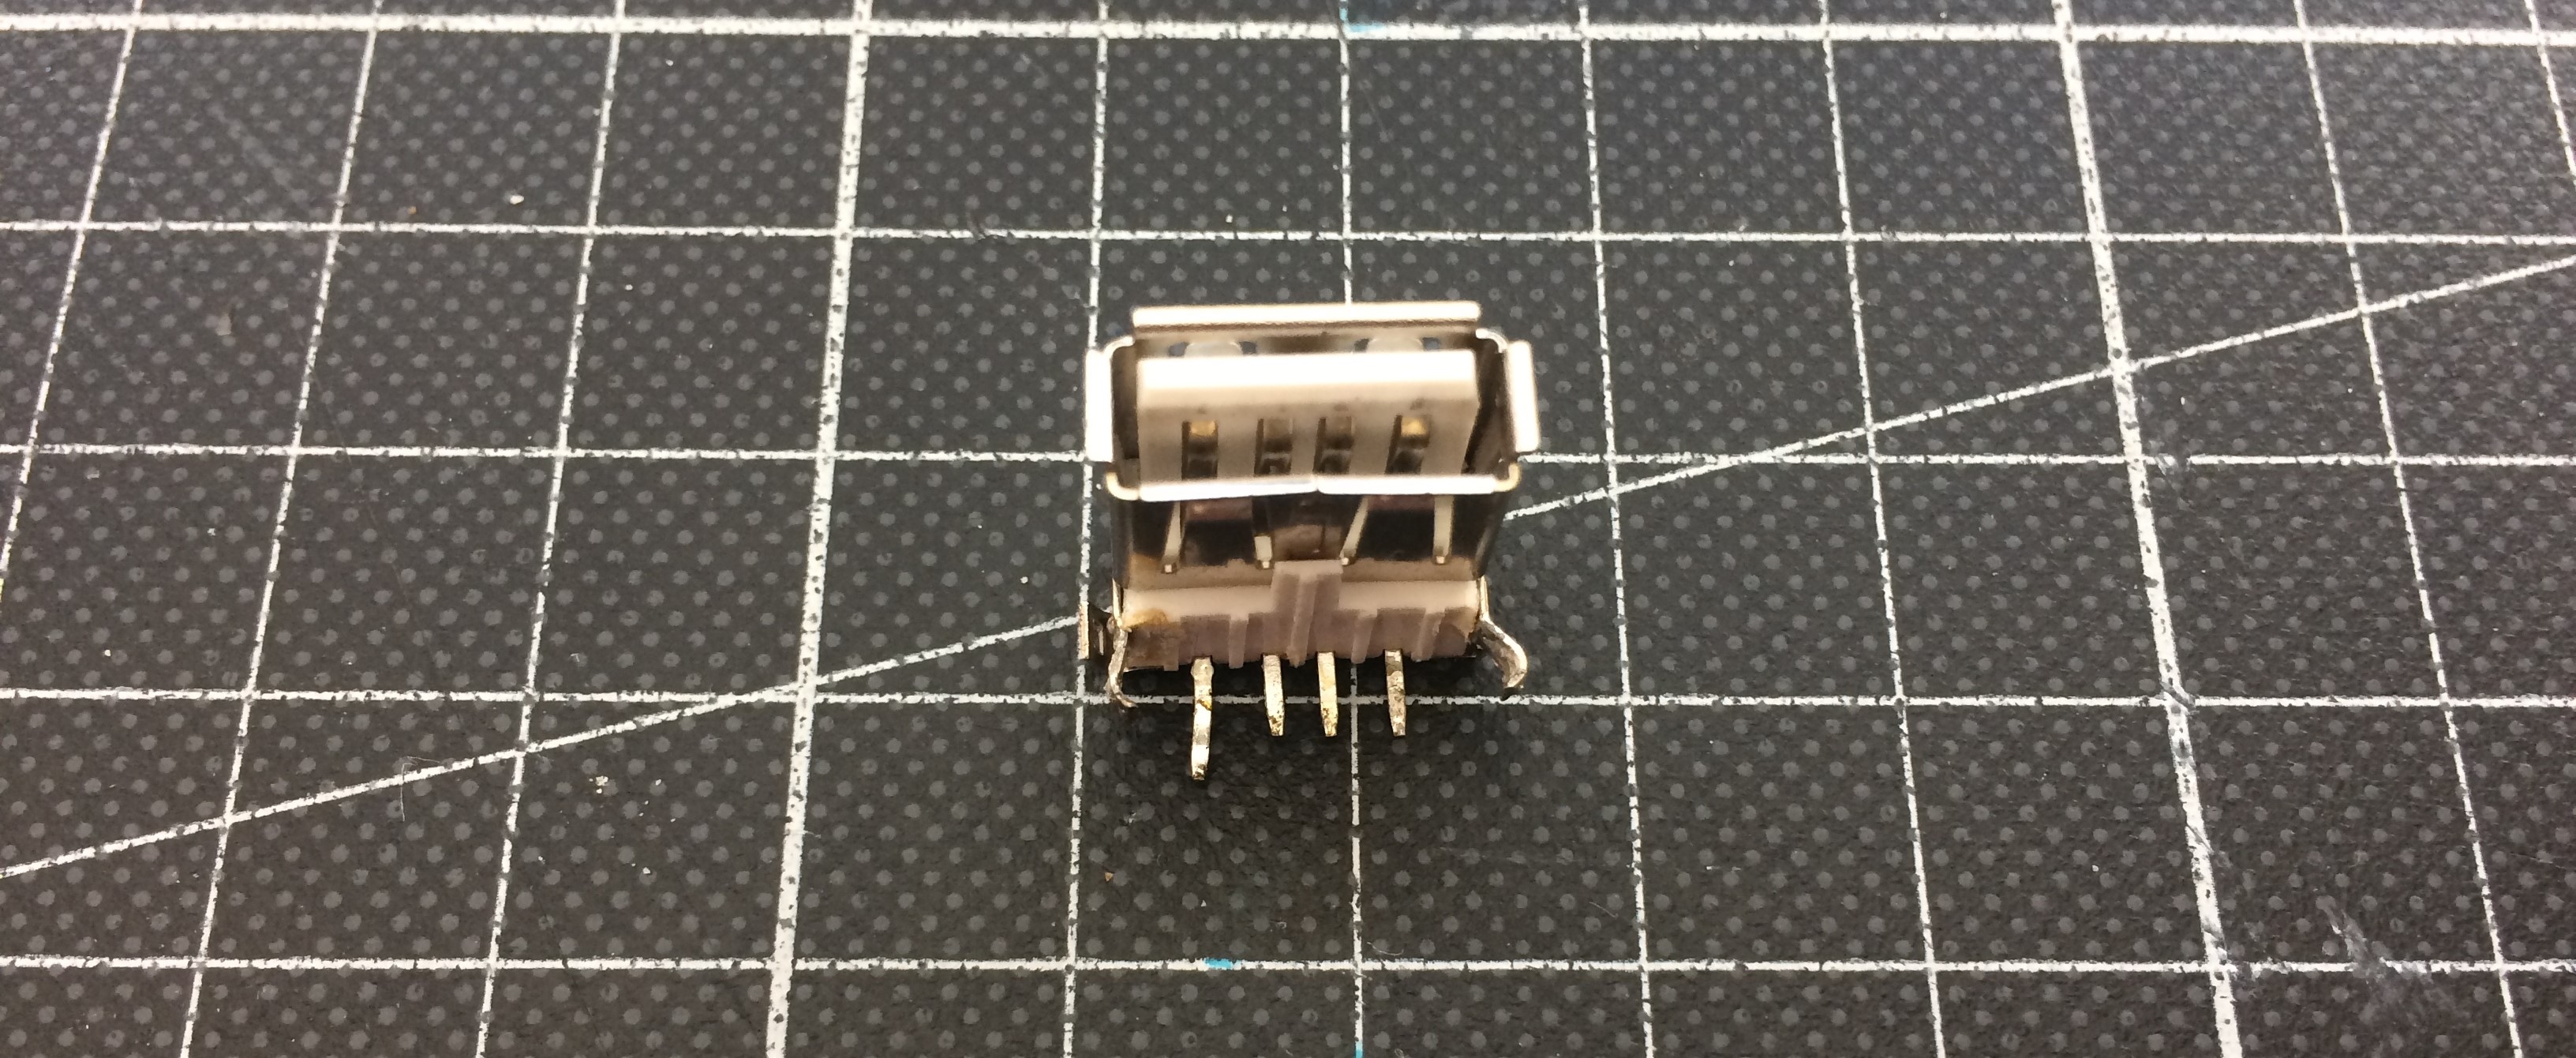
dismantled it,
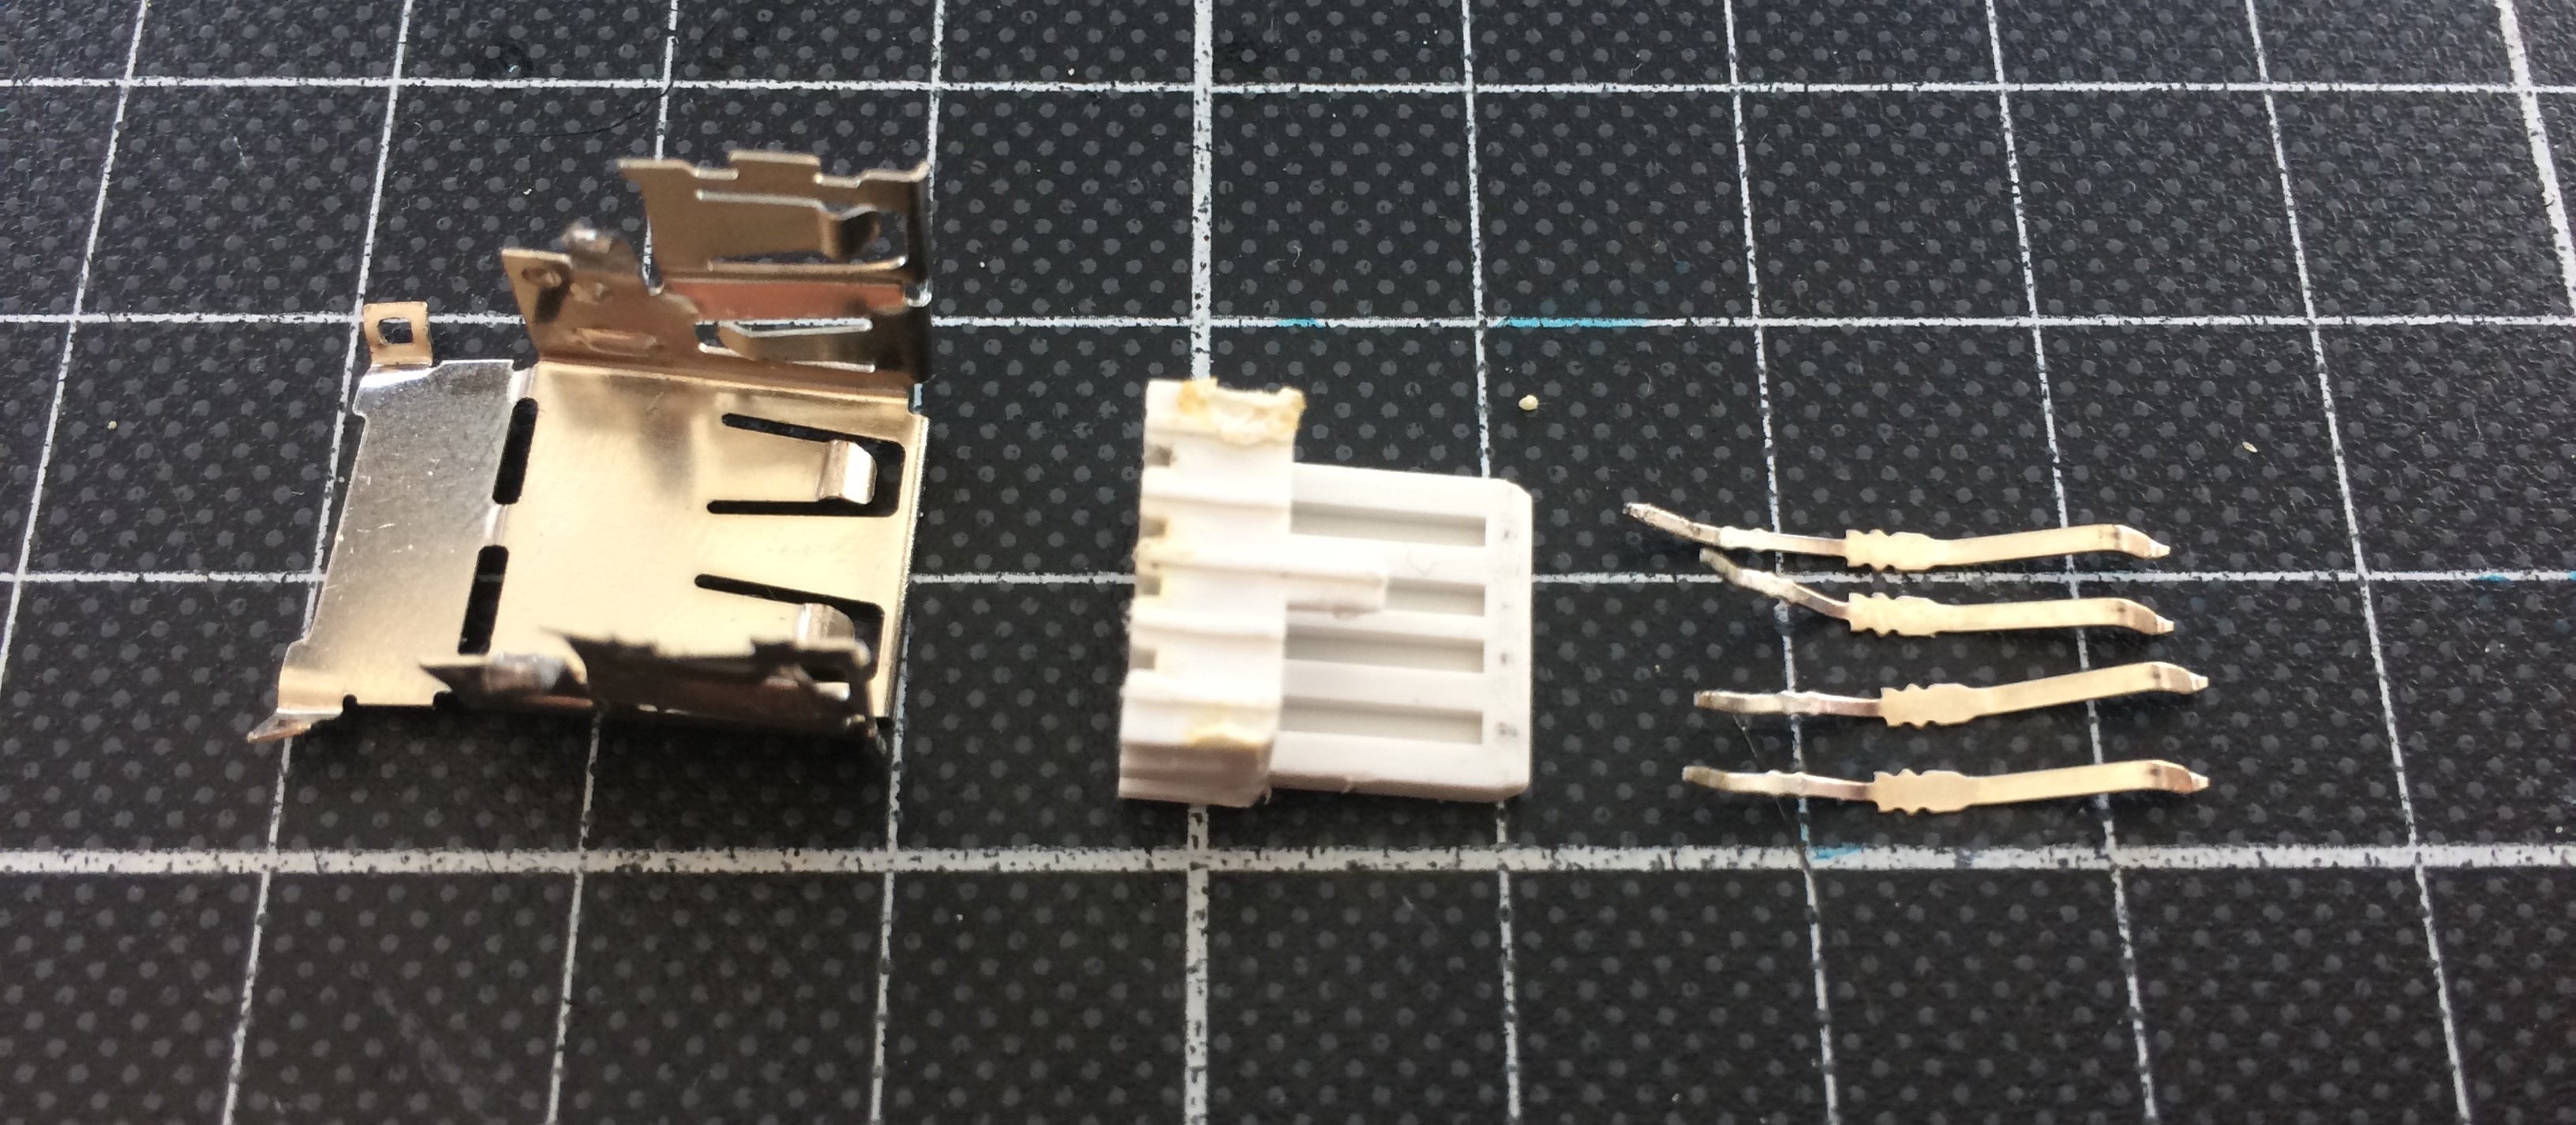
cut a few bits off the casing, bent a few bits around, soldered it to the ground through slots,
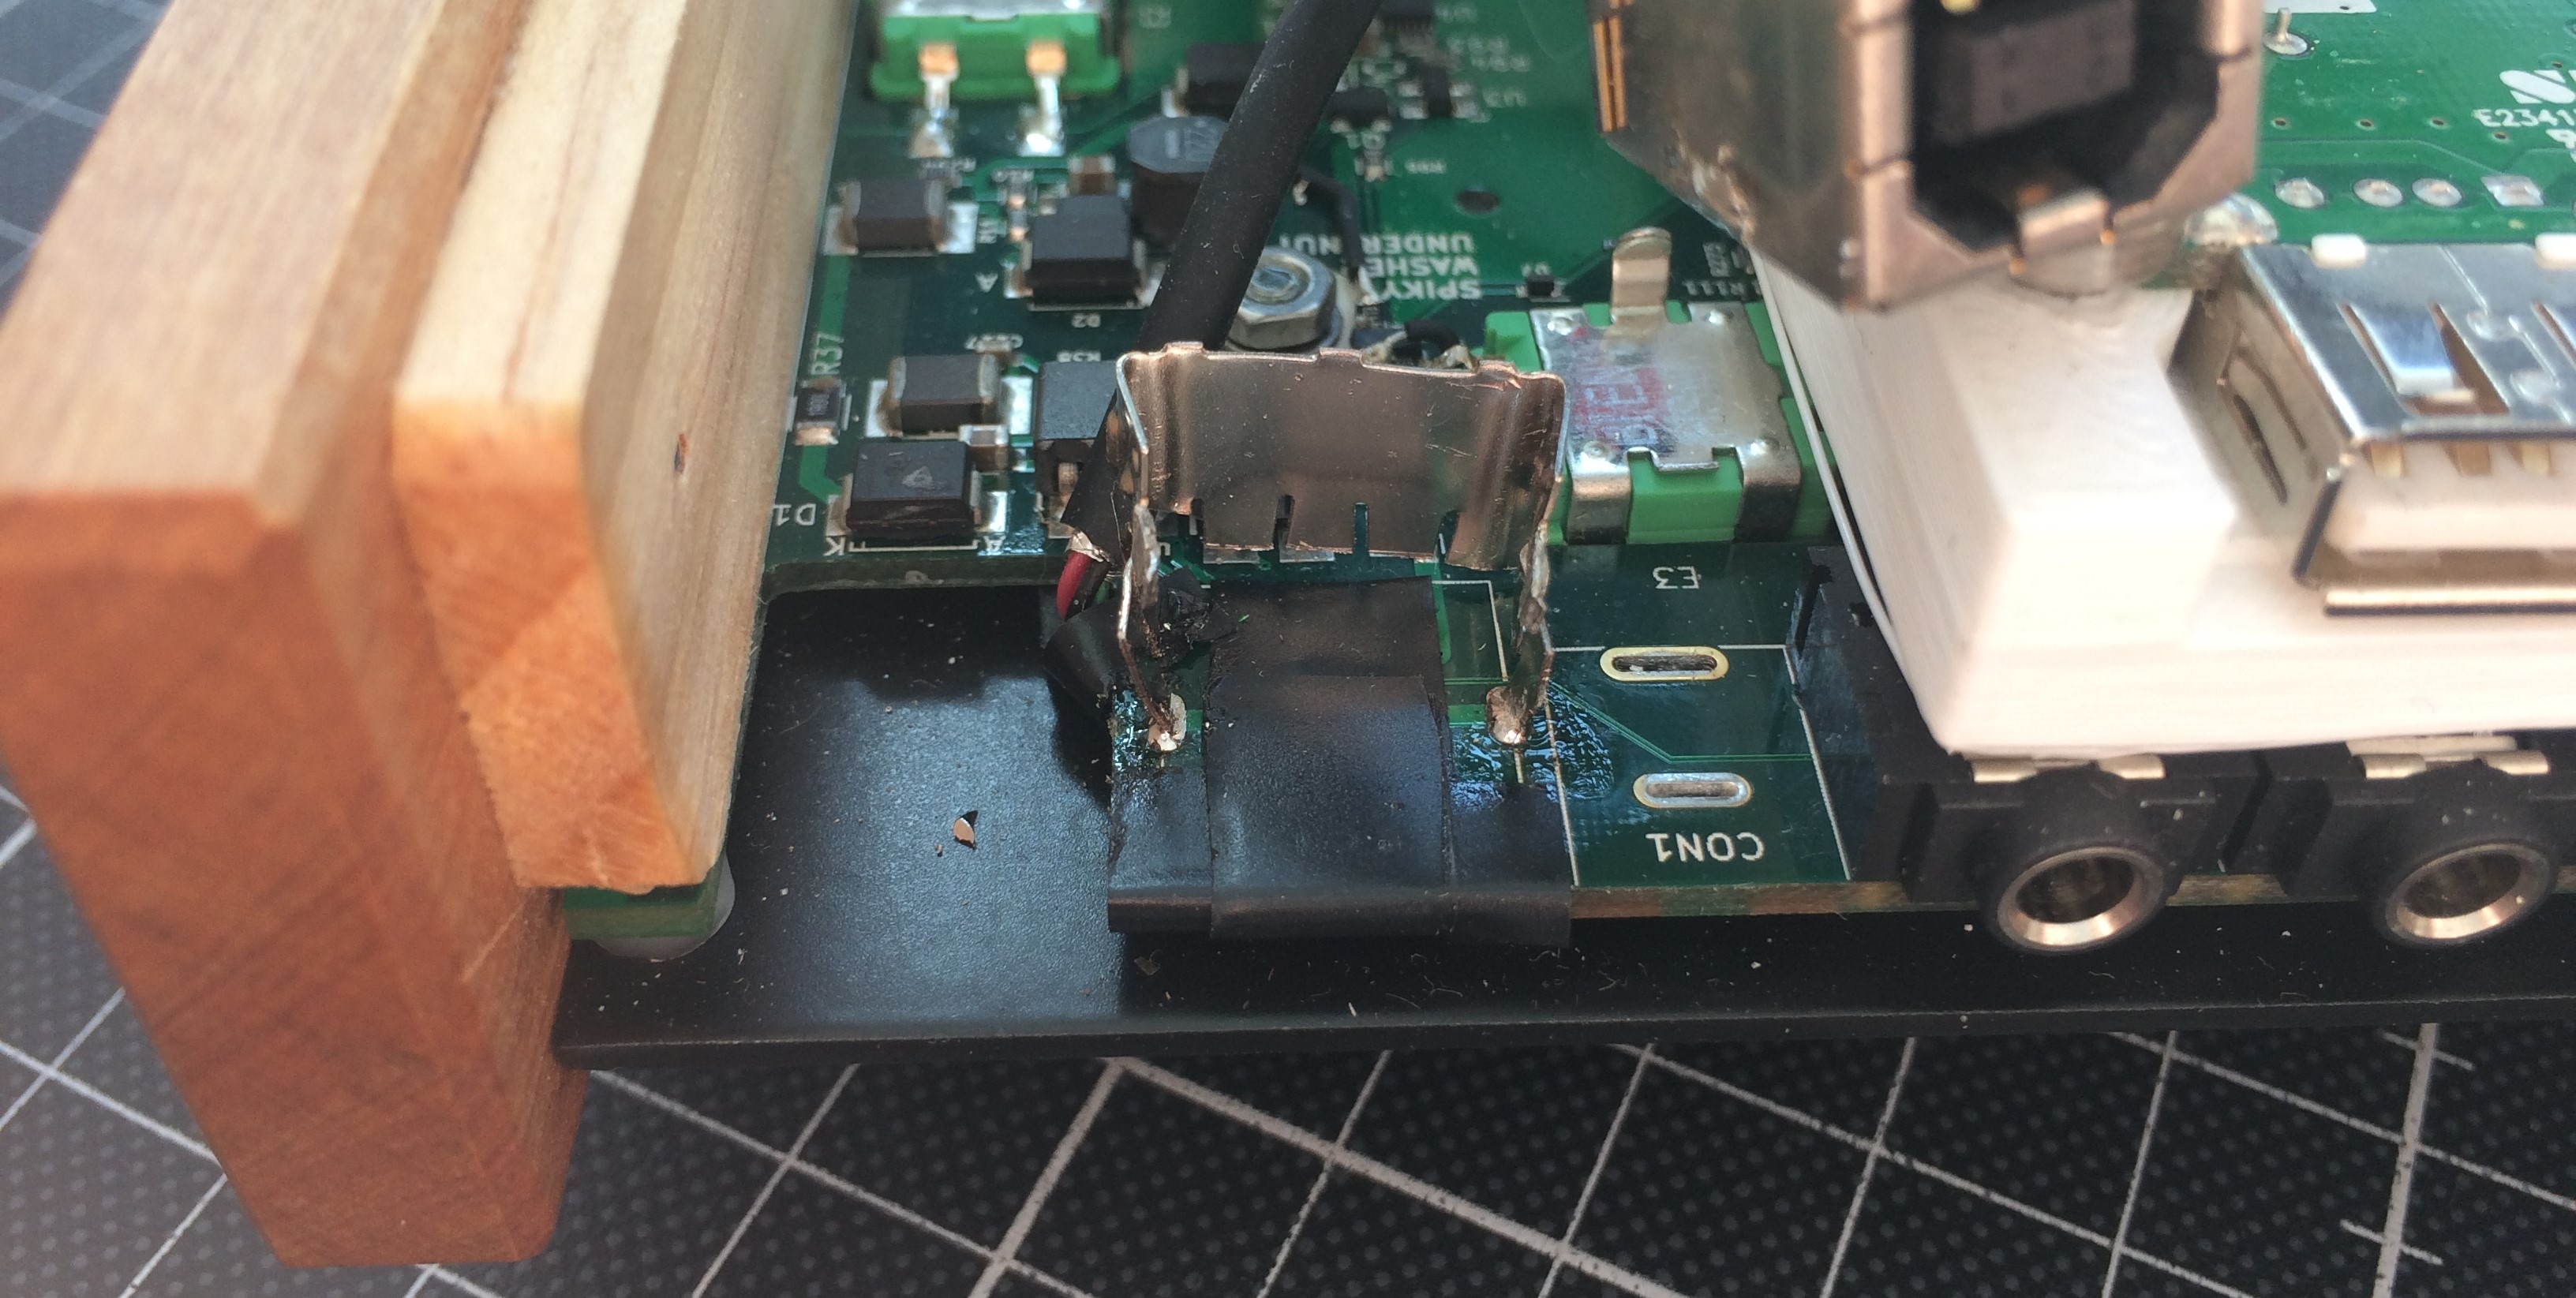
and soldered the B jack to that.
Feels pretty sturdy, let's see if it stands the test of time.
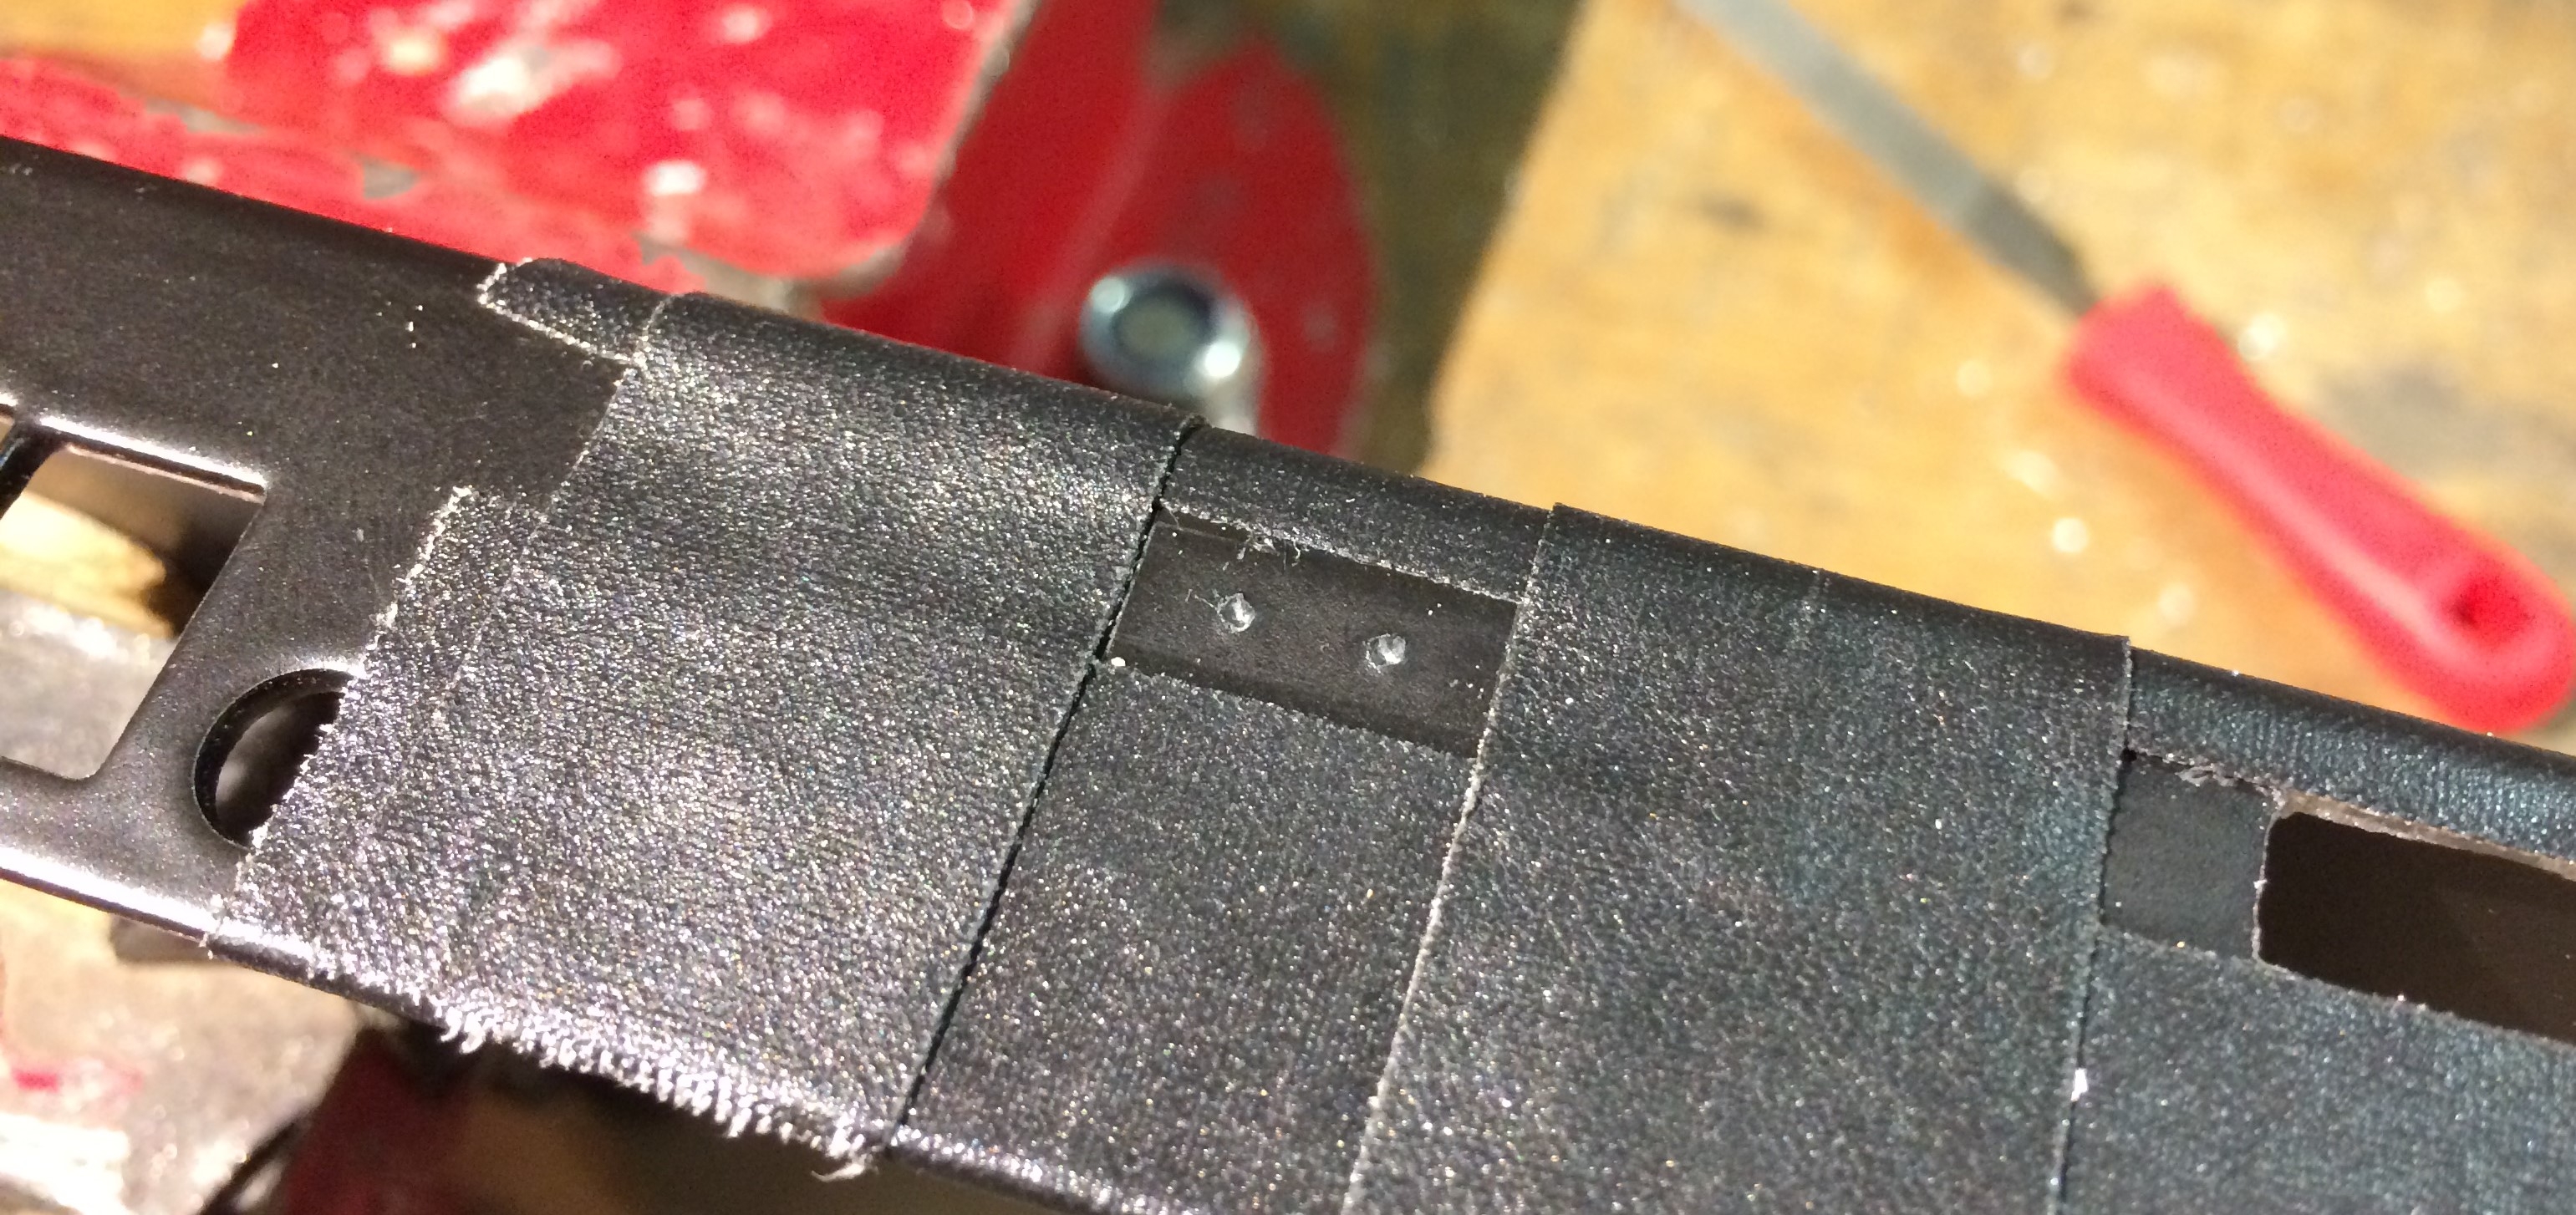
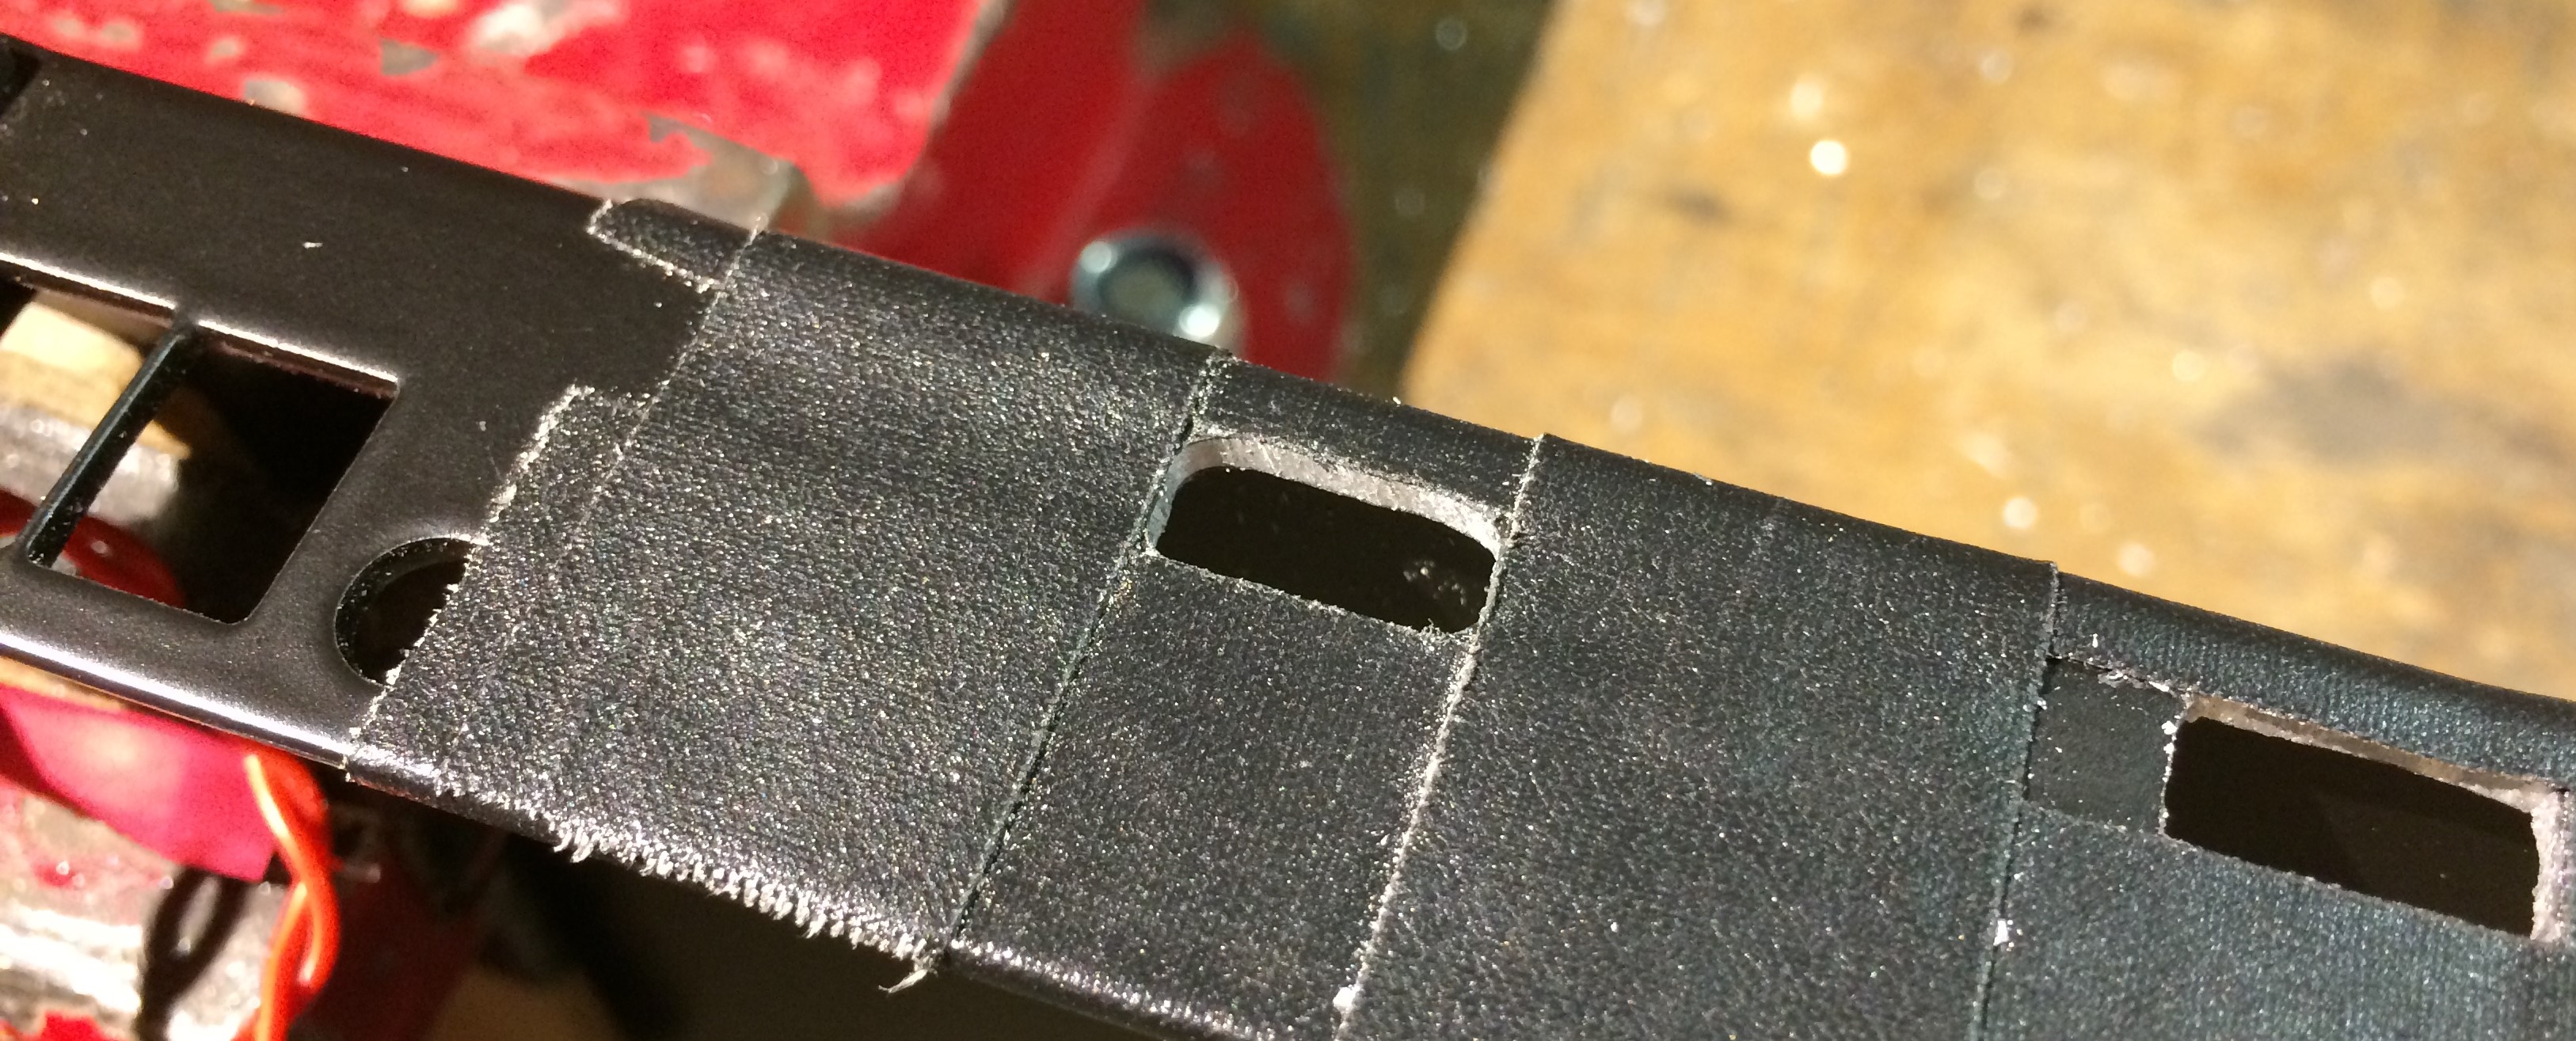
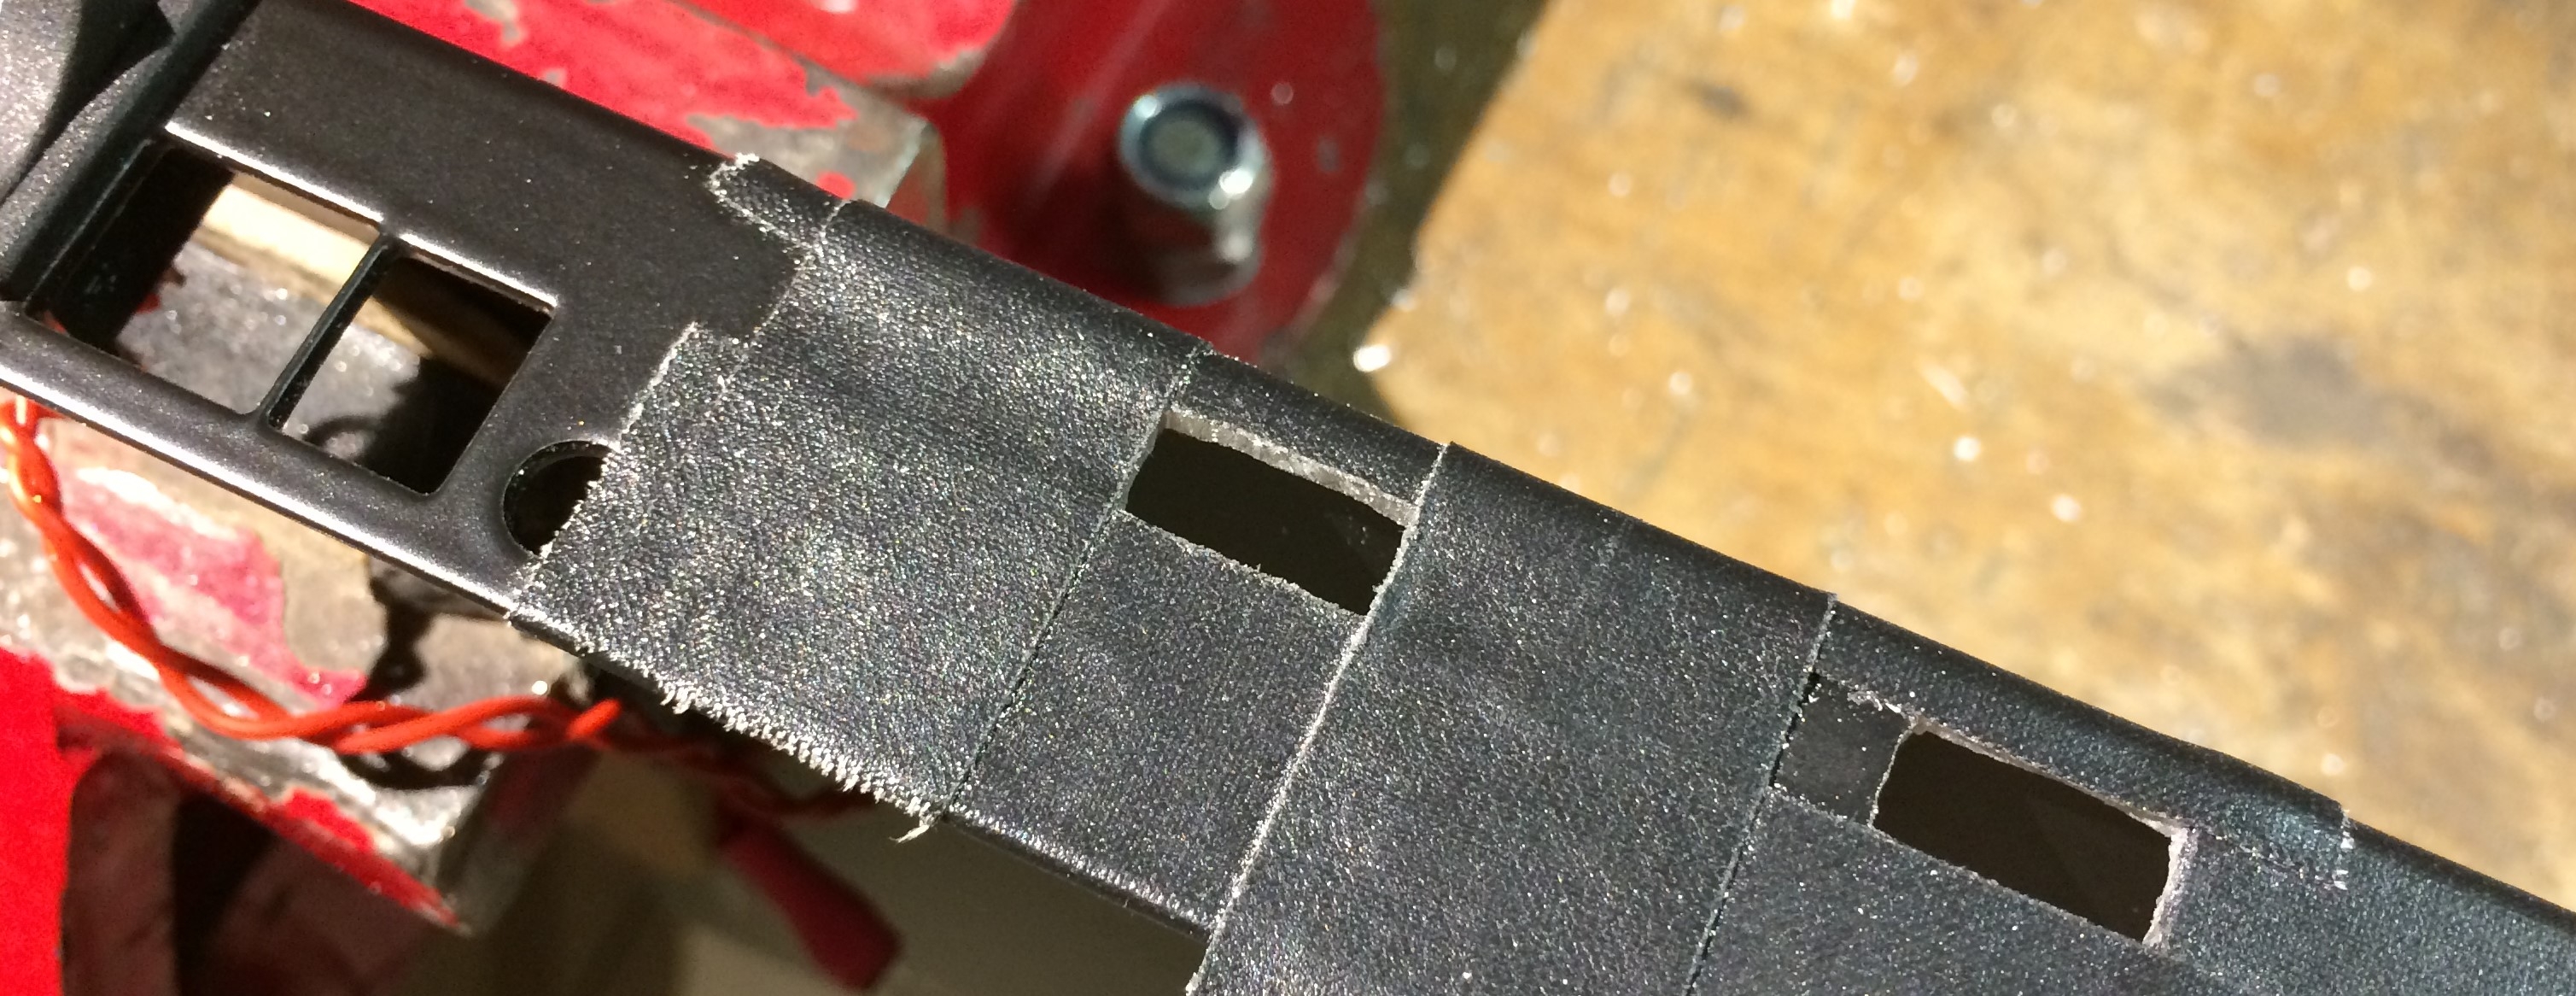
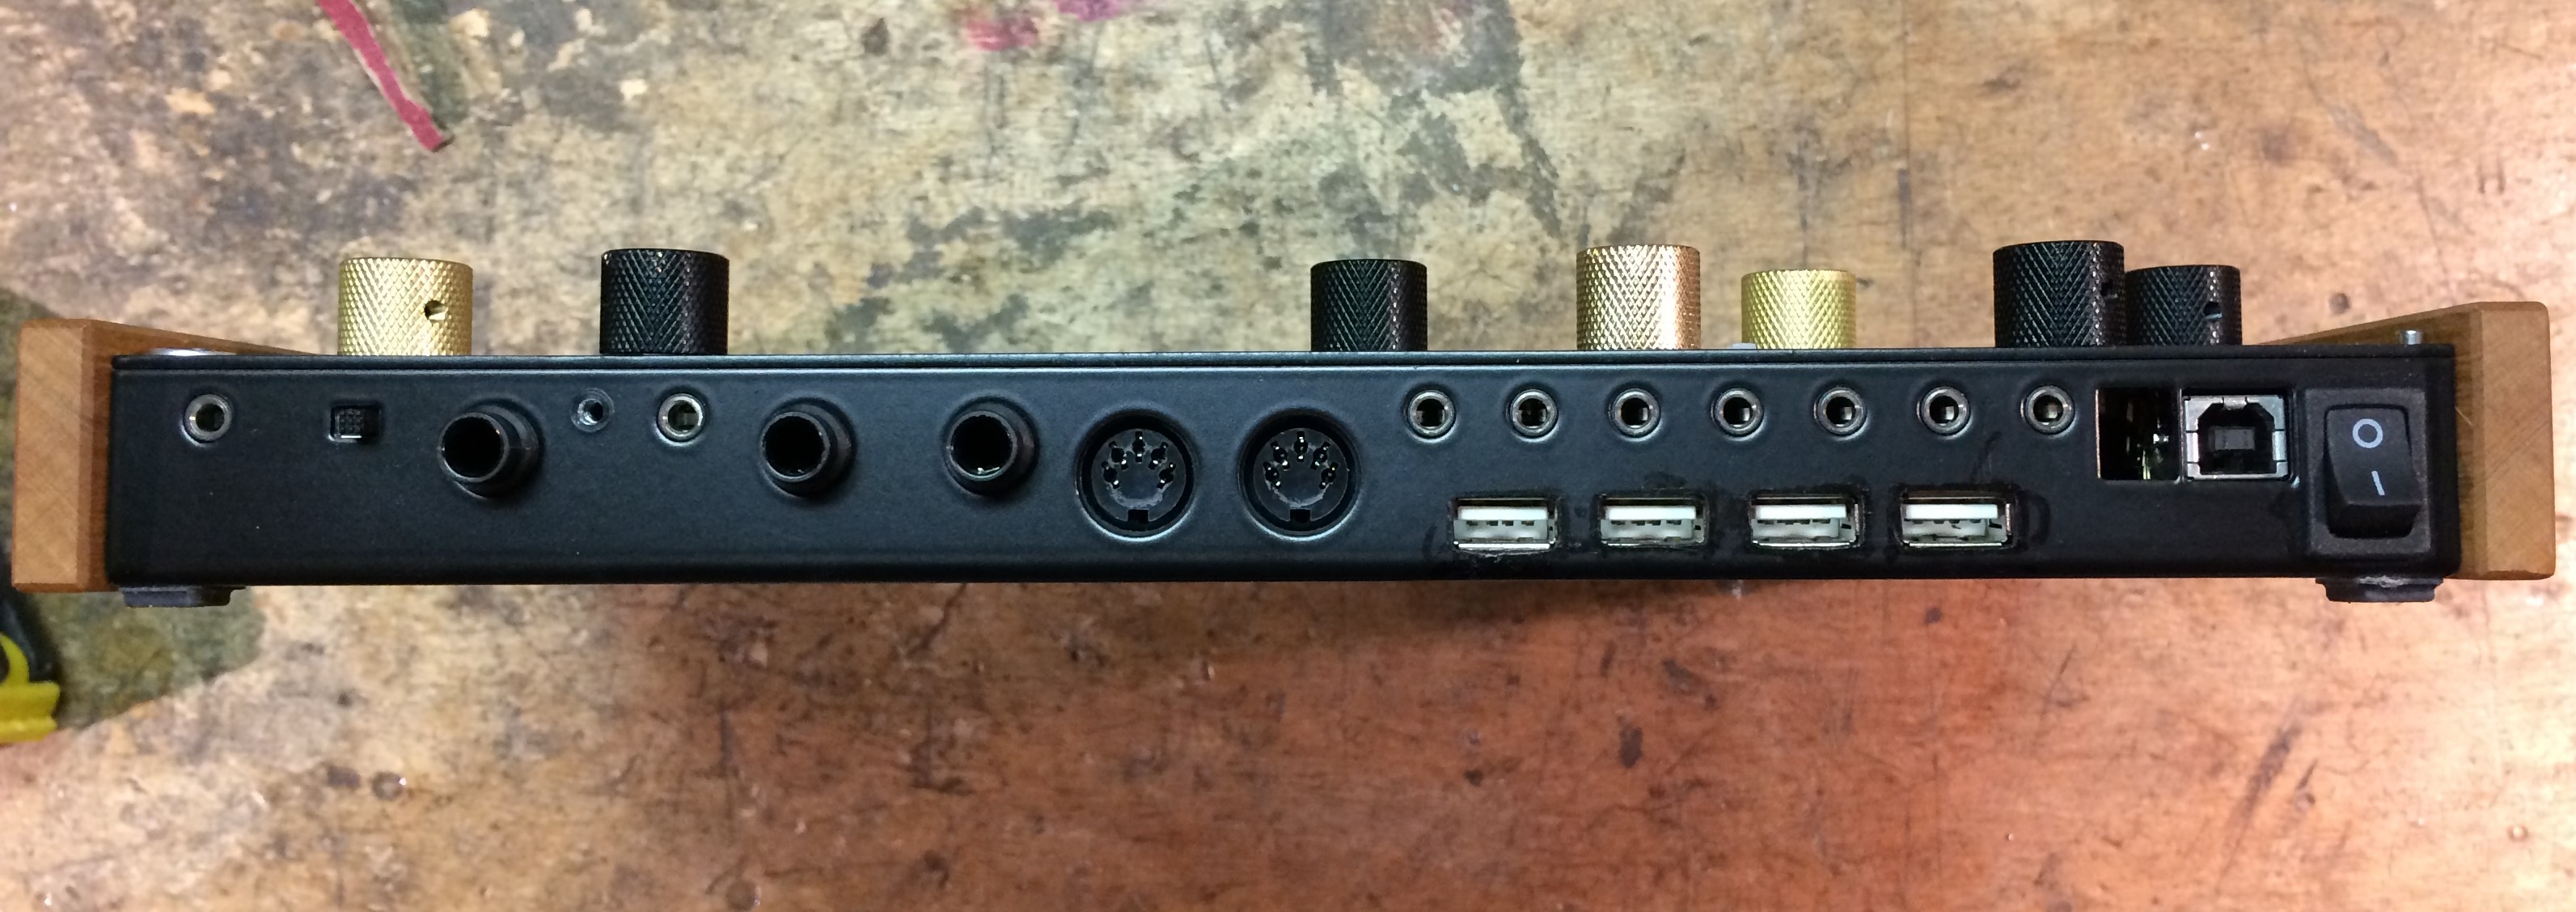
USB A holes
As I don't have any equipment really suited for making nice rectangular holes, I had to wing it using what I found in the workshop, which is:
- Small power drill
- 4.5mm drill bit
- 2 random milling bits I found in an off-brand dremel bit set (the tool the bits are for was too underpowered for milling)
- The smallest file with a flat side I could find
- A center punch (not pictured)
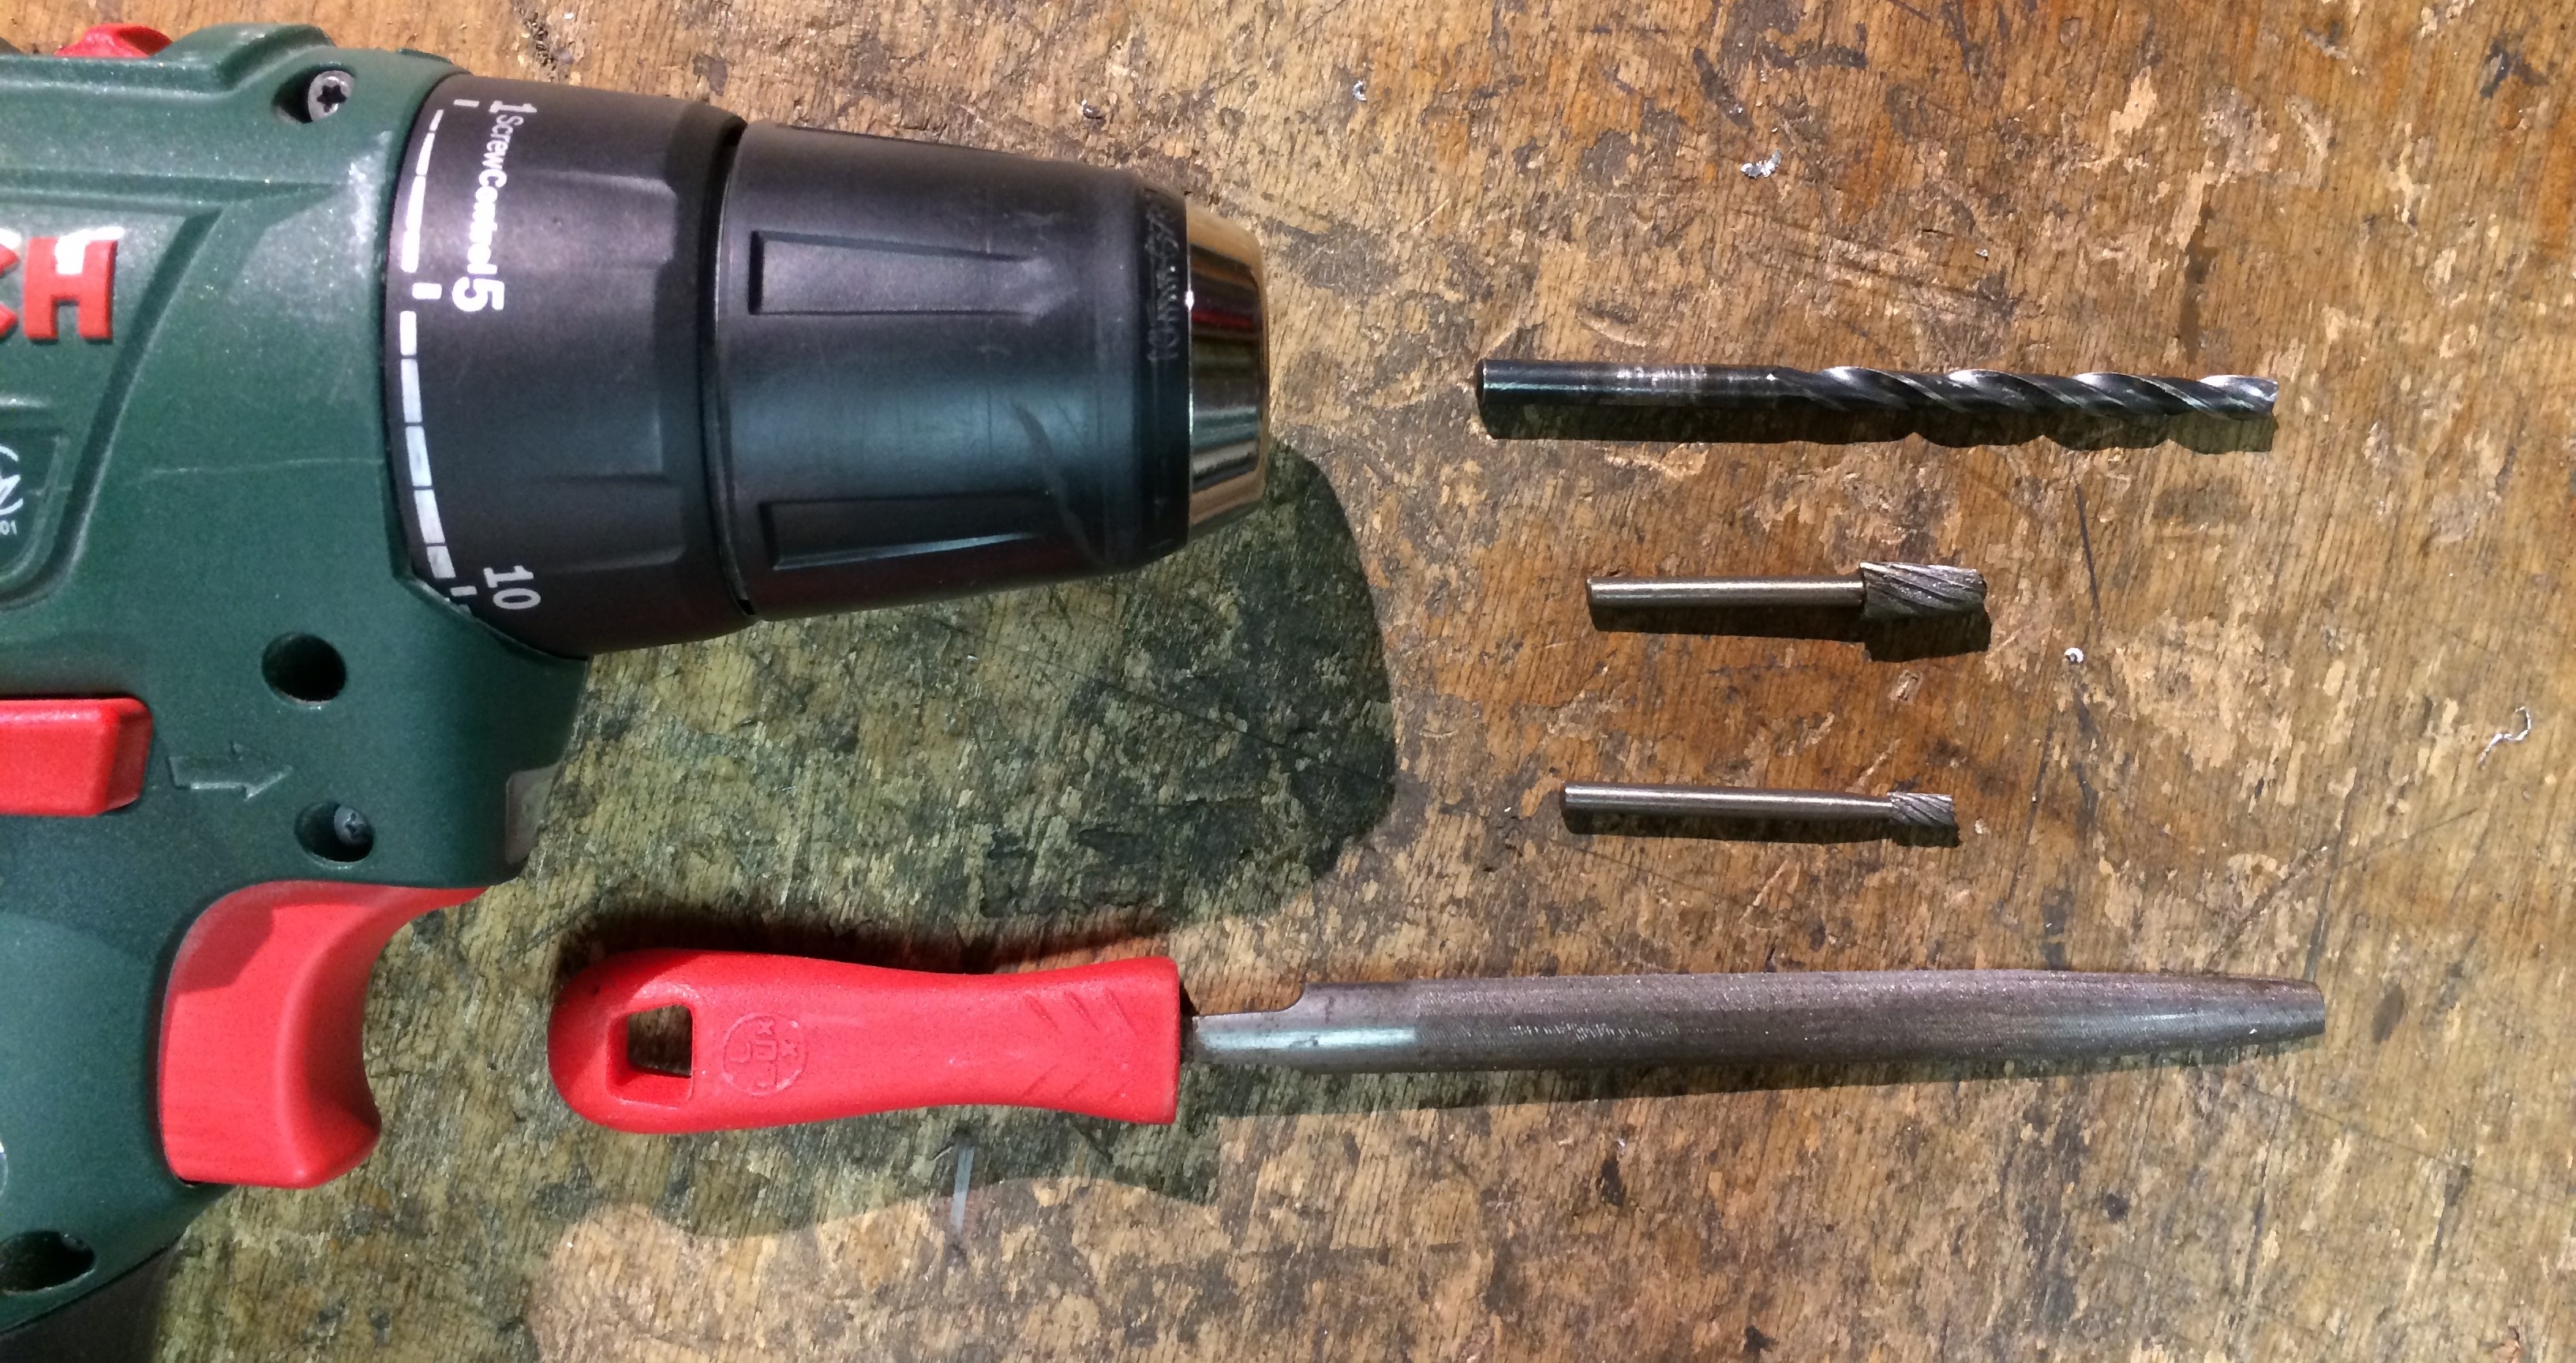
Tape around the desired hole (meticulously measured five times or so) to avoid scuff marks and center punch the holes.
Drill with the 4.5mm bit. The drill was still wandering, notwithstanding the center punches, so I had to be extra careful to stay within the perimeter.

Mill out most of the material using the bigger milling bit.

Go into detail with the smaller milling bit.
File for the corners.
Check fit.
Repeat 4x

Remove tape, file some more to make the edges straight and the corners nice, sand everything down with a thin strip of sandpaper, and paint everything that's become silver with black permanent marker.
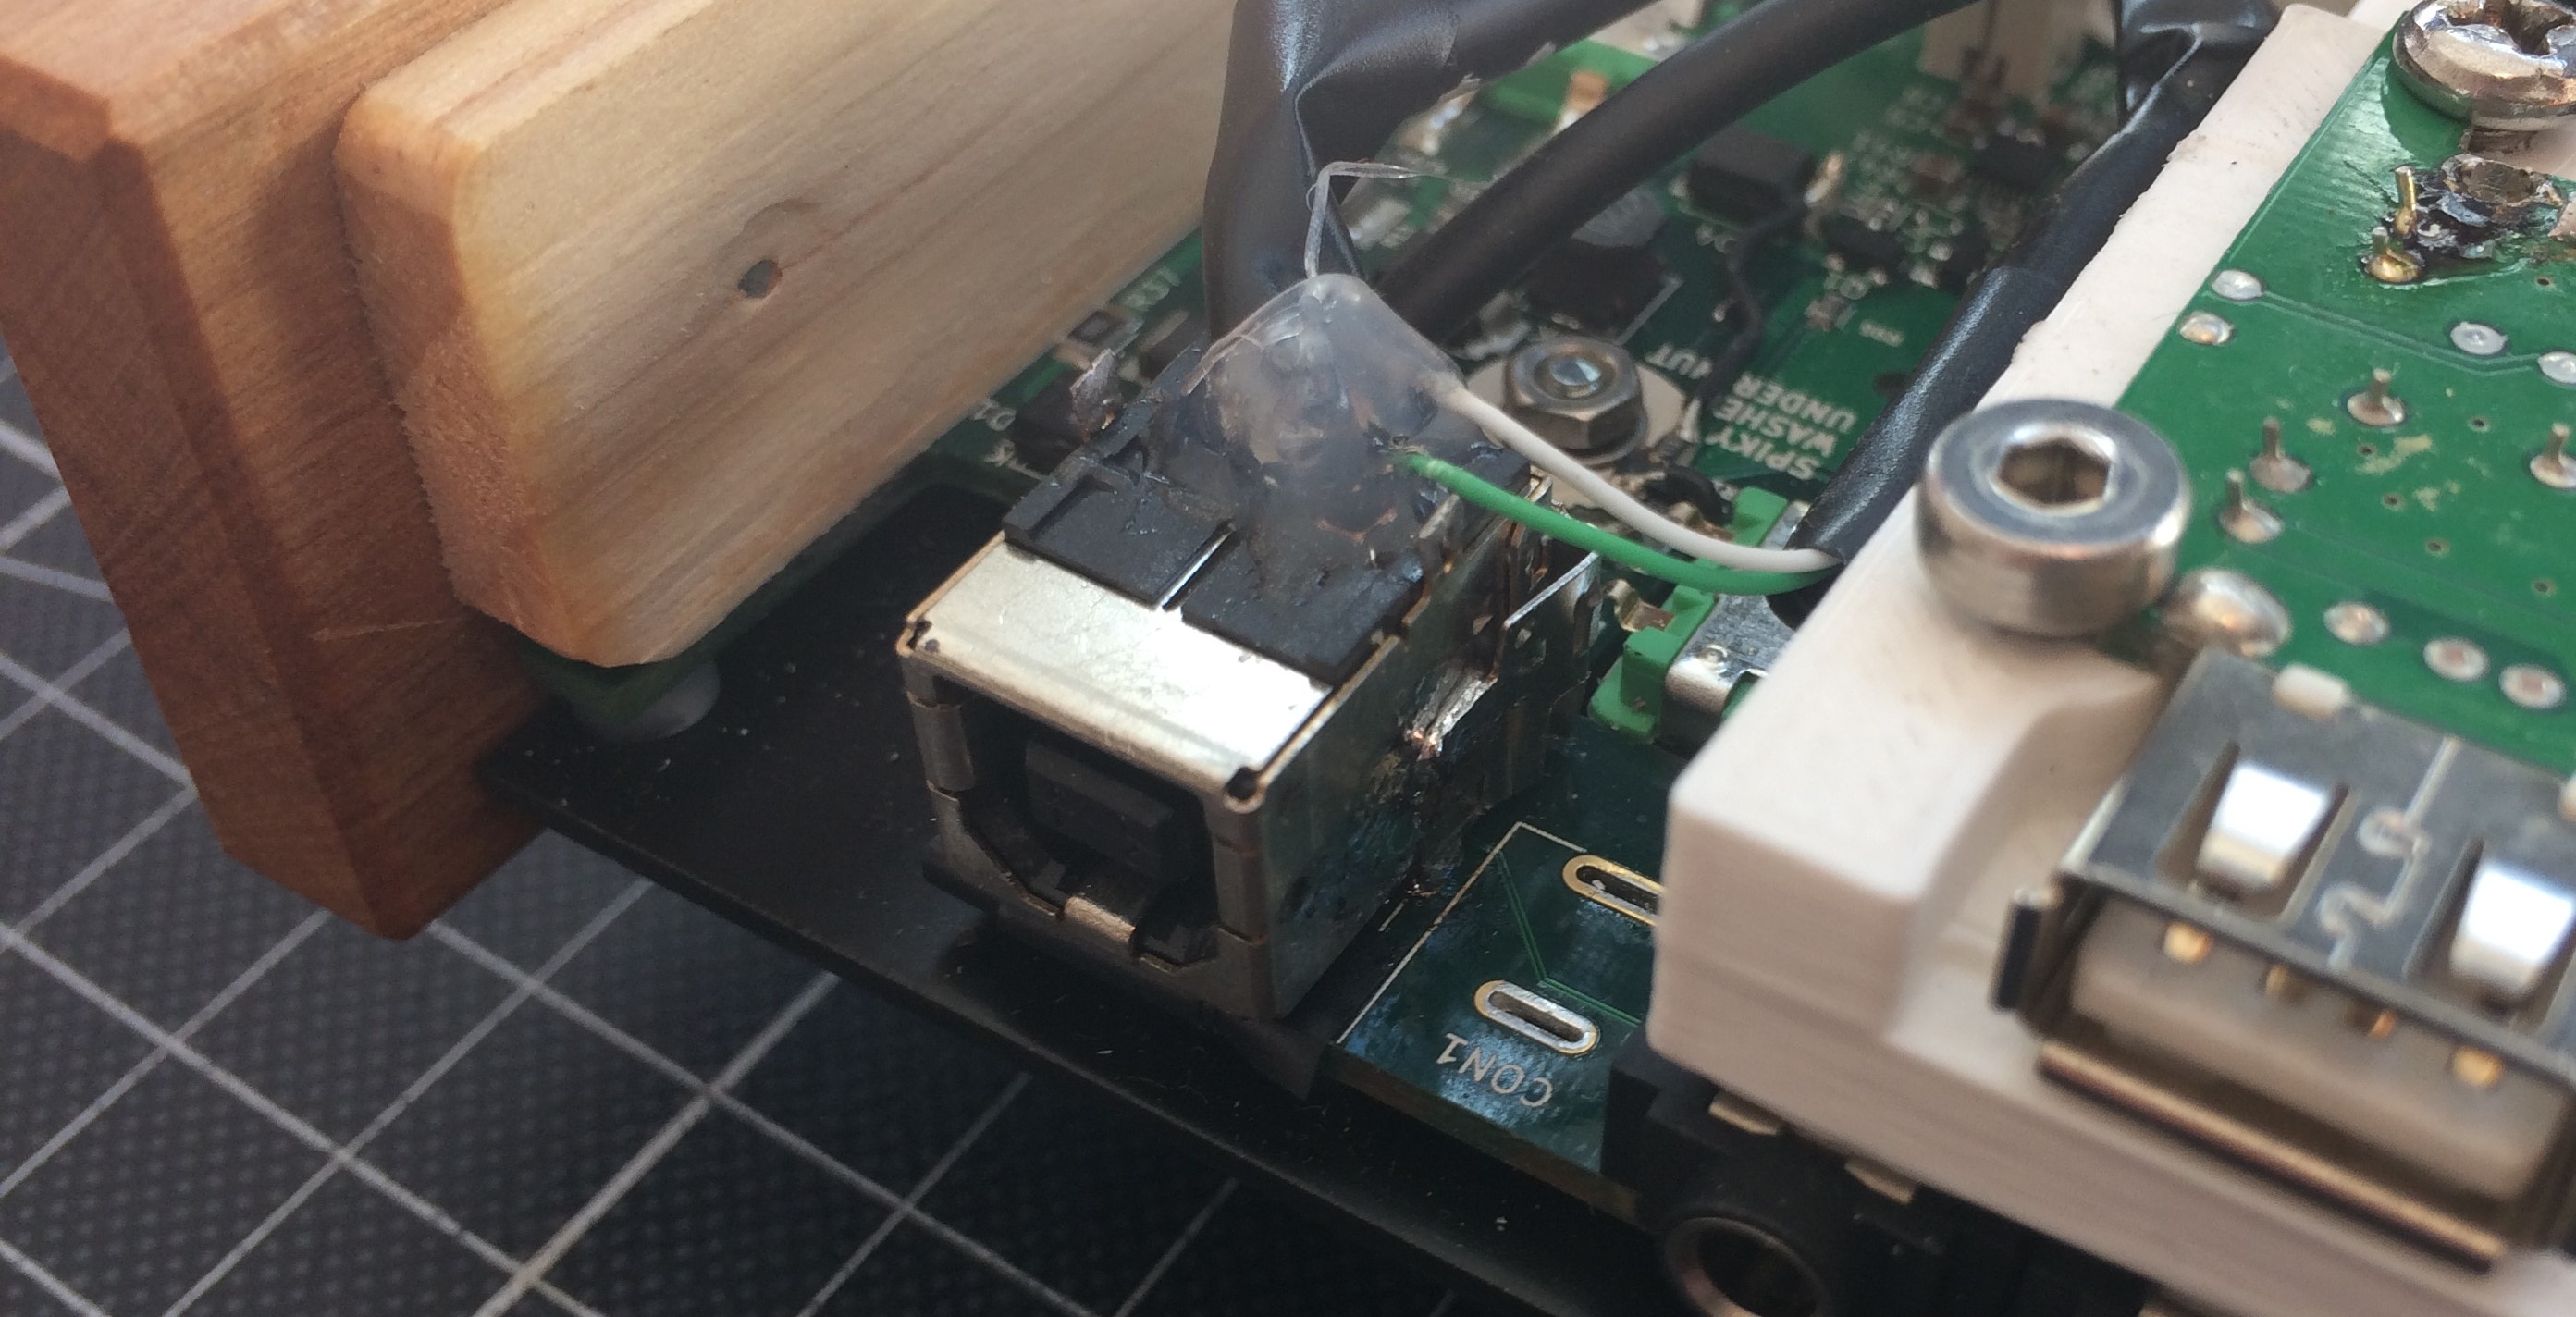
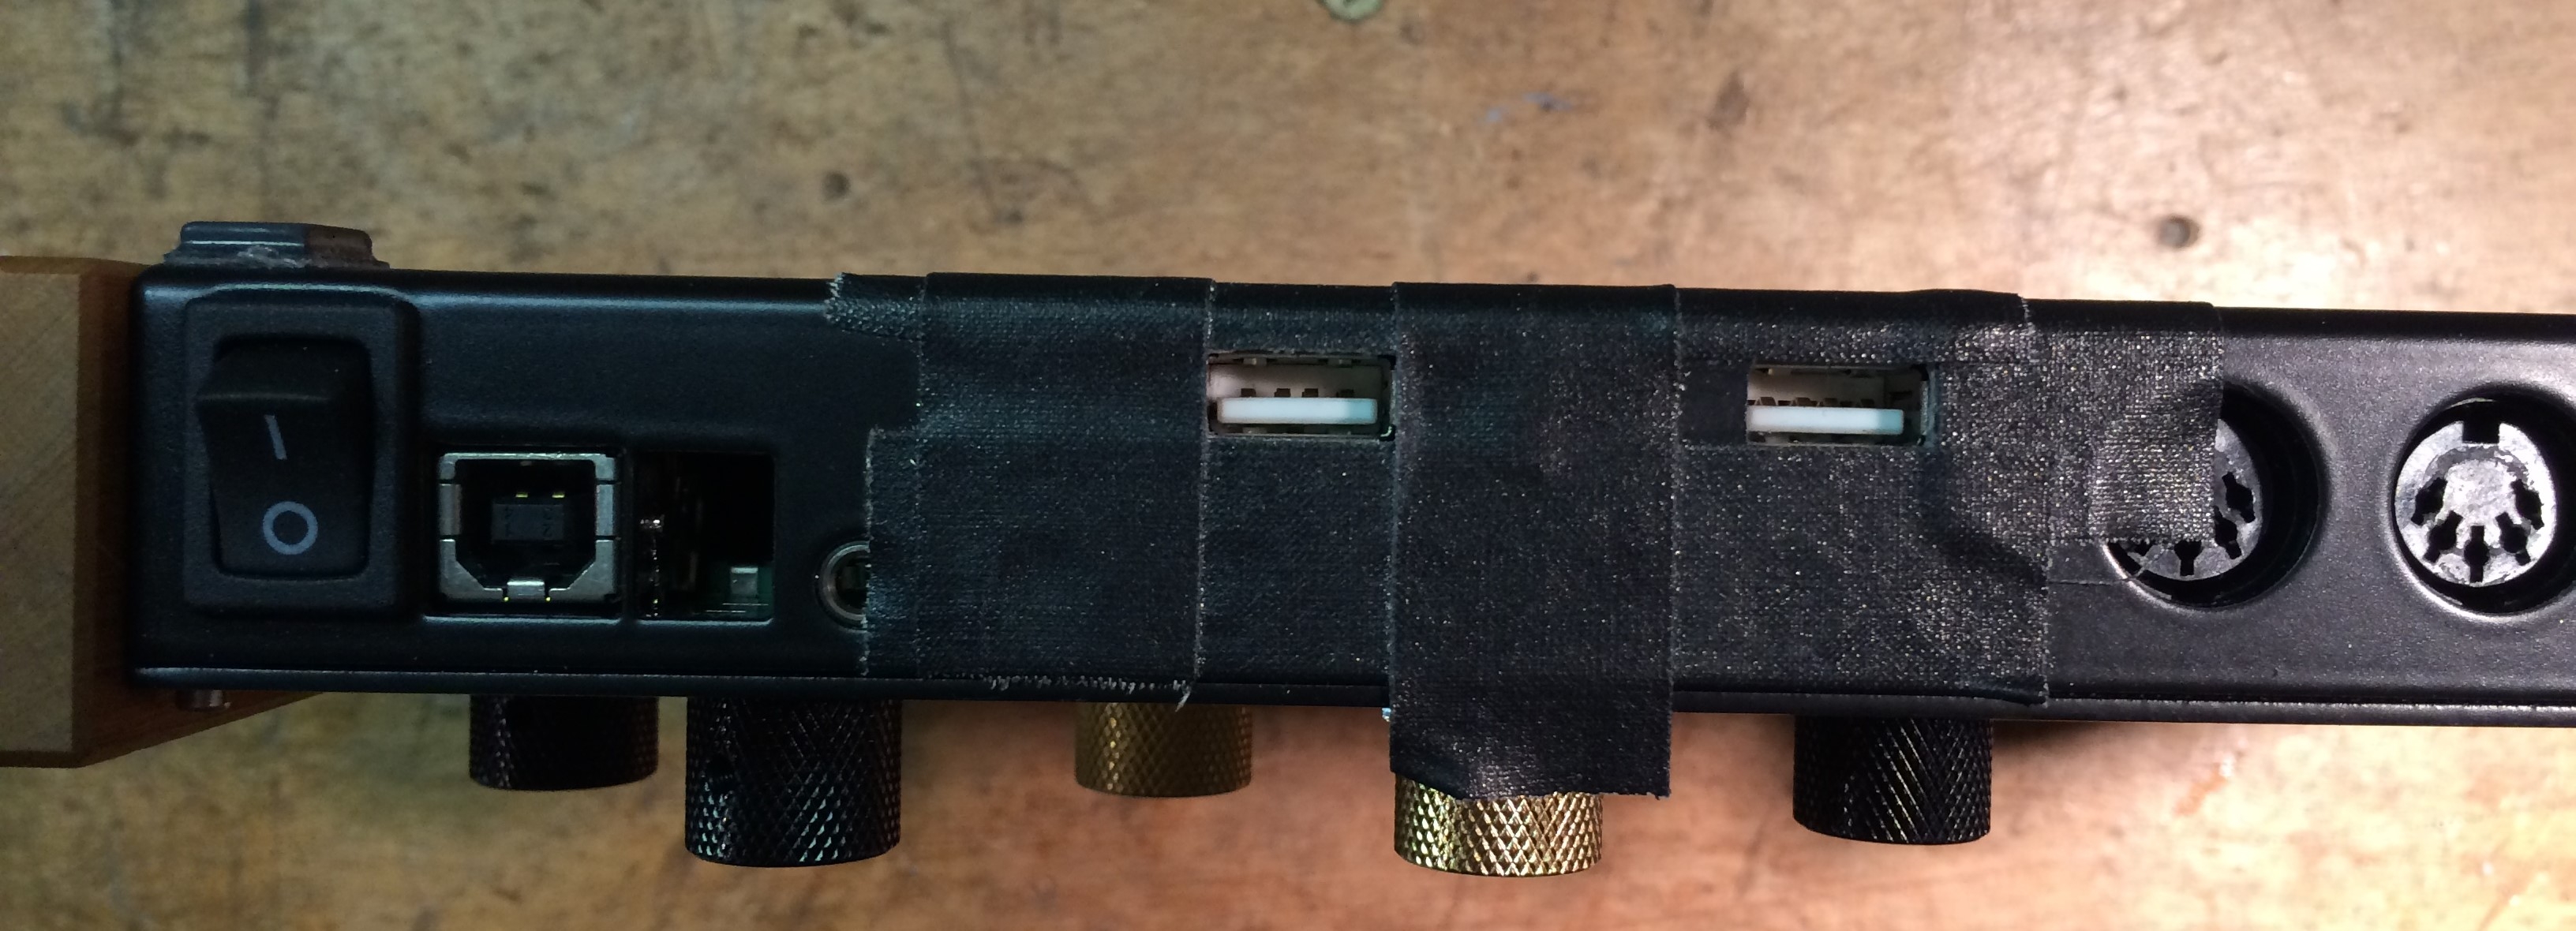
Finally plug stuff in for the first time.
Actually this picture is a little misleading. Power now works, but MIDI doesn't. The RK 005 doesn't connect to the hub properly. Maybe a supply voltage problem, or they have a weird way of sensing whether something is plugged into the output port.
But from the outside it's pretty much finished now.
Next steps
Find out why the RK 005 is misbehaving.
Fix the power issue outlined last update.
Thanks for reading! Sorry for the short explanations, it's super late.
-
Deluge MIDI Host Mod Buildlog
@kleinstar this is awesome! Just so I understand correctly, the Deluge itself is still powere by its own battery, right? The powerbank only powers the hub and thus the downstream devices, is that right?
