I remixed a stand by another user that sits at a great angle, and adds the Synthstrom logo (minus the italics) on the sides - if you have access to a 3d printer you can print this for free here is the link:
I found this thread recently and decided to customize my deluge. Cut down the side panels to be flush on the table saw. Stained with India in and the clear-coated with satin. Changed out the gold knobs for black. I think it looks really clean and sleek now. Plus the lower panels make access to the side pads better for me as noted in other posts.
I found this thread recently and decided to customize my deluge. Cut down the side panels to be flush on the table saw. Stained with India ink and the clear-coated with satin. Changed out the gold knobs for black. I think it looks really clean and sleek now. Plus the lower panels make access to the side pads better for me as noted in other posts.
I found this thread recently and decided to customize my deluge. Cut down the side panels to be flush on the table saw. Stained with India ink and then clear-coated with satin. Changed out the gold knobs for black. I think it looks really clean and sleek now. Plus the lower panels make access to the side pads better for me as noted in other posts.
Per my previous post, here's the process I went through to to trim down the Deluge cheeks and refinish them to my liking.
Step 1: Mark the wooden cheeks.
Using a really sharp pencil, trace along the edge of the deluge where the metal case meets the inside edge of the side panels. This will be the start of the dimensions you cut the panels to.
Step 2: remove the cheeks from the Deluge.
Use a 1.5mm hex key to remove the four screws from the left and right side of the front panel
Use a small phillips head screw driver to remove the two screws from the left and right side of the rear panel (if you're listening synthstrom folks, it would be nice if these were all hex heads. They're so much better than phillips screws!)
Step 3: Cut the sides down.
I do this part on my table saw because it's accurate and will make perfectly straight cuts. Also because I have one, know how to use it, and it's quick. If you don't have access to a table saw, you could file the sides down carefully or even sand them down to the dimensions.
I make sure to align the outermost kerf of the saw blade to the edge of my marked line with the intent to "sneak up" to the cut. At this point I'd much rather be too wide than too narrow. I can always shave more wood off but obviously can't put any back if I overshoot.
Now that I've done this process twice I've noticed something about the case of the Deluge - it flexes a bit. This is neither good nor bad, but worth noting because it means making these side panels truly flush is difficult. This is due to the fact that when the side panels are reattached with the screws torqued down the front face will be slightly lower than when we dry fit the cheeks after our cuts. If you want them truly flush I'd suggest reinstalling them screws and all, noting the variance, and then carefully sanding down to final dimensions. I'm not concerned with them being spaceflight accurate, so I get them very close and don't worry about that final .25 millimeter difference. In any case, I would rather them stand slightly proud of the face panel than fall below it. Onwards.
After making a cut, I dry fit the piece to the Deluge, line up the screw holes and check to see if I've made the cut to the size I want. If I need to remove more material I adjust my table saw and shave a little more off. Then test fit again, wash rinse repeat until it's to my liking.
Step 4: Sand the cutdown cheeks to remove finish and apply a rounded edge to the front corner.
Before we can refinish the cheeks we need to remove any remaining finish from the factory. As these are pretty small pieces of wood I don't want to use my bench sander or a mechanical sander on them. I want to remove just the finish. I also want to round the very front corner to match the rounded profile of the front edge of the Deluge. When I traced the dimensions to the wood in step 1 that rounded edge got marked to the wood so I have a guideline. I don't stress about it being exactly perfect. I want it to be close and look like it matches.
I've found the best way to do this kind of sanding is to attach my sandpaper to a flat piece of board. I use double-sided tape to secure several pieces of 320 grit paper to a square of plywood. You can use whatever you like for this, but for a good-looking surface I'd use 200 or greater grit sandpaper. Again, for my purposes I'm not attempting to make the sides of my Deluge look like glass. I don't mind that there is a slight wood texture that comes through the finish so 320 is about right for me.
With my paper glued down flat I can slide my pieces against the surface to get a very flat, even sanded surface. The key is to let the weight of your hand with the help of gravity make the pressure. You don't need to press down. If you do it's likely you'll apply pressure unevenly and sand an angle into your surface. So go slow with light pressure and the face should turn out smooth, flat, and free of any finish. Be sure to check frequently. Only sand to the point the finish is all removed unless you're trying to remove more material. I like to leave the sides as close to the factory width as possible so that decksavers and cases will still fit nicely.
To round the front corner I place the top side of the cheek flat against the sandpaper and drag towards me. As I drag, I rotate the angle smoothly until I have the front face of the cheek flat or nearly flat to the surface. I only have to do this a couple times to get a nice enough rounded edge.
Step 5: Apply finish to taste
My aim in these customizations is to simplify the overall look of my Deluge and improve access to the pads near the left and right sides. I find playing the audition pads difficult with the wall of the factory cheek so close to the pads. Lowering the edge makes the Deluge more playable for me. I also find the look of the Deluge a bit intimidating and busy. There's a ton of pads, labels, 2 logos, etc. etc. Simplifying the look streamlines it to my eye and makes me want to play it more. And I think it looks great all blacked out.
I've wondered about changing all the pads to shades of grey, red and orange to simplify even more, but that might actually hinder usage. Anyways...
I use Higgins waterproof India ink for this step. It's super black, permanent, and soaks right into the raw wood. I coat all sides evenly. It dries pretty quickly but if you want to accelerate this process you can use a blow dryer to speed up the drying time. If you wanted at this step you just as easily might spray paint a finish to these pieces. I would recommend applying a sanding sealer and primer, then a color coat, then a clear coat. But I wanted a more organic look to my finish.
To seal the surface I apply a topcoat of Clear Matte Minwax water-based Polycrylic. It produces a tough, quick-drying finish that's easy to put on, dries thoroughly in a few hours, has no toxic fumes or odors, and cleans up with soap and water. The trick with this finish is to obey the instructions! Don't shake or stir it vigorously before application. Stir it slowly to ensure it's mixed but avoid agitating it to the point of introducing air bubbles. Unlike slow drying coatings the air bubbles will not smooth out as it dries too quickly. Brush on a coat slowly going with the grain of the wood. Don't go over parts you've coated too many times either, since it will already be curing and can smear a bit.
After a few hours on a dry warm day you can finish these off with a light polishing with steel wool to smooth off any brushstrokes if you want. If it's damp or rainy or cold, allow longer time before handling. As a final step I rub everything down with crumpled up brown paper. I learned this trick from a woodworking video on YouTube and it works great if you want to put a slight shine on a clearcoat and smooth it out slightly.
Step 6: Reinstall side panels, enjoy your custom Deluge.
I found this thread recently and decided to customize my deluge. Cut down the side panels to be flush on the table saw. Stained with India ink and then clear-coated with satin. Changed out the gold knobs for black. I think it looks really clean and sleek now. Plus the lower panels make access to the side pads better for me as noted in other posts.
Really beautiful and sleek cheeks!
....and I even went further when I customized my Deluge. I mounted the wooden sides WITHIN the confines of the box itself, (so I have everything protected), but built it right into my pedal powered ambient bicycle project, along with all my other electronics........so I have a really ergonomic workspace...
(these photos show 2 slightly different times within the progress......
Thanks so much for this, really helpful! When I find time I think I'll do steps 1-4, then maybe just varnish the wood. I echo your sentiment about the ends getting in the way physically and visually, a bit of bad feng shui going on
Comments
I remixed a stand by another user that sits at a great angle, and adds the Synthstrom logo (minus the italics) on the sides - if you have access to a 3d printer you can print this for free here is the link:
https://www.thingiverse.com/thing:5148767
I found this thread recently and decided to customize my deluge. Cut down the side panels to be flush on the table saw. Stained with India in and the clear-coated with satin. Changed out the gold knobs for black. I think it looks really clean and sleek now. Plus the lower panels make access to the side pads better for me as noted in other posts.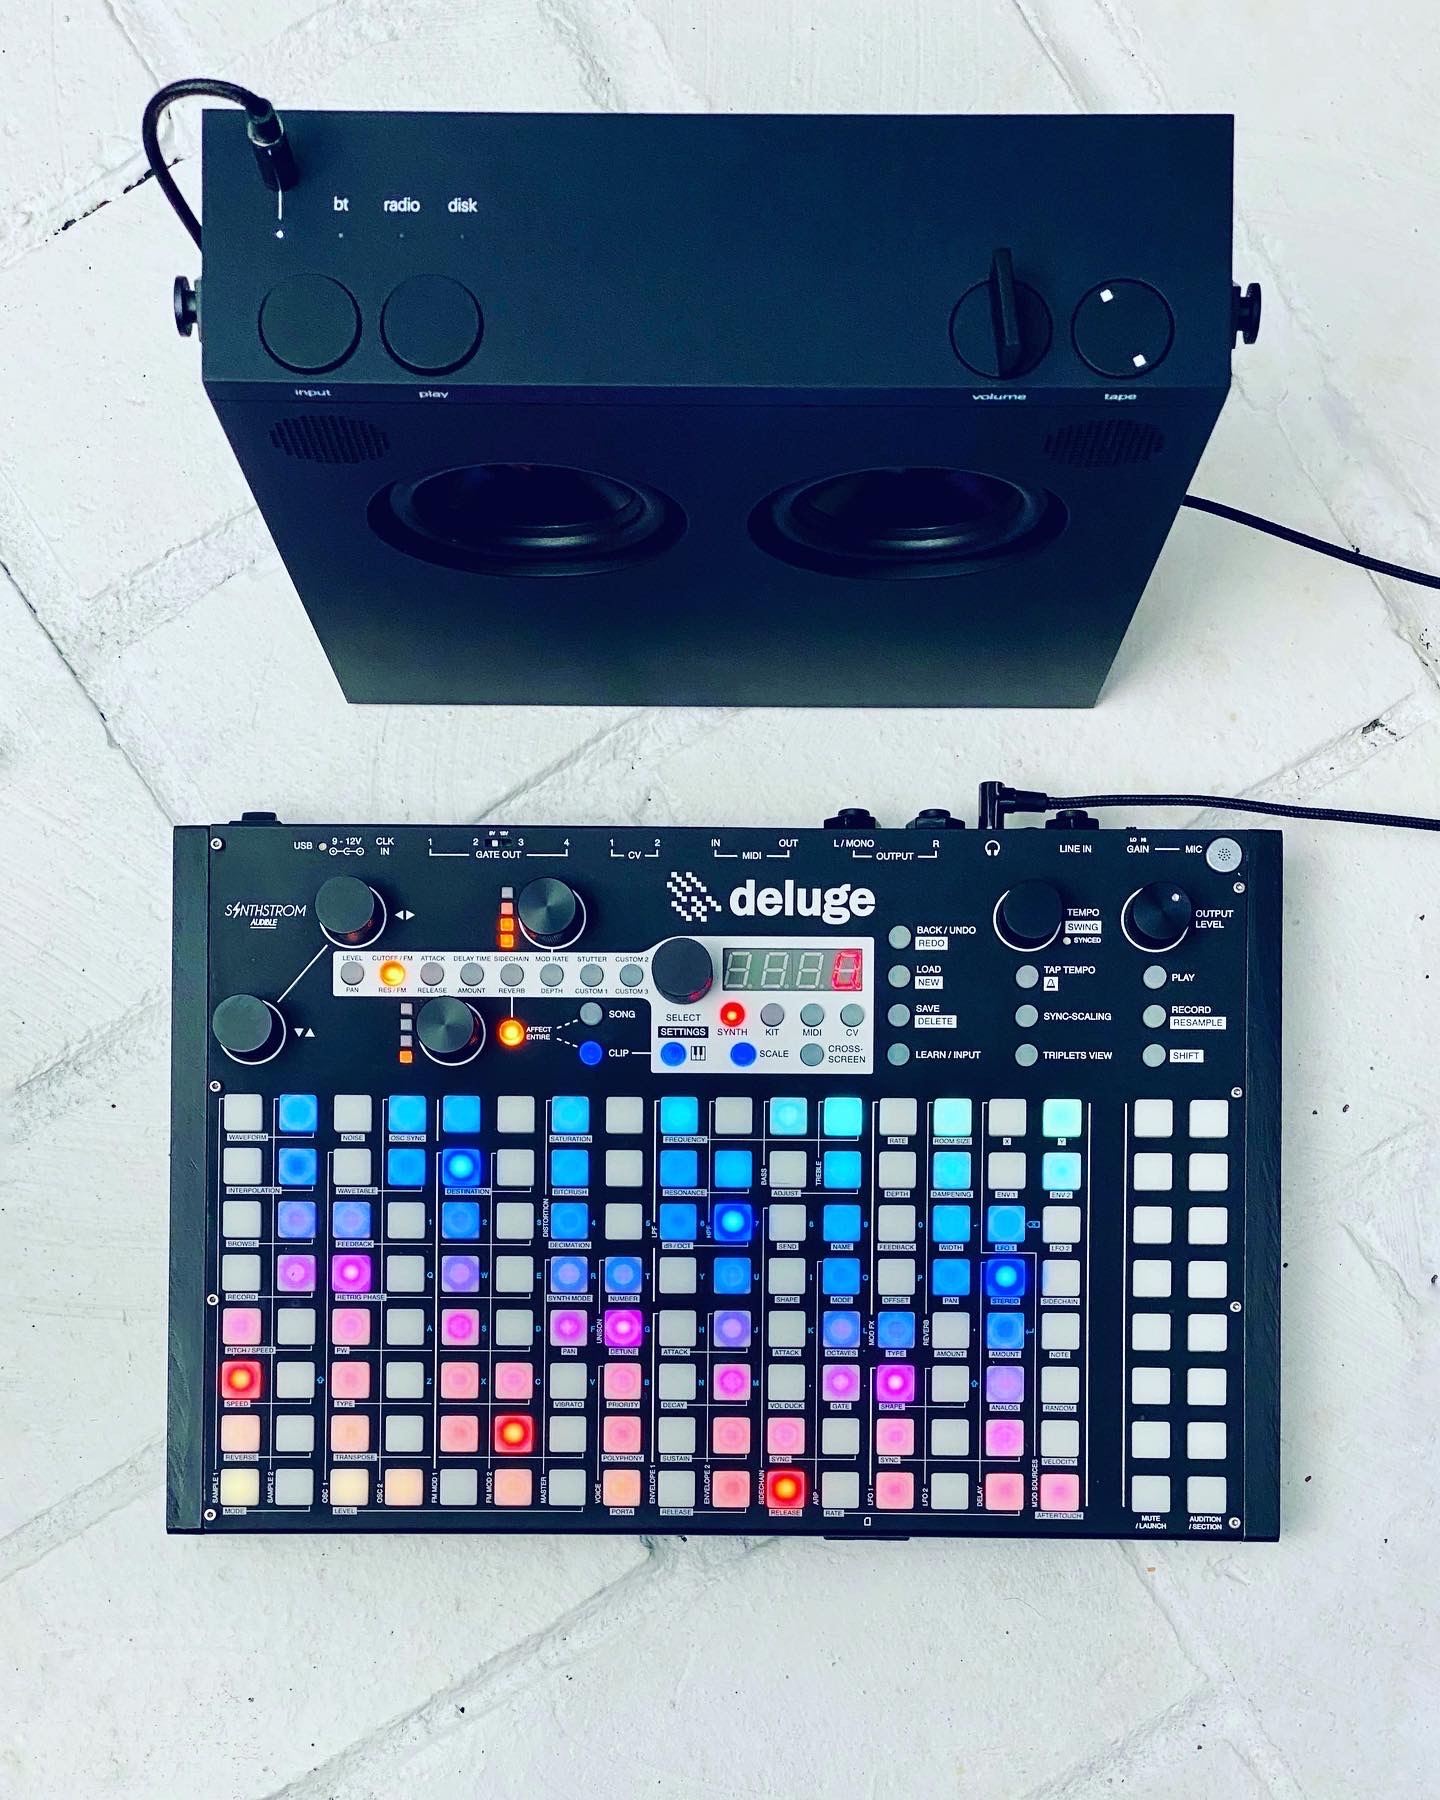


I found this thread recently and decided to customize my deluge. Cut down the side panels to be flush on the table saw. Stained with India ink and the clear-coated with satin. Changed out the gold knobs for black. I think it looks really clean and sleek now. Plus the lower panels make access to the side pads better for me as noted in other posts.
I found this thread recently and decided to customize my deluge. Cut down the side panels to be flush on the table saw. Stained with India ink and then clear-coated with satin. Changed out the gold knobs for black. I think it looks really clean and sleek now. Plus the lower panels make access to the side pads better for me as noted in other posts.
Has anyone else trimmed down the side panels to be flush? Any advice would be greatly appreciated
Per my previous post, here's the process I went through to to trim down the Deluge cheeks and refinish them to my liking.
Step 1: Mark the wooden cheeks.
Step 2: remove the cheeks from the Deluge.
Step 3: Cut the sides down.
Step 4: Sand the cutdown cheeks to remove finish and apply a rounded edge to the front corner.
Step 5: Apply finish to taste
Step 6: Reinstall side panels, enjoy your custom Deluge.
/
Really beautiful and sleek cheeks!
....and I even went further when I customized my Deluge. I mounted the wooden sides WITHIN the confines of the box itself, (so I have everything protected), but built it right into my pedal powered ambient bicycle project, along with all my other electronics........so I have a really ergonomic workspace...
(these photos show 2 slightly different times within the progress......
![](https://forums.synthstrom.com/uploads/editor/bu/ch3zhbz8gp56.jpg ""
Thanks so much for this, really helpful! When I find time I think I'll do steps 1-4, then maybe just varnish the wood. I echo your sentiment about the ends getting in the way physically and visually, a bit of bad feng shui going on